.avif)
.png)
Google is quietly but aggressively building a full-stack automation ecosystem that spans nearly every layer of the AI landscape. Across Google Labs, ideas are moving from internal brainstorms to public experiments at an unusually fast pace, with new tools and services shipping in rapid succession. Not everything will stick, and some products will inevitably be folded back into the stack, but the sheer volume of experimentation matters. It signals a company testing the outer limits of what AI-driven automation can realistically handle, from simple workflow helpers to more ambitious, agent-like systems.
For end users, this moment is unusually favorable. Instead of betting on a single, rigid solution, you can try a wide range of tools, compare approaches, and see what actually fits your workflows. Some automations will feel half-baked, others surprisingly polished, but the optionality is the real advantage. If you care about efficiency, leverage, or simply understanding where AI is heading next, now is the right time to explore what Google is putting into the wild and decide which pieces are worth adopting before the landscape settles.
In this tutorial, you’ll see how to use Google Stitch to generate a predictive heat map that shows, almost instantly, where attention actually goes on your website. Instead of guessing, you get a clear view of what people notice, what they ignore, and where your design is quietly leaking clicks and conversions. This is particularly useful if your site feels dated, if you’re a designer trying to push CRO further, or if you own a website with decent traffic but disappointing CTR or sales, using this tool might help you figure out the problem without spending a fortune.
By the end of this tutorial, you’ll learn how to:
- Access Google Stitch
- Generate a heat map and explore the tools
- Create an updated web design
- Explore Google Stitch options
Let’s dive right into this amazing tutorial!
Step 1 - Access Google Stitch
Google Stitch helps you with heat maps. They are the best way to turn raw data into something you can understand at a glance. You instantly see what actually matters and where people are paying attention.
Take a landing page heat map, for example. You can immediately spot which sections get the most clicks or interaction just by looking at where the page lights up, making it obvious what’s working and what’s being ignored.
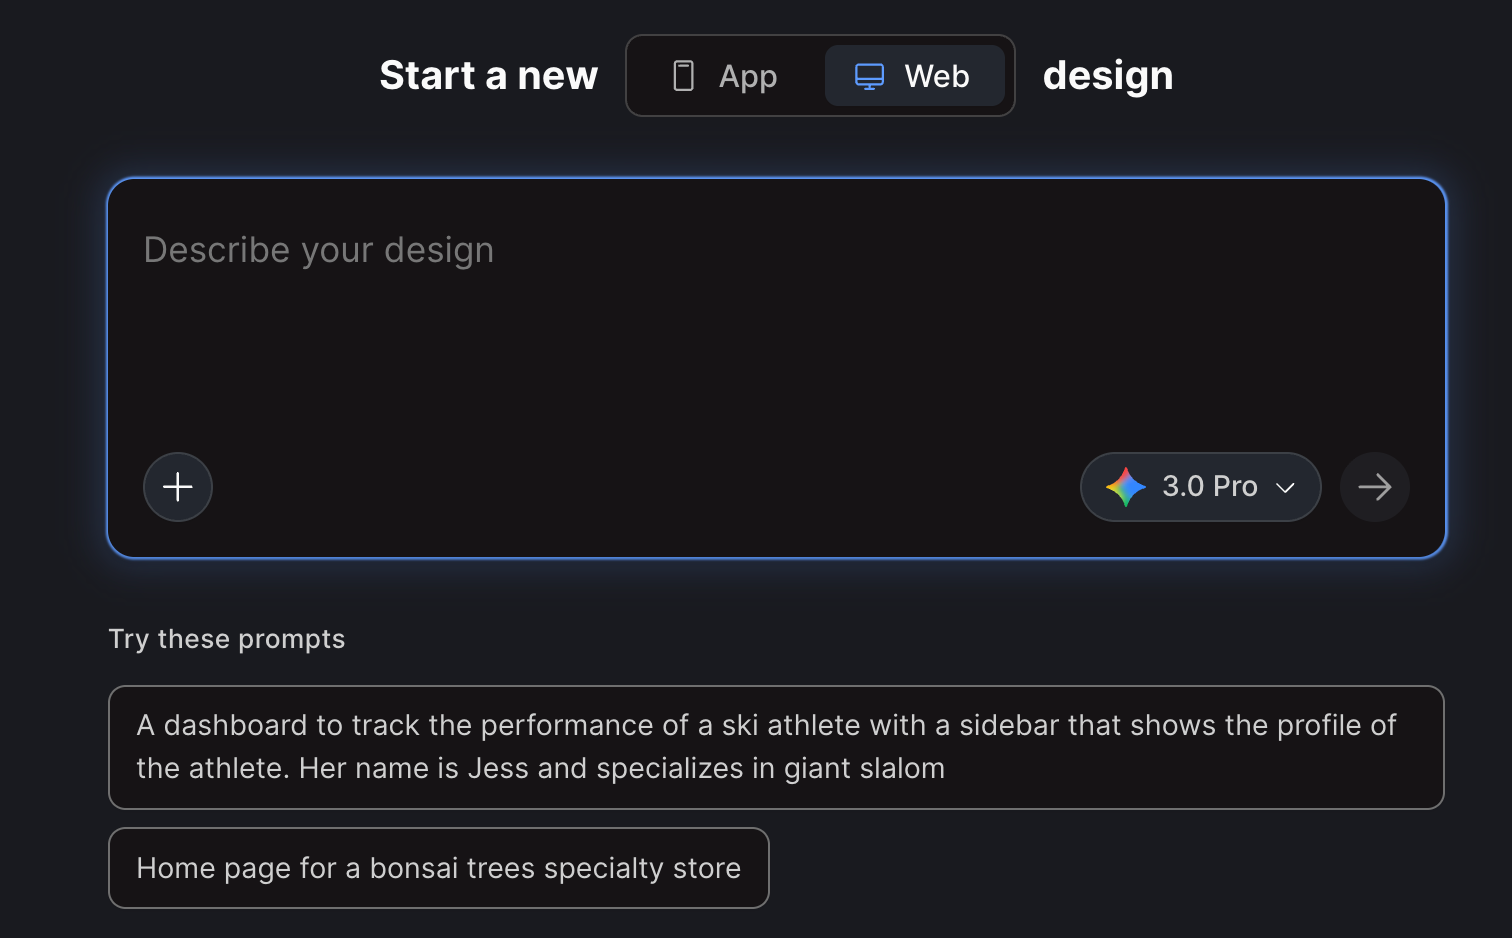
Go to Google Stitch and sign in to a Google account.
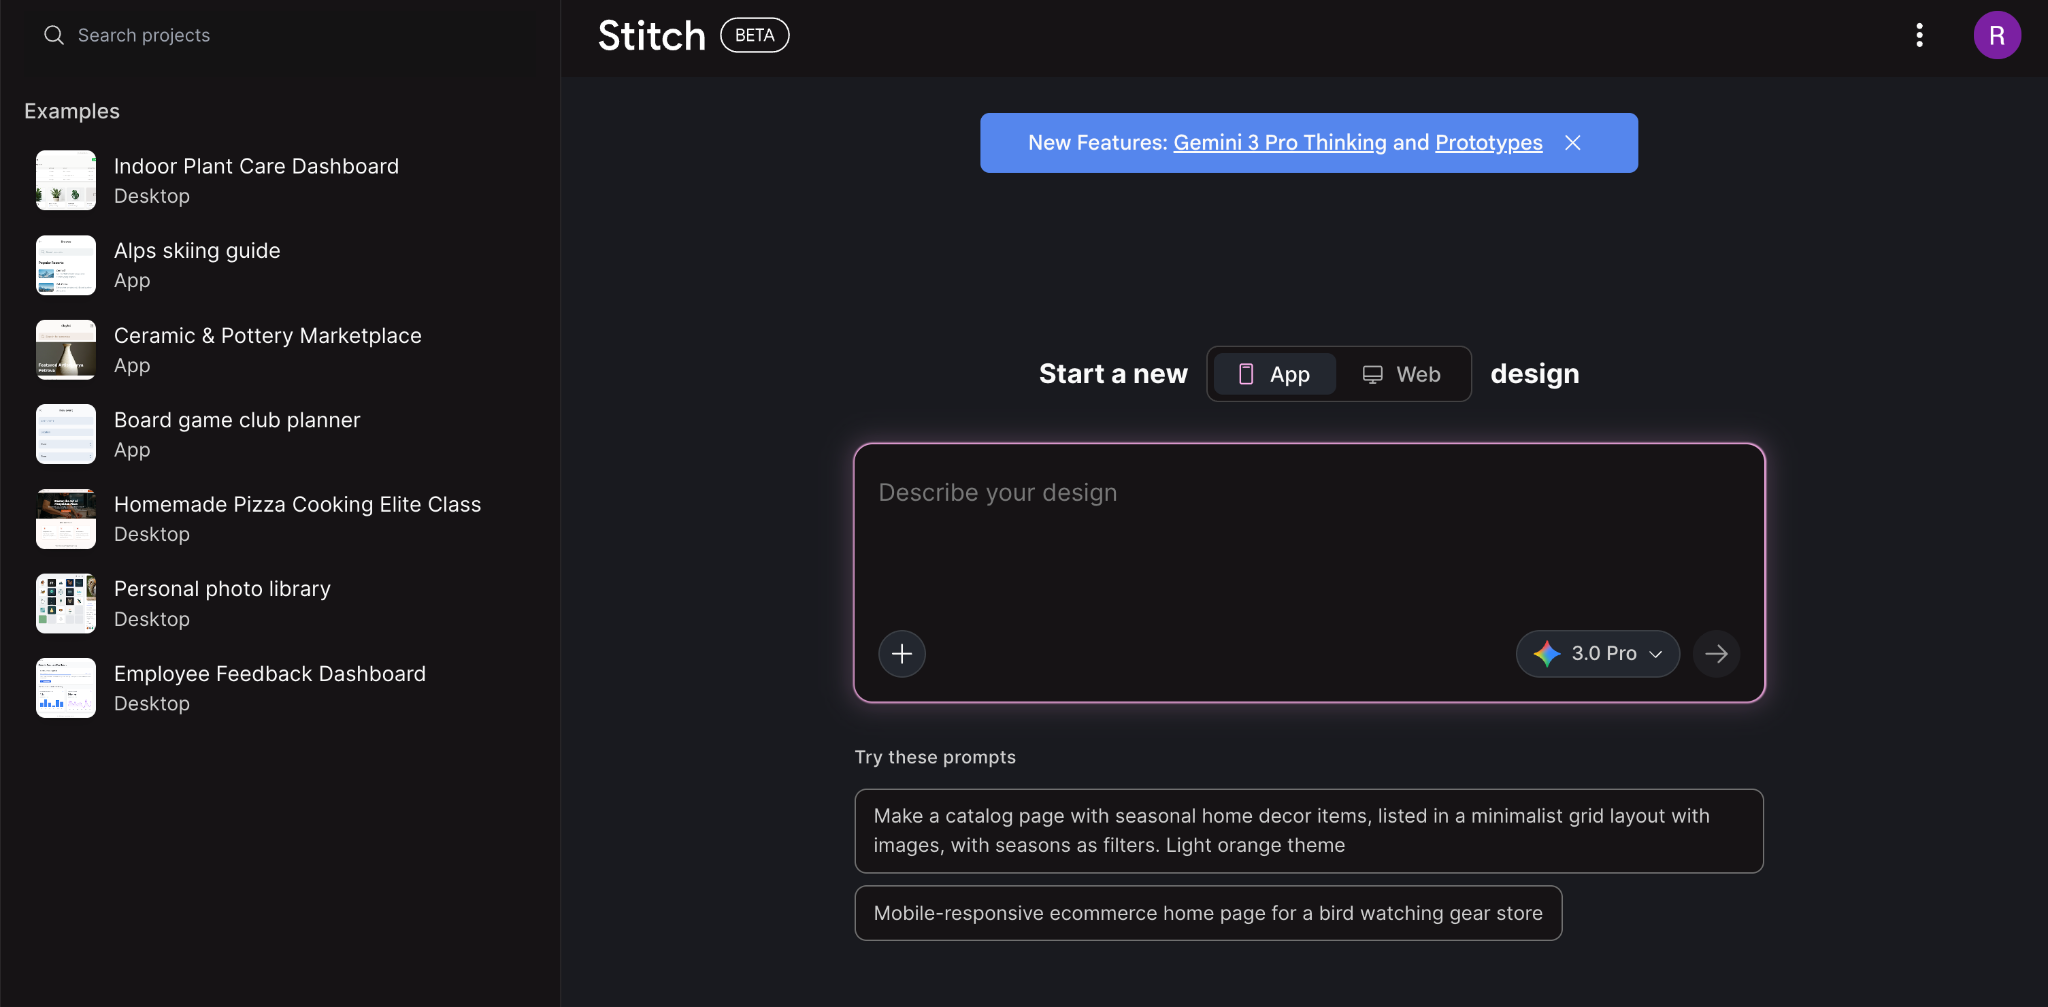
Click the web design button. If you want to analyze an app’s interface, you can select ‘App’ in the interface.
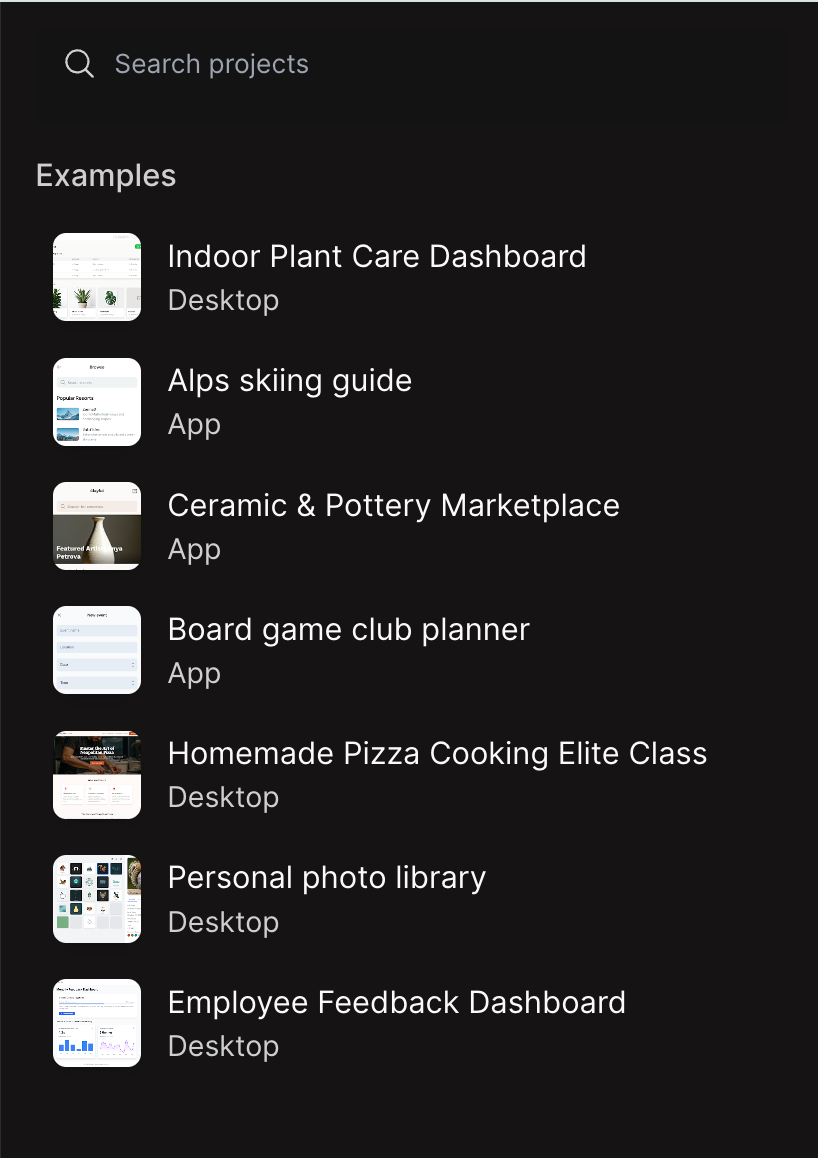
You can explore the design examples in the navigation bar on the left.
Step 2 - Generate a heat map and explore the tools
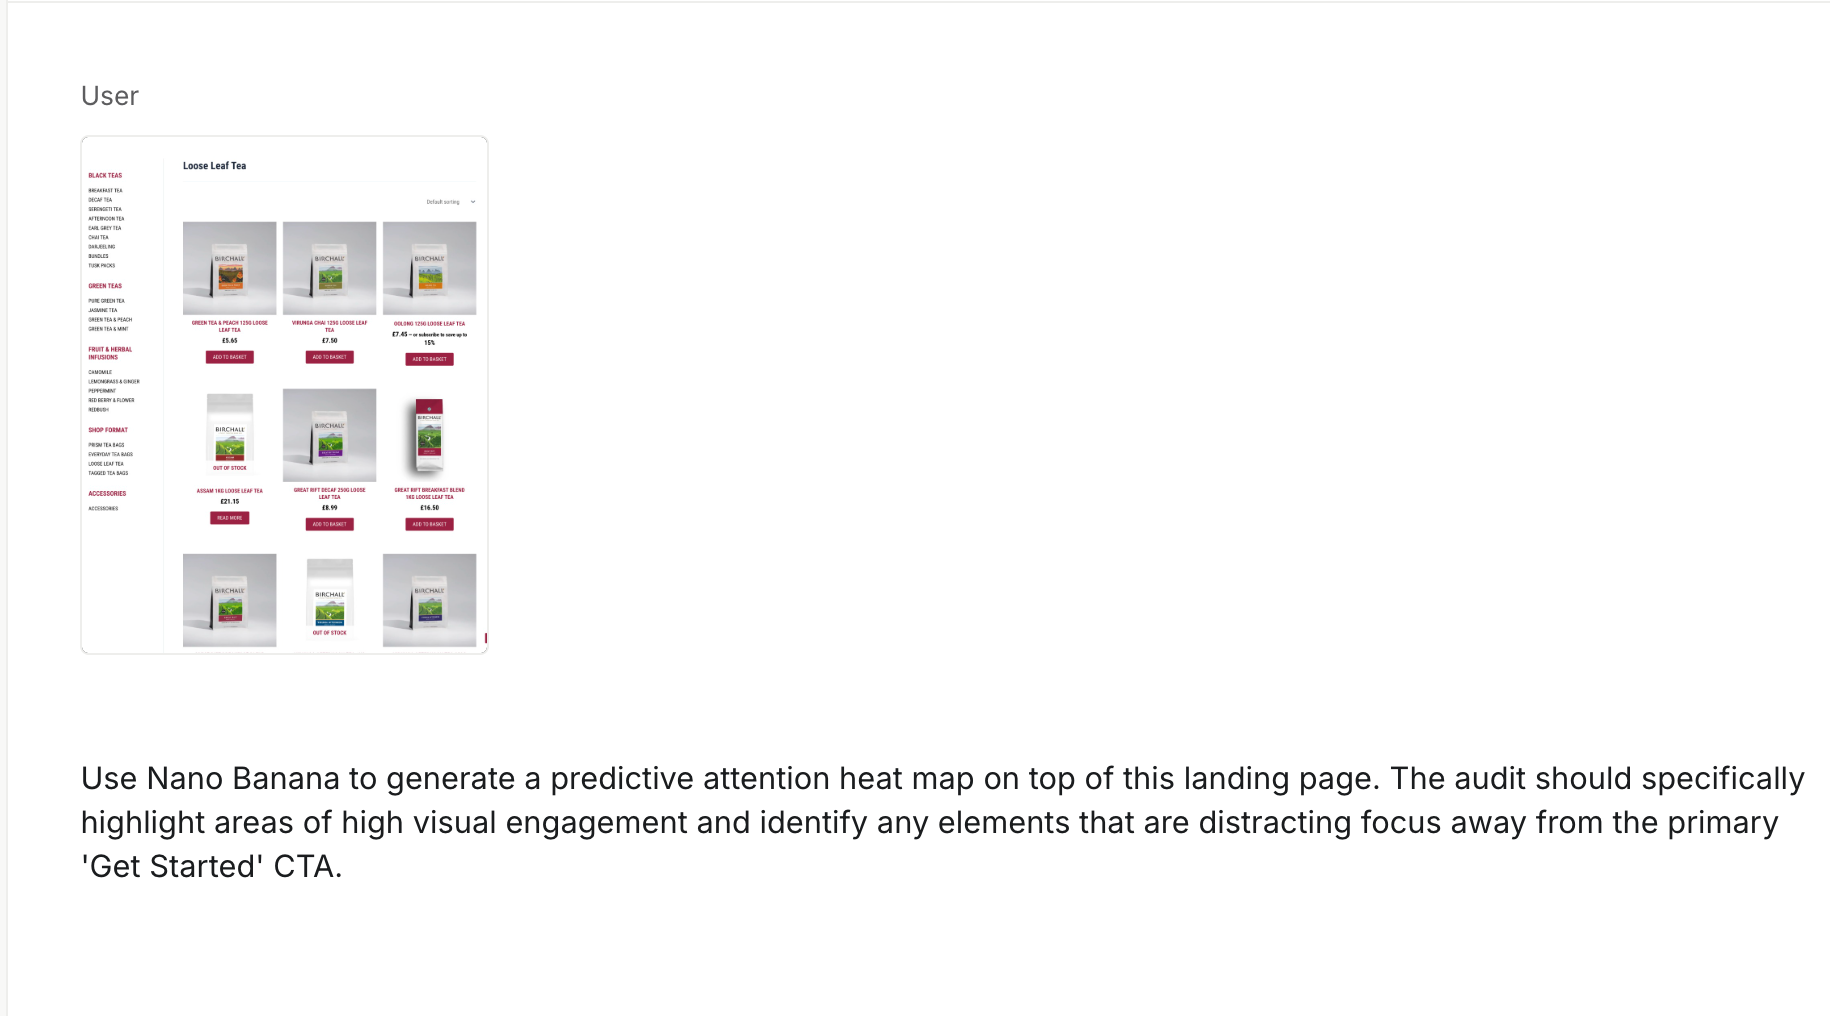
The first step is to screenshot your landing page or the webpage that opens first when a visitor comes to your site. Let’s say you have a site that sells a variety of high-quality teas. Screenshot the entire page or a hero section.
Go to Google AI Studio. Attach the screenshot to the chat. Use the following prompt to generate a heatmap. Make sure to update your CTA text to match your site.
Prompt:
Use Nano Banana to generate a predictive attention heat map on top of this landing page. The audit should specifically highlight areas of high visual engagement and identify any elements that are distracting focus away from the primary 'Get Started' CTA.
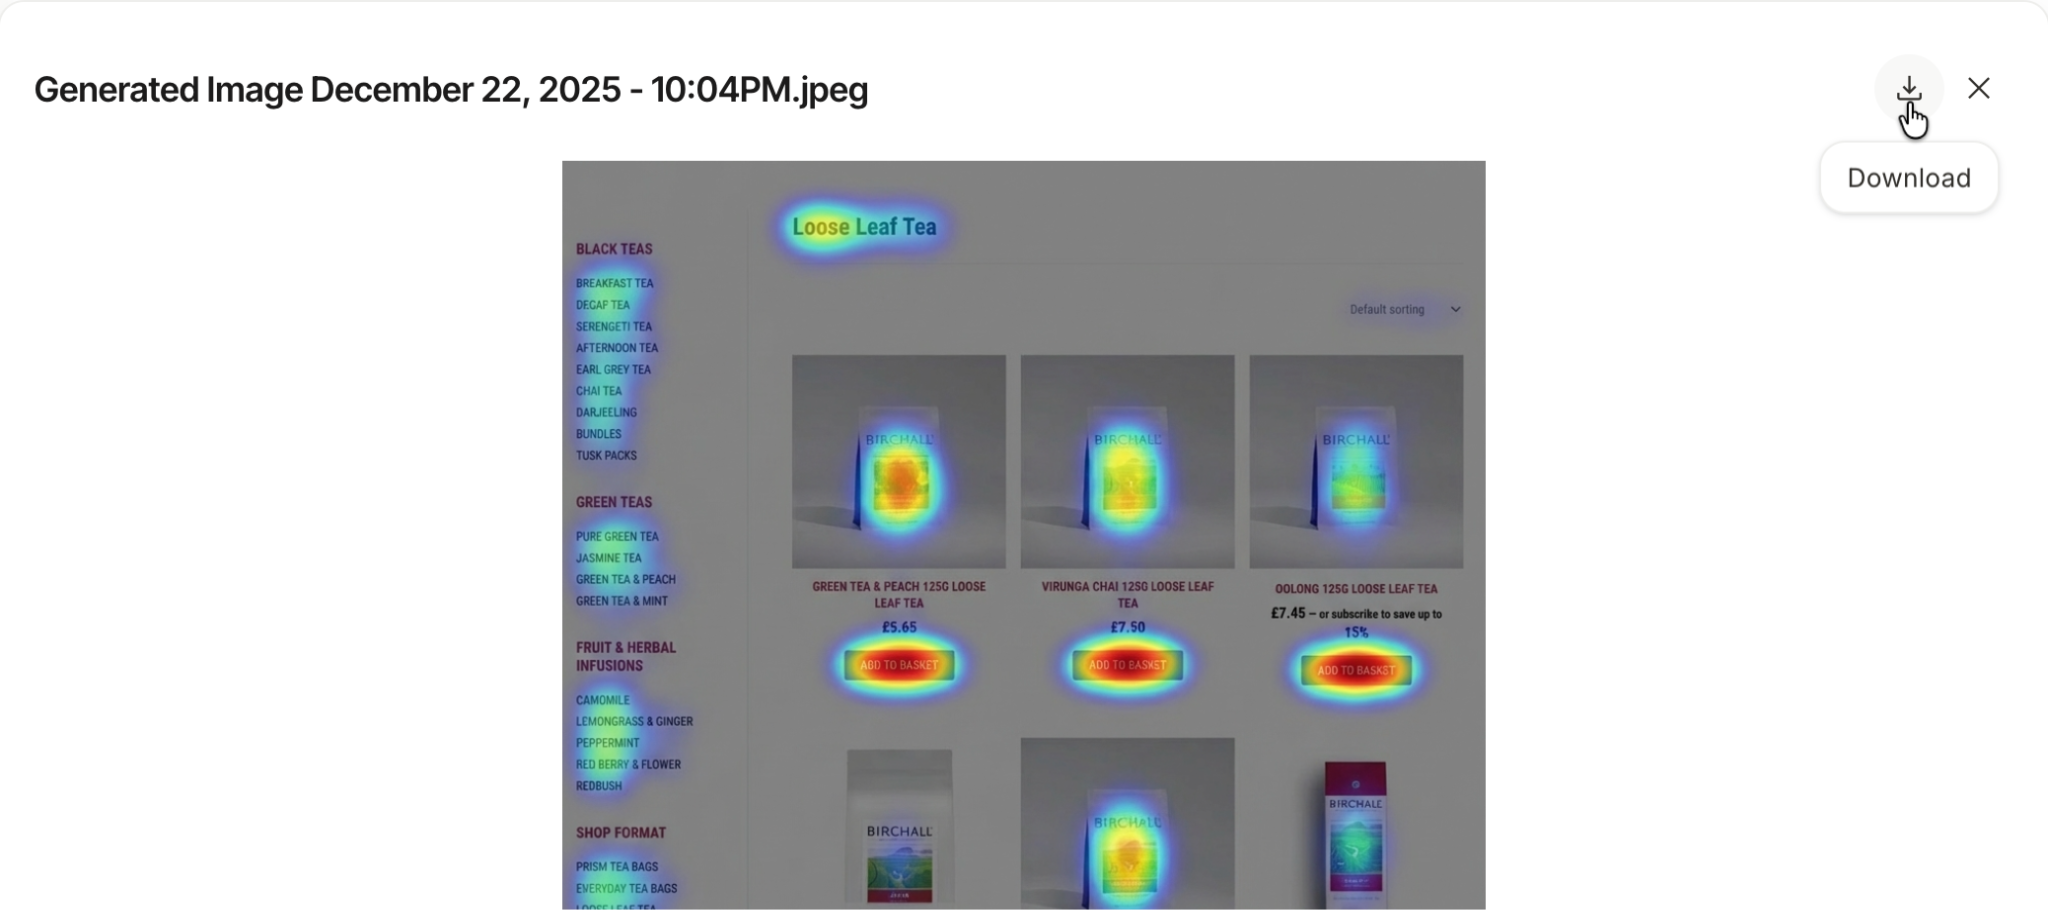
Google Gemini Pro will generate a heatmap for you in seconds.
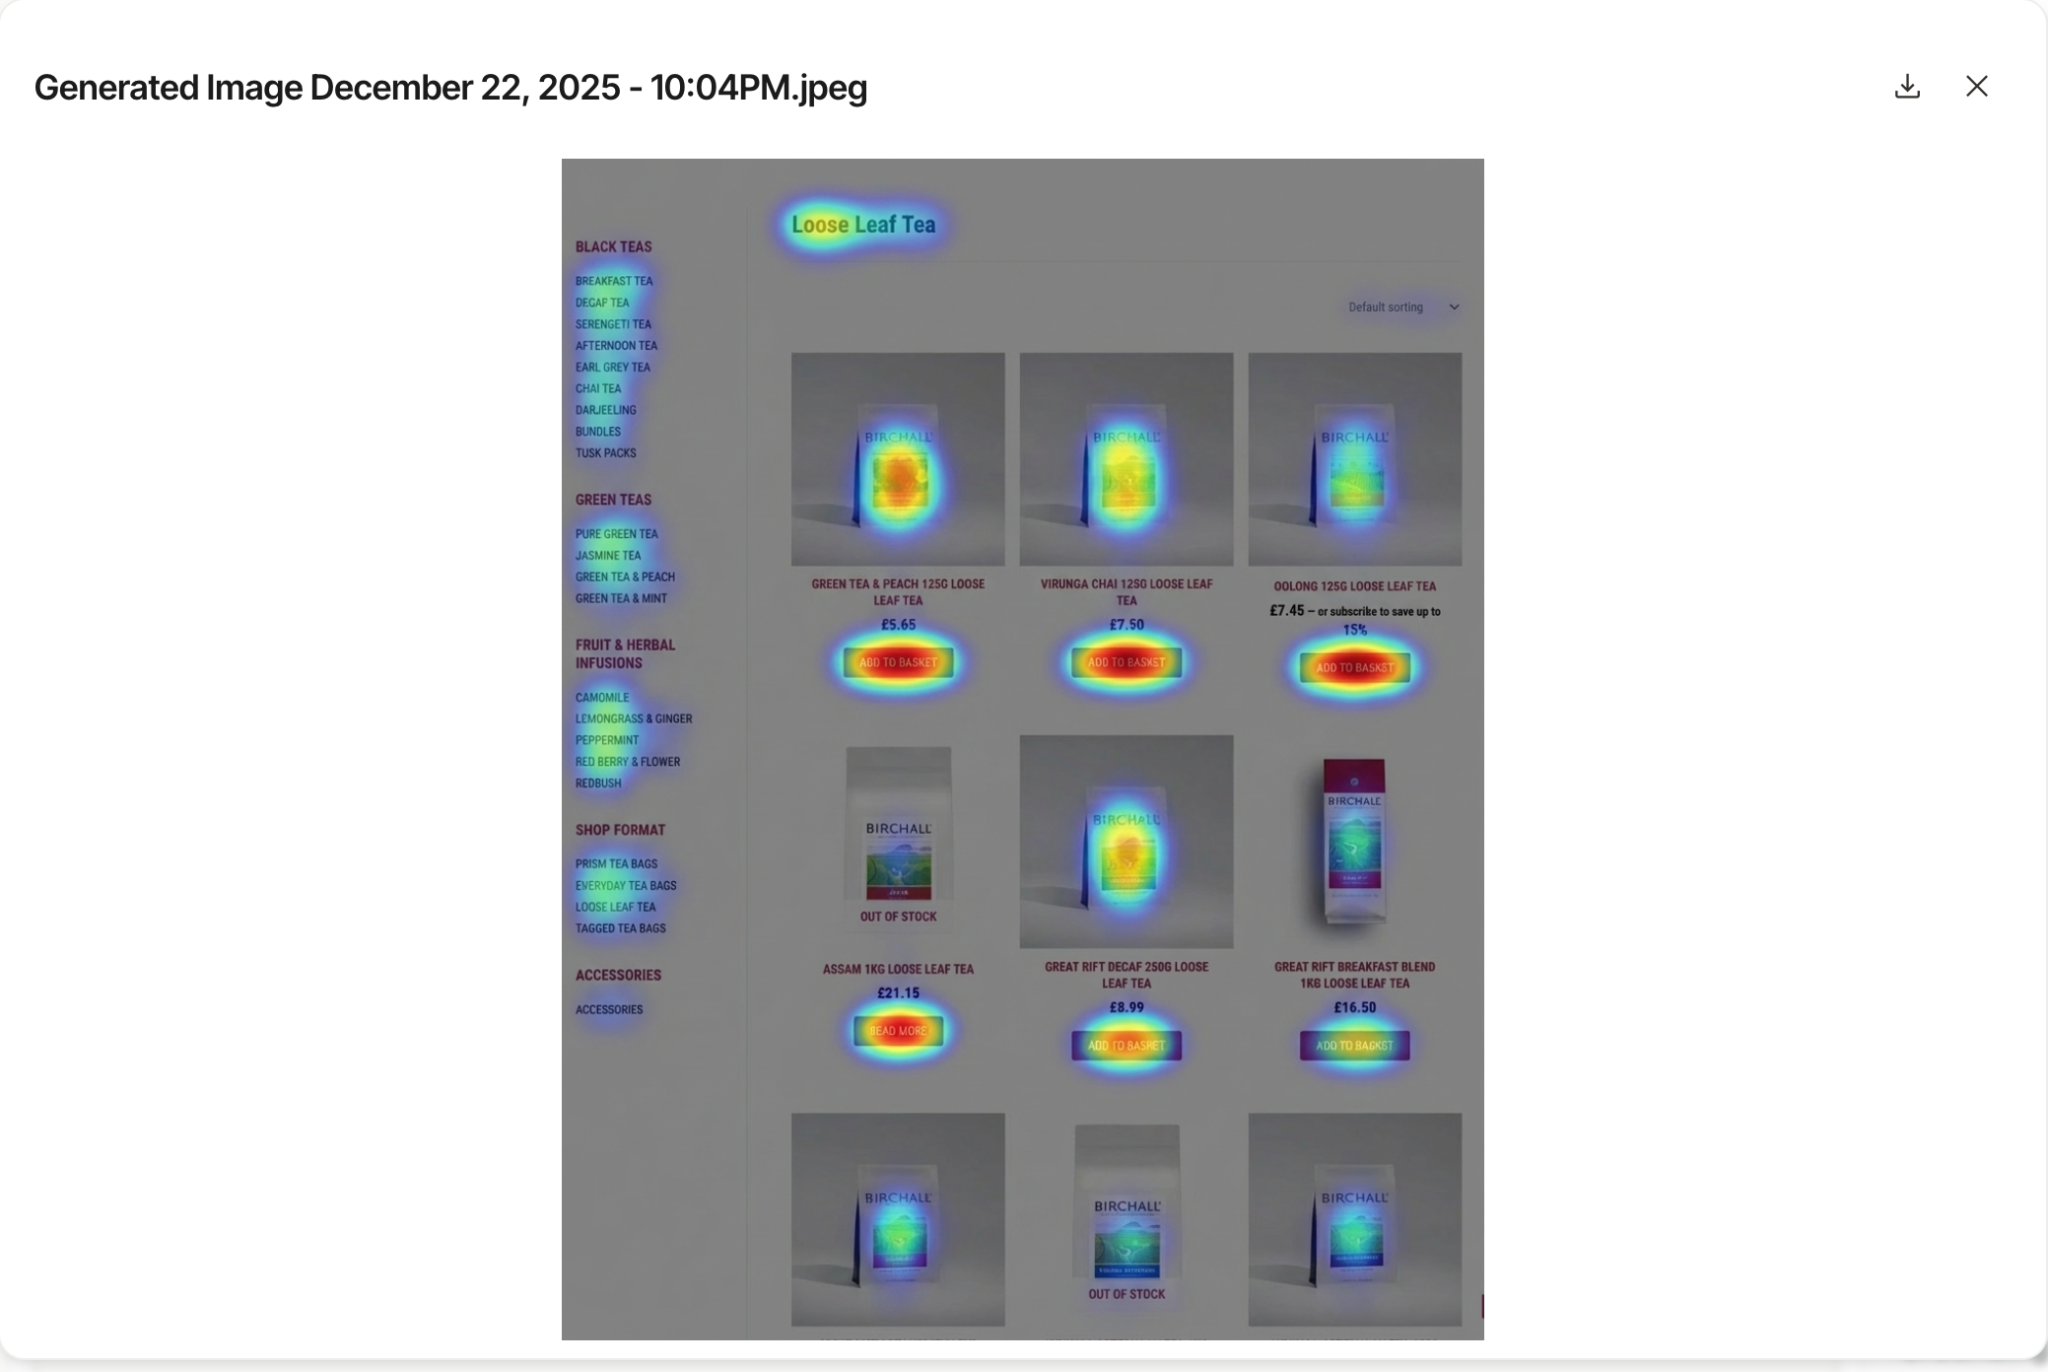
Click the download button to download the image.
Step 3 - Create an updated web design
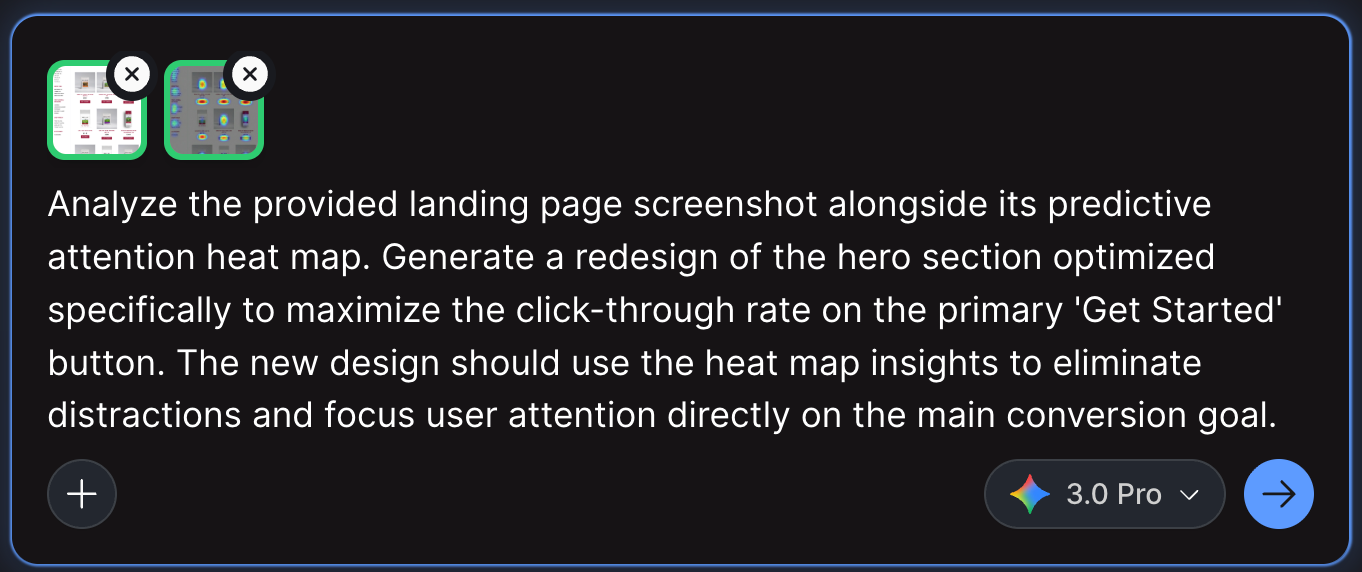
Go to the Google Stitch interface and attach the downloaded heatmap and the original screenshot in a new session. Use the following prompt. Make sure to start a new web design session.
Prompt:
Analyze the provided landing page screenshot alongside its predictive attention heat map. Generate a redesign of the hero section optimized specifically to maximize the click-through rate on the primary 'Get Started' button. The new design should use the heat map insights to eliminate distractions and focus user attention directly on the main conversion goal.
Here’s a simple before and after from two designs we optimized. The changes look minor on the surface, but that’s usually how it goes. A small 10 to 20% lift on a live site compounds fast and can easily turn into hundreds or even thousands of extra conversions over a year.
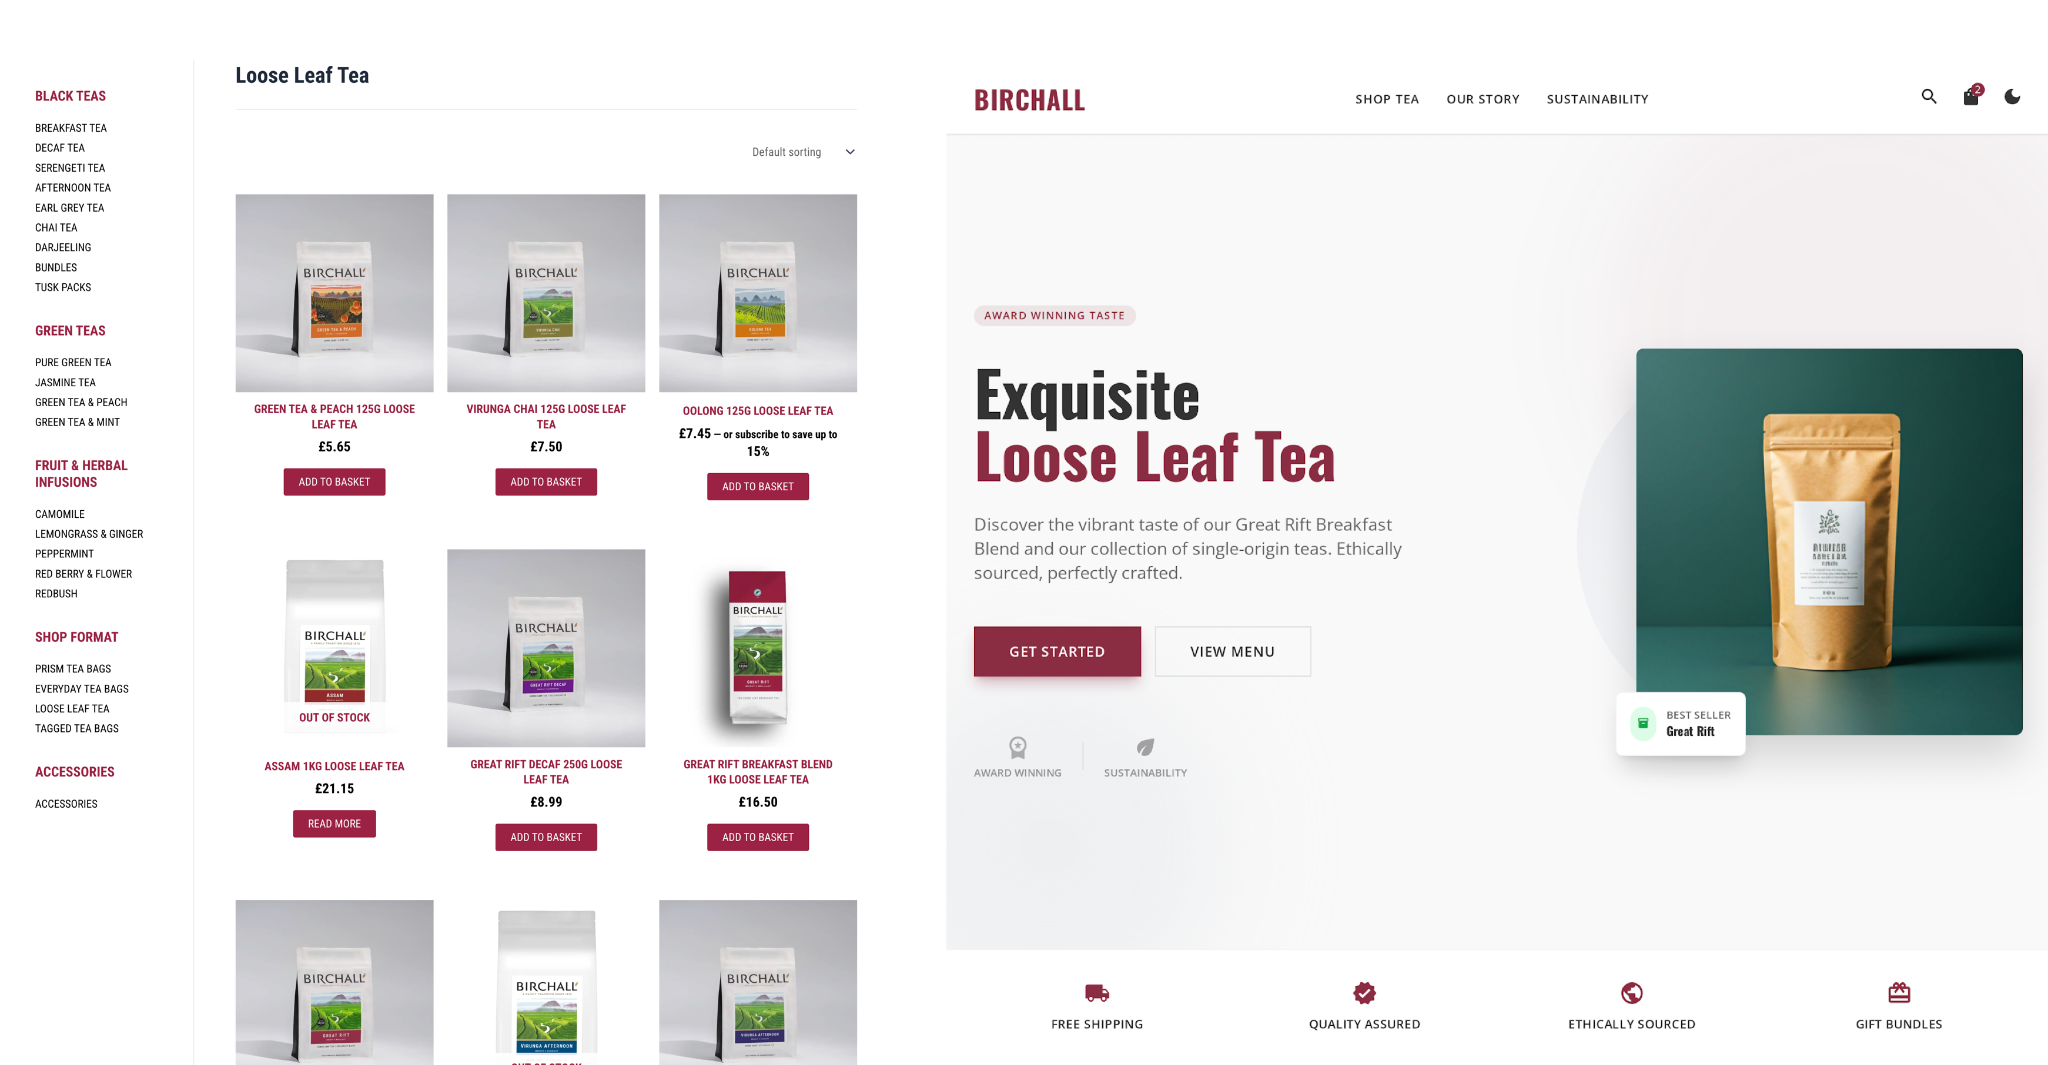
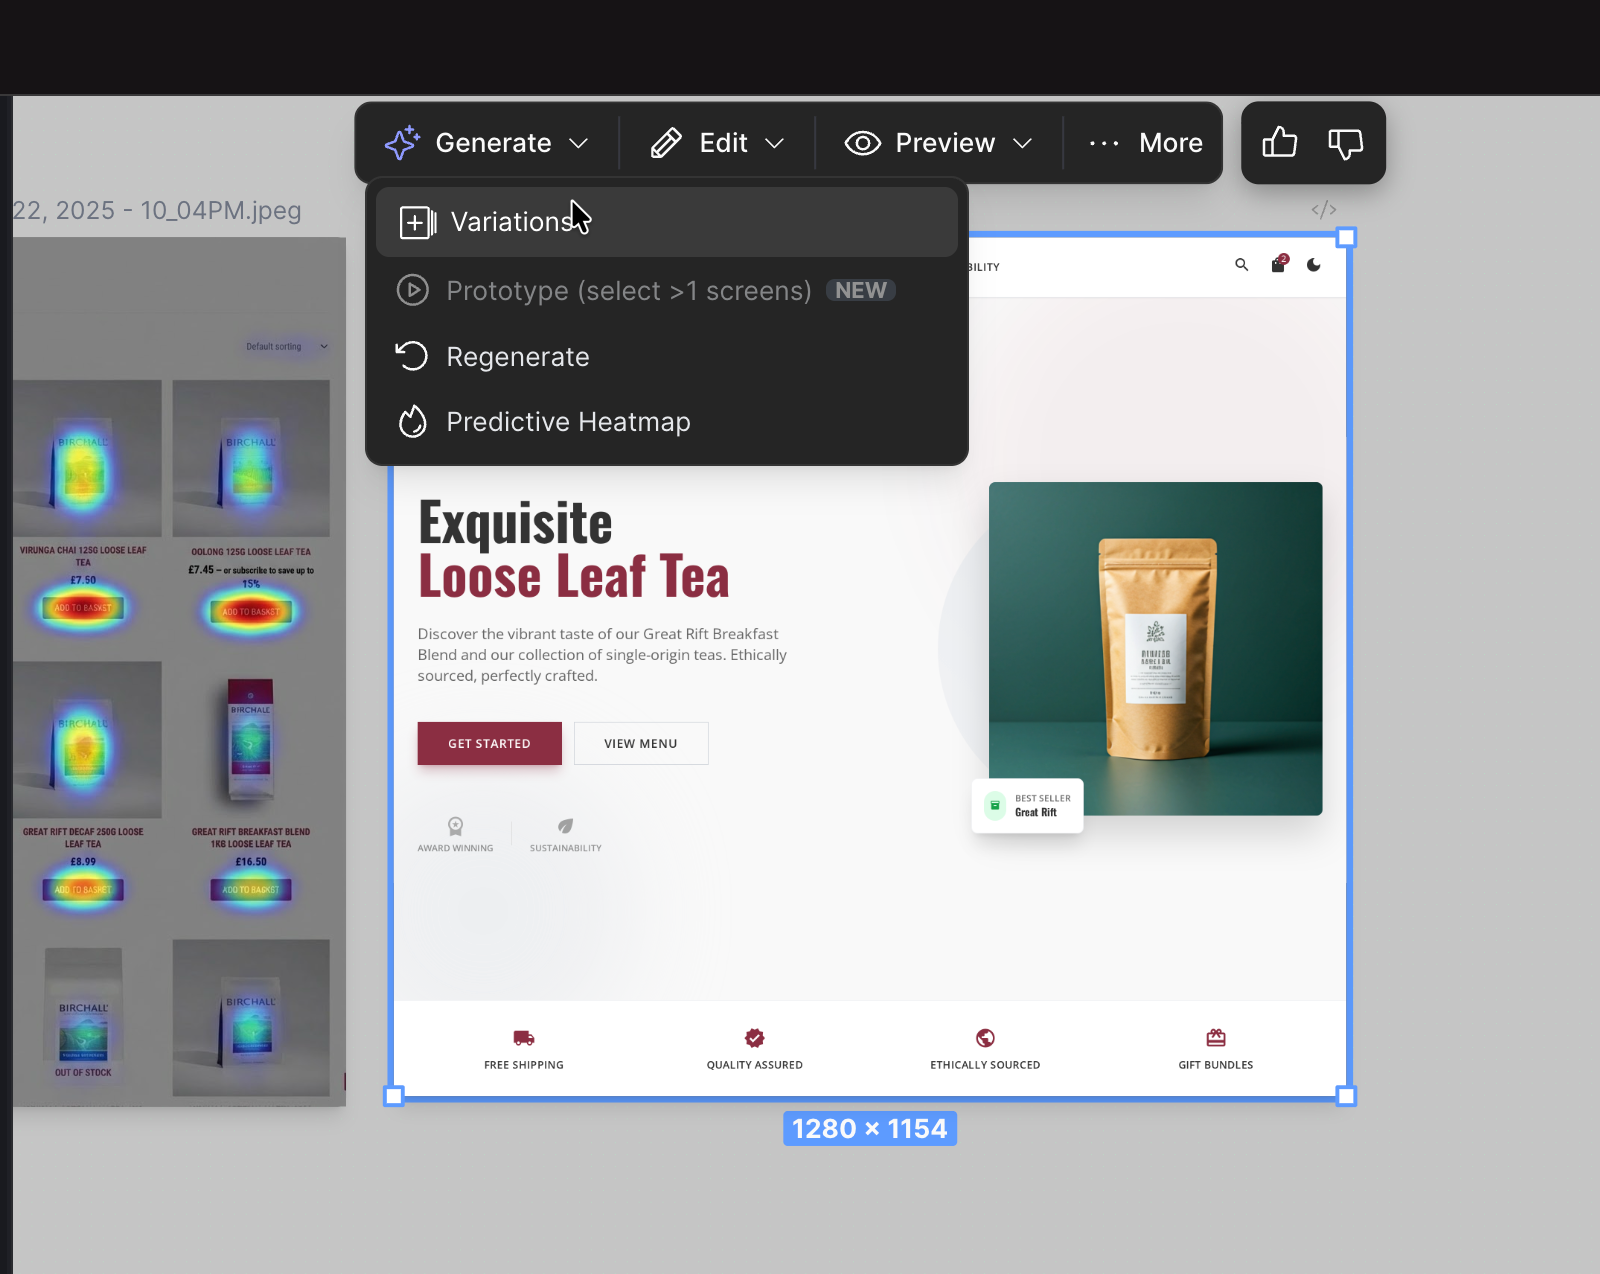
Everything is sharper and more pronounced. The get started button is in red. This is how you grab the attention of the visitors. If you include the Call-to-Action near every single product, it will become the biggest conversation factor on your site.
Take a look at the picture on the right with ‘Best Seller’ written in the corner. Stitch put focus on a single product labelling it ‘Best Seller’. This is a great way to convert visitors into buyers.
Do not settle for the first variation. Click the ‘Generate’ button at the top of the generated design in Stitch and click ‘Variations.’
Specify the number of variations and create a range. Medium is fine. Write specific instructions for the Stitch. Check the aspects boxes to change the things you want to change in these variations. Click ‘Generate variations.’
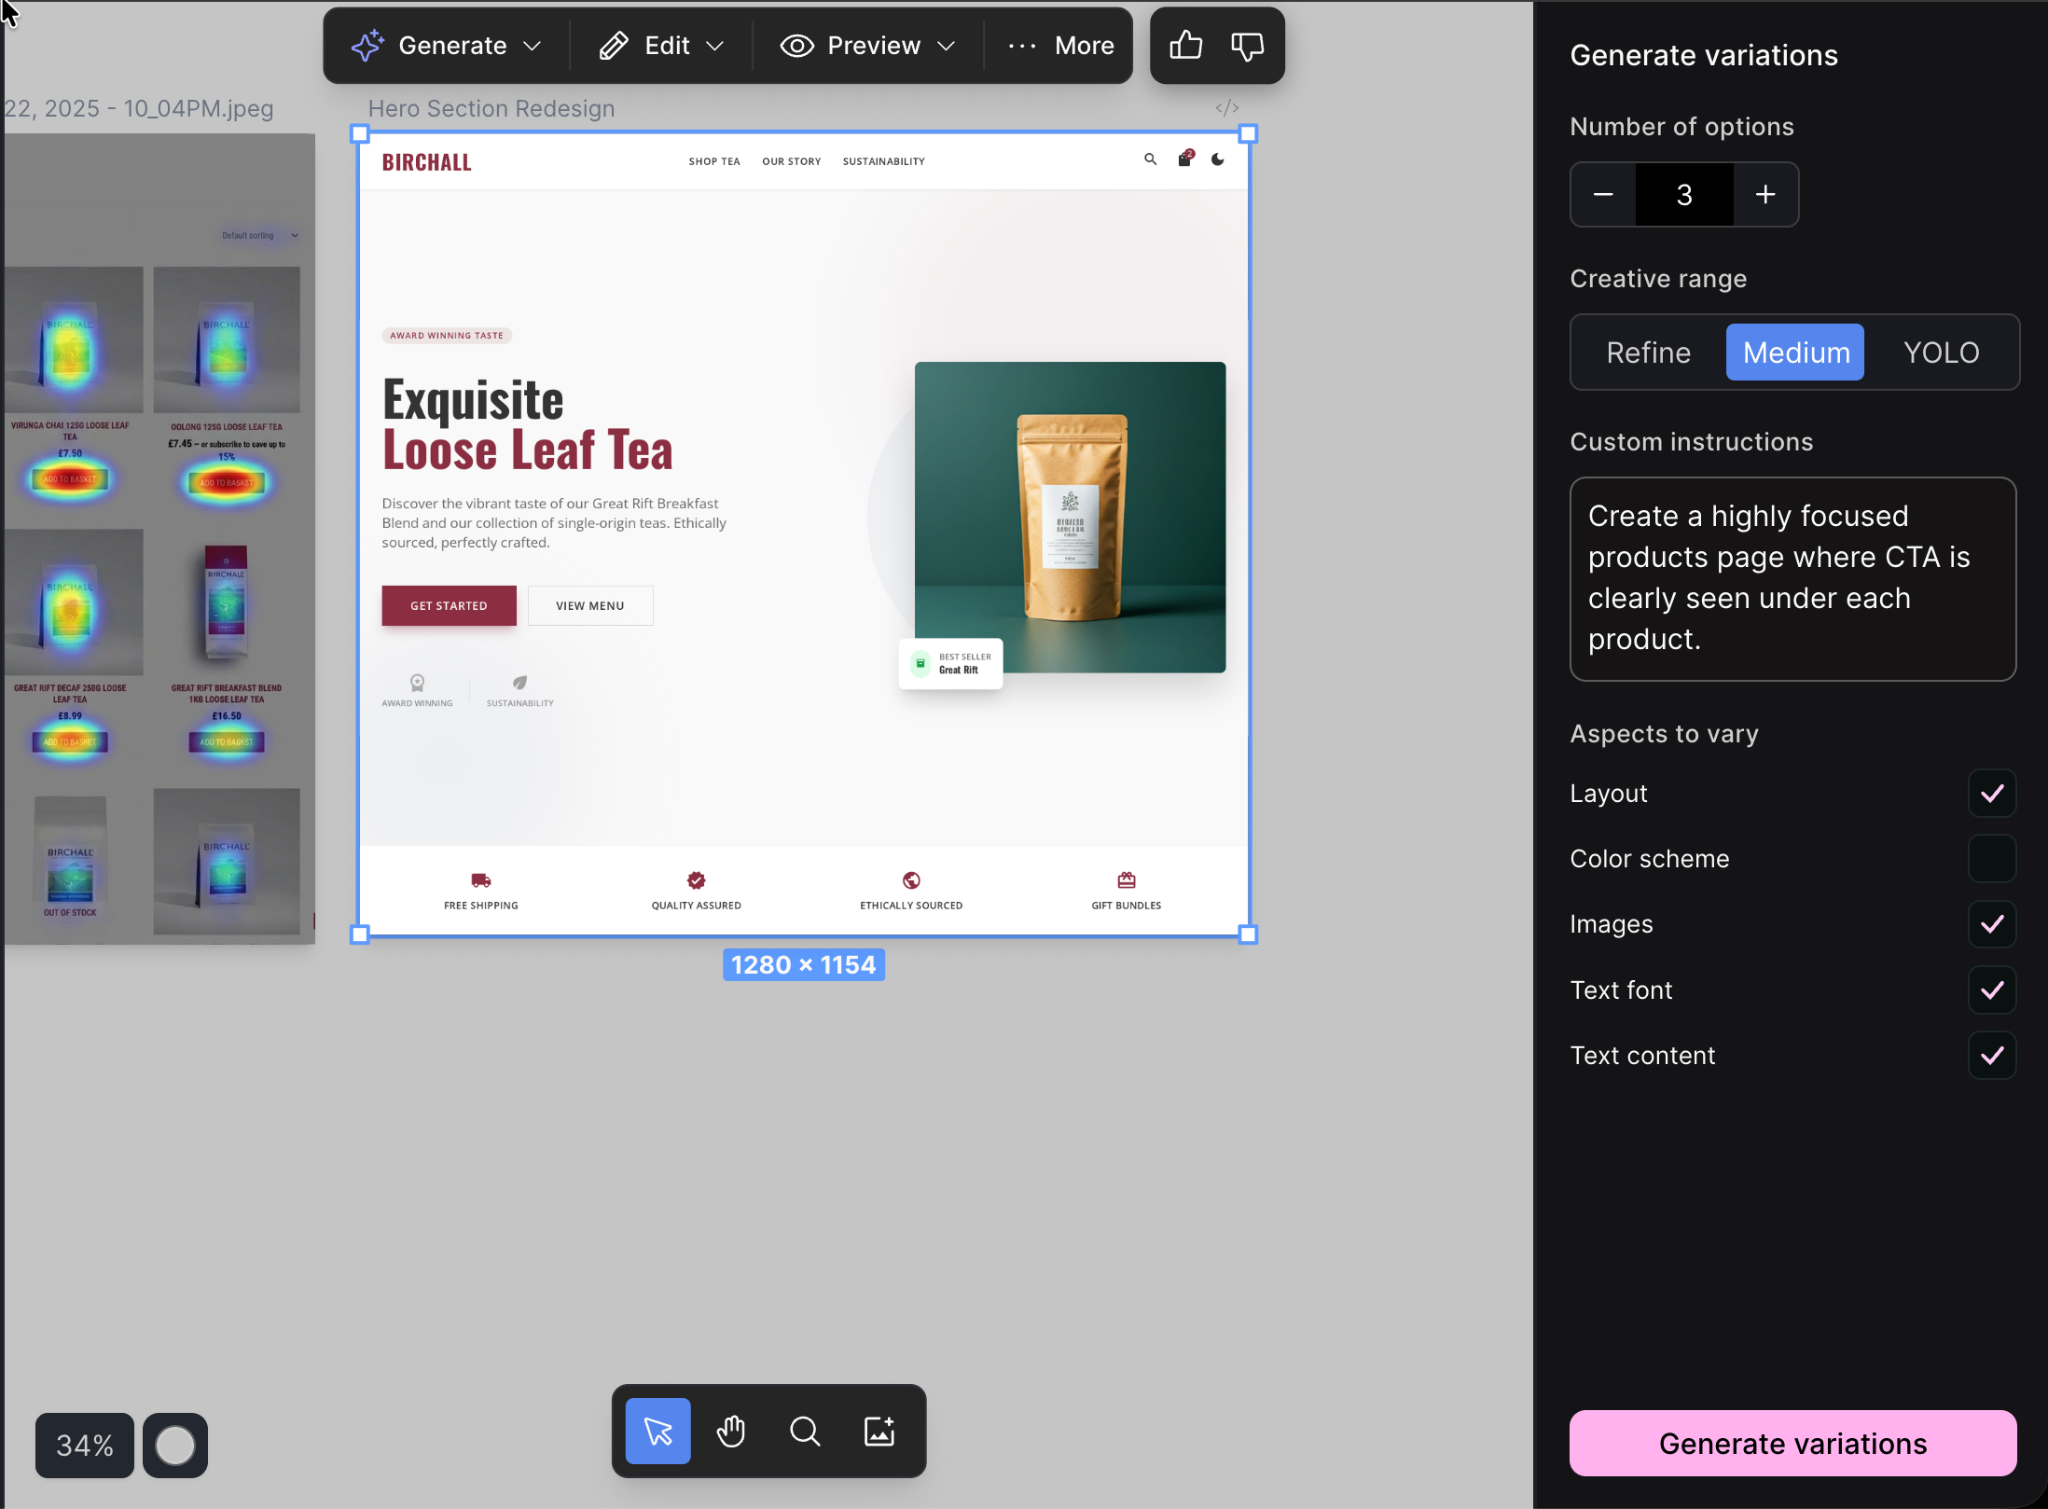
In 100 seconds, Stitch will conjure up three great variations of the web design of our site.
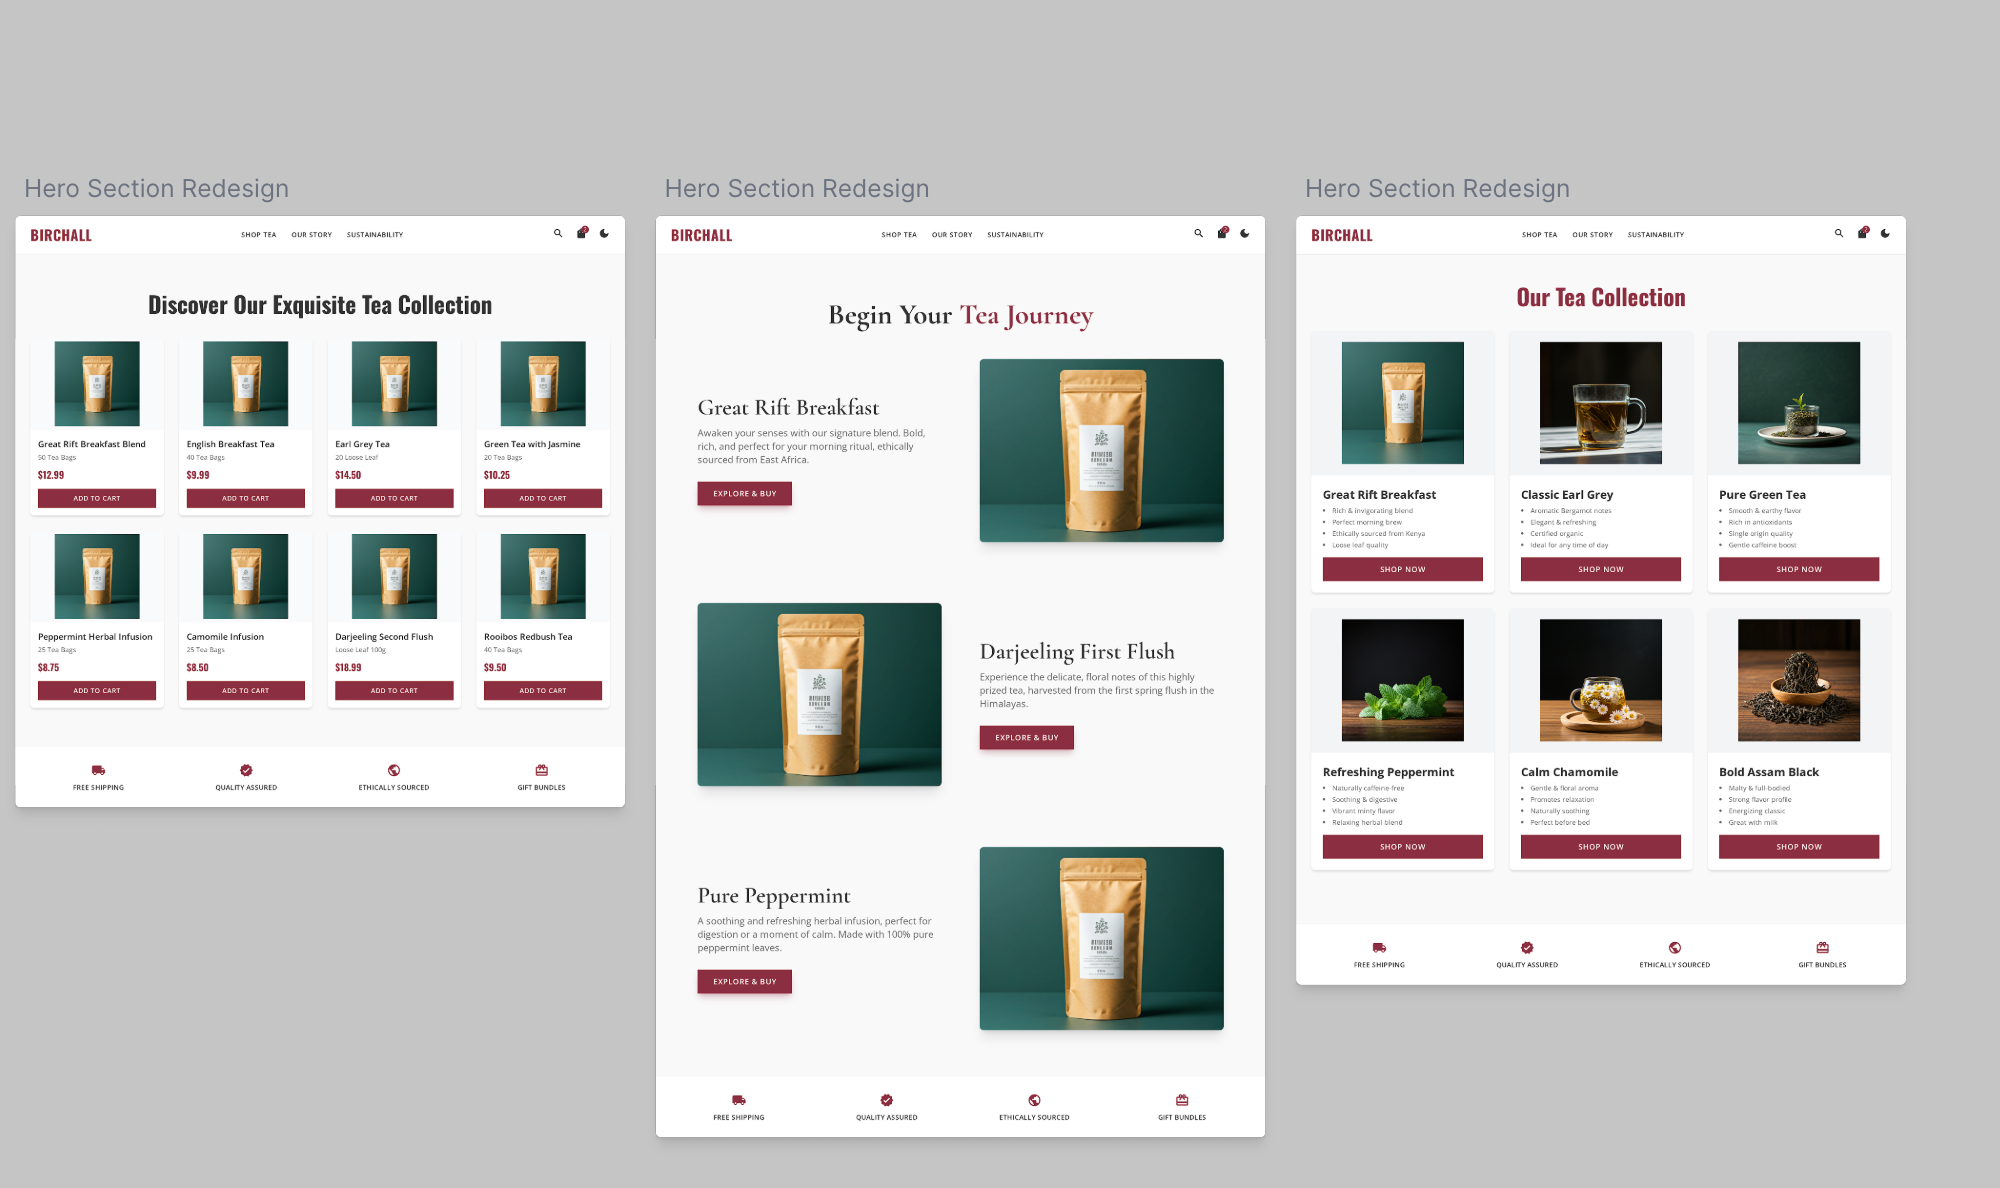
The variations turned out great. Everything is defined and clearly laid out. Google Stitich can create some amazing web designs in seconds.
There are quite a few tools in Stitch that helps you refine the web design. You can click ‘Edit’ and refine a variation further by adding the generated web page to a chat. You can also annotate with Nano Banana. And if you want to edit the theme manually, you can do so with ‘Edit Theme.’

Let’s say you want to add a ‘Add to Cart’ icon in the corner of each product image. Click ‘Add to chat’ and use the following prompt to change your products page into an conversion machine.
Prompt:
Add the ‘Add to Cart’ icon button in each image of the product on this page.
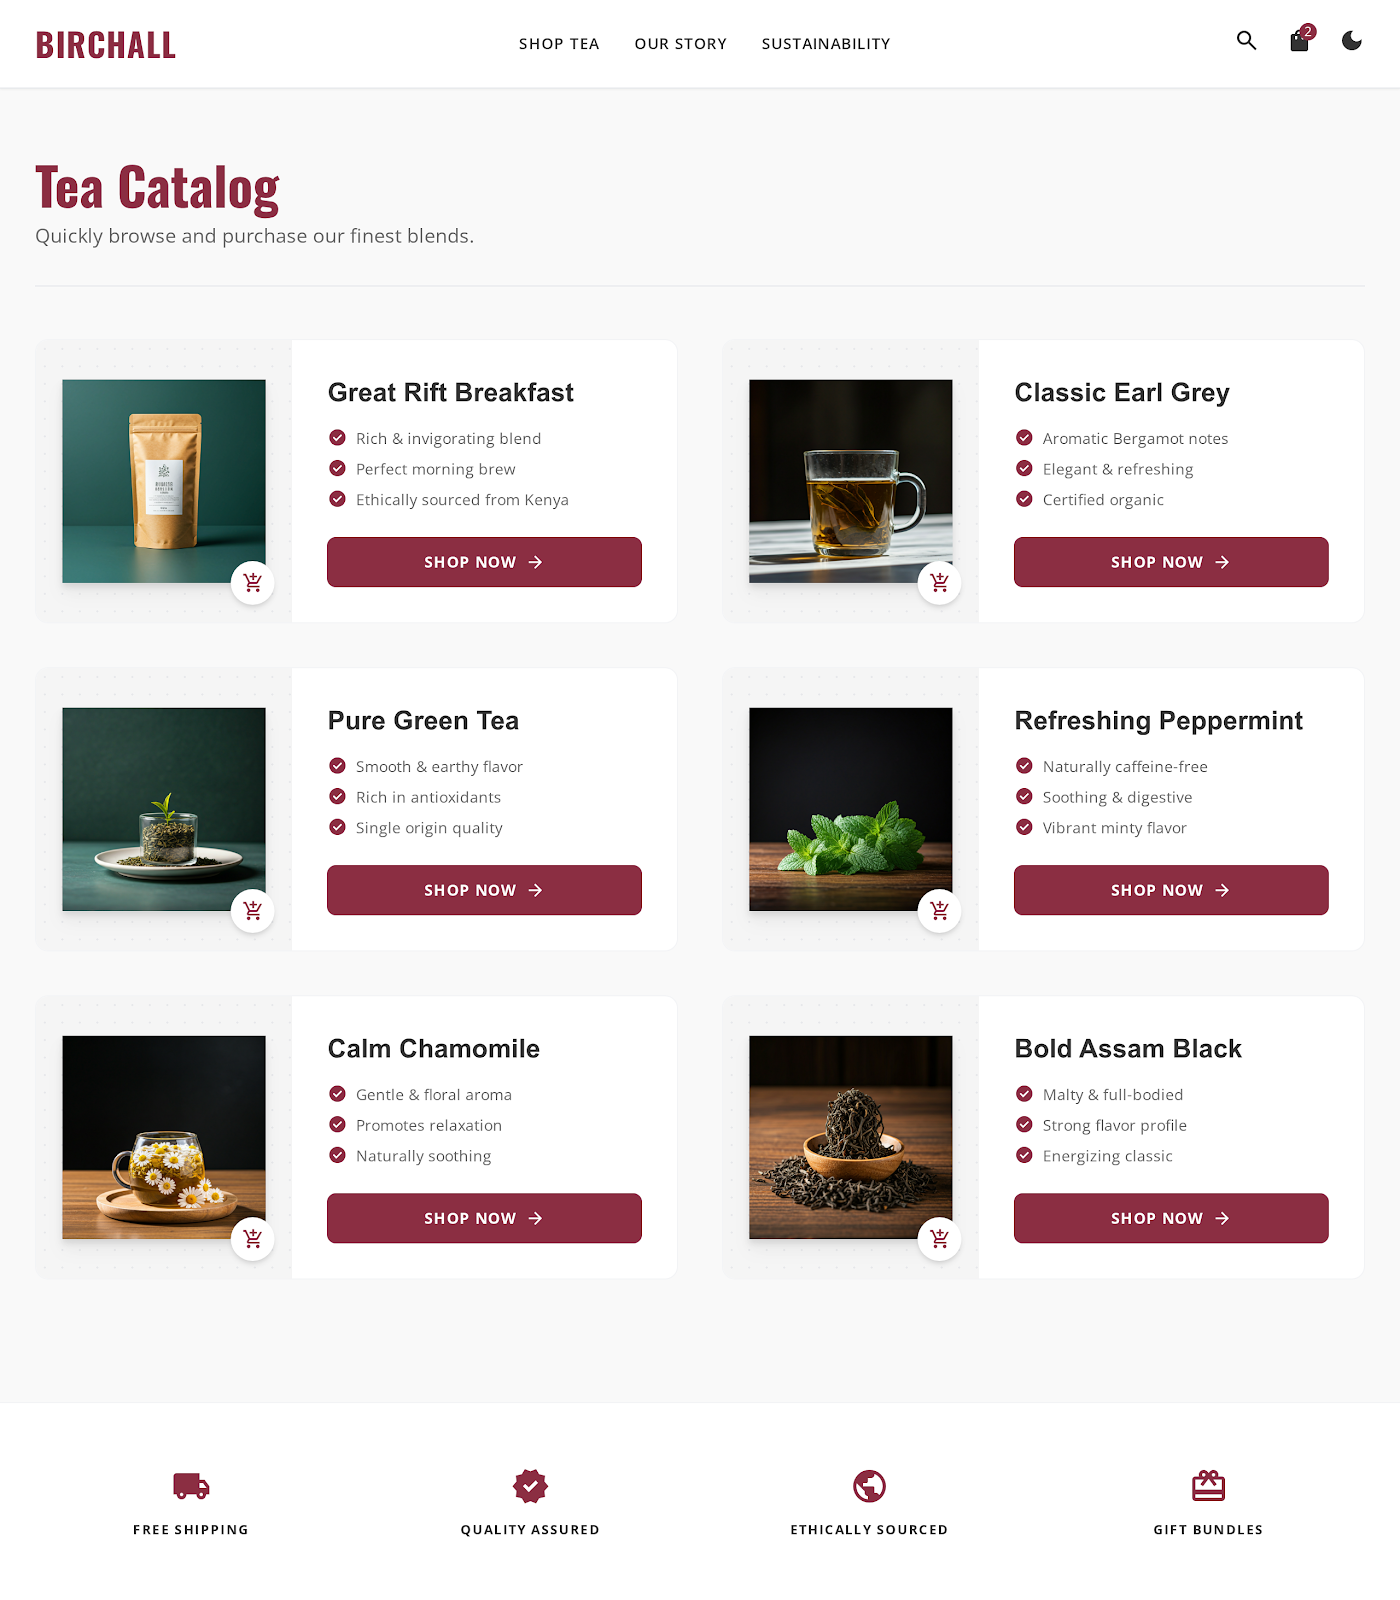
How amazing is that! It added the ‘add to cart’ icon next to each product. This is how you convert visitors into buyers. A simple click to the cart and the product is ready to be paid and shipped.
Here, we’d like to say that you are only limited by your imagination. Generate the best web design you can for your website and download it as a code. Upload it on your hosting server and generate a heat map again or simply download the design Stitch generated for you and upload it in Gemini 3 Pro. Generate the heat map for your new web page design. If the heatmap is on spot, you are good to go with your newly minted web design.
Step 4 - Explore Google Stitch options
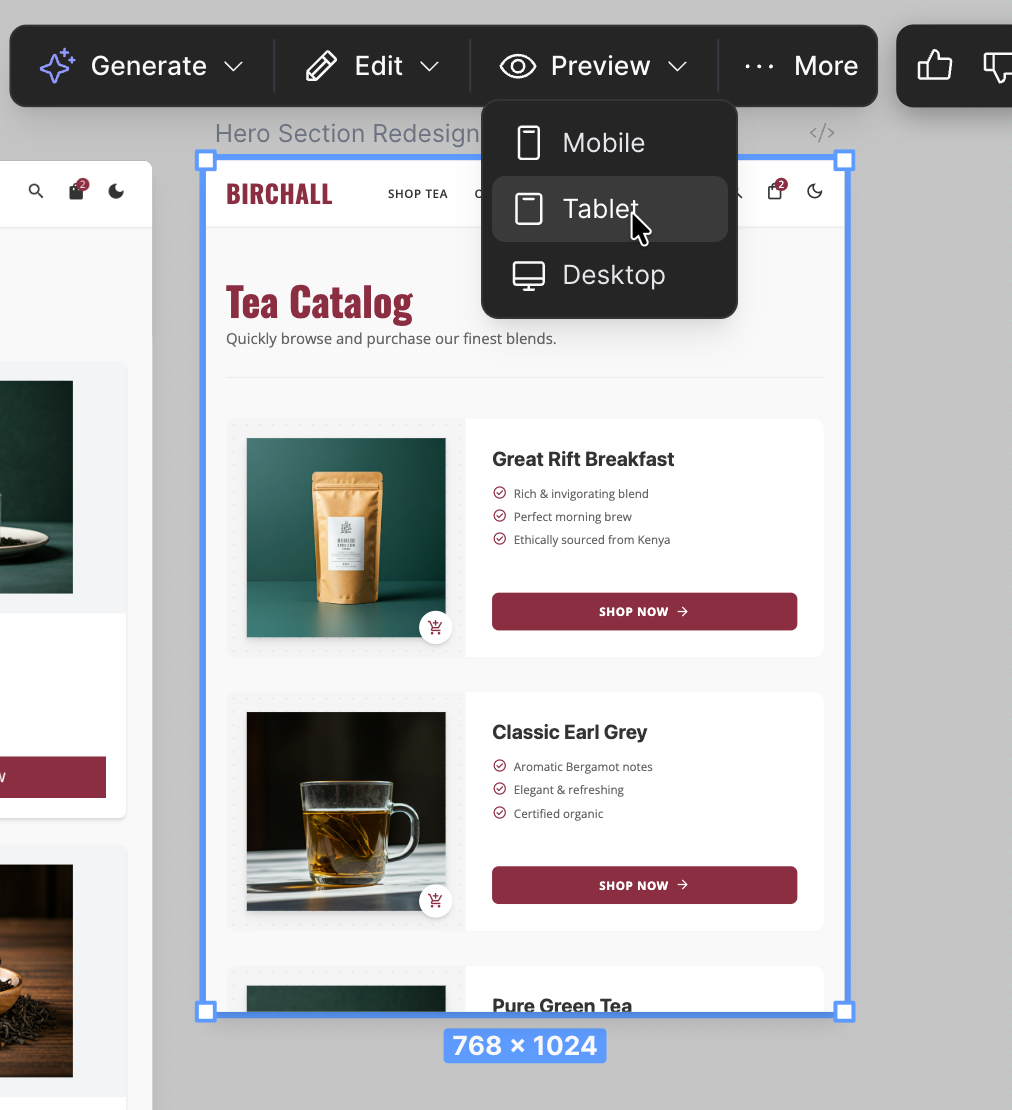
There are a few options you can use to play around in Stitch. Click the ‘Preview’ button in the floating bar above the generated design. You can view the web design in mobile, tablet and desktop orientation.
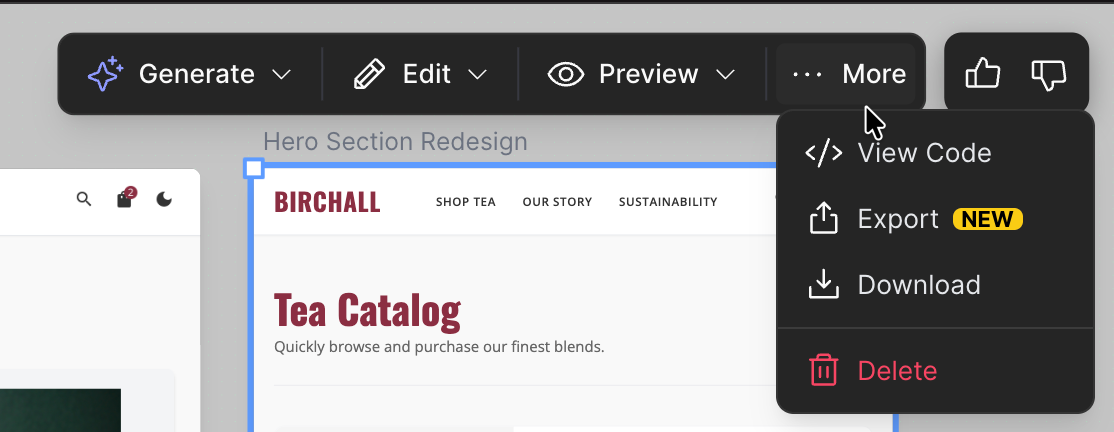
Next, click the ‘More’ button. Here you can view and copy the code and use it for your website. You can export the design and download it as code or an image.
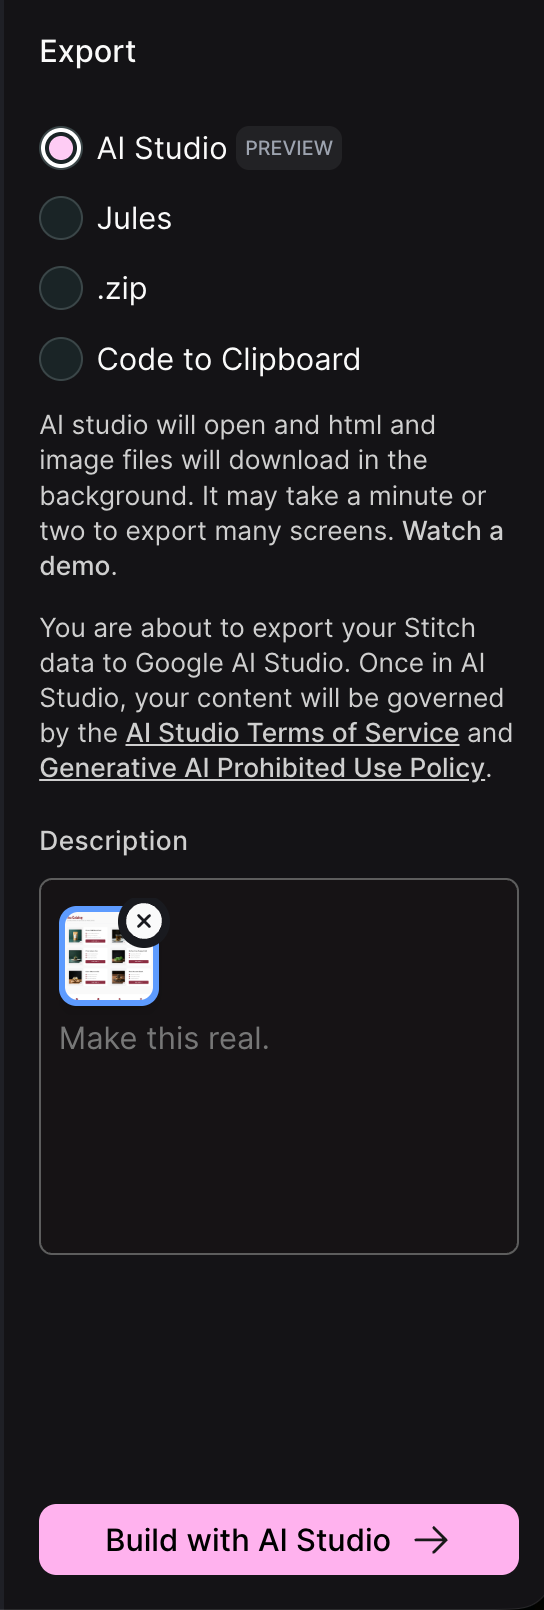
For example, click the ‘Export’ button. A side bar panel gives you a host of options to export your design. You can export it in Google AI Studio, Jules (Google’s autonomous AI coding agent), a zip file or a simple copy to clipboard.
That’s it for this tutorial, AI Mavericks. Google Stitch is a solid tool for web design, especially now that it’s integrated into AI Studio. You can move from idea to layout without touching code, which removes a lot of friction early on. Don’t wait for a “perfect” project to try it. Start experimenting now and you’ll quickly see how much AI can speed up both the design and build phases.

.png)
