.avif)

This tutorial continues the Excelling at sales prospecting with Apollo and AI tutorial and is the second in our Boosting sales with AI course.
In the last tutorial, we focused on extracting targeted leads using Apollo. Now, the next vital step in creating an AI-powered sales funnel is enhancing that data. This process will enable you to personalize your outreach and significantly increase your chances of grabbing your leads’ attention.
With Clay, you can seamlessly pull raw data from various sources—think contact lists, LinkedIn profiles, or email databases—and transform it into something truly actionable. The platform doesn’t just stop at collecting data; it enhances it by adding valuable insights, such as job titles, company details, social media profiles, and even relevant industry information. This means your leads become much more than just names and numbers—they’re enriched with context that can help you tailor your outreach and close deals faster.
This tutorial shows you how to:
- Import and prepare company data in Clay
- Find and enhance contact information
- Add valuable context through multiple data enrichment layers
- Export enriched data to your CRM for outreach
Tools you’ll need for this tutorial are:
- A Clay account
- Apollo CSV file for the previous tutorial (or any other document that has company data)
- HubSpot account (or another CRM tool)
Let’s get right into it!
Step 1 - Import and prepare company data in Clay
To get started, we’ll set up our workbook in Clay and import the initial company data. Log in to your account, and you’ll be ready to begin!
Click the ‘Create new’ button on the dashboard screen and select ‘Workbook.’

Choose the "Blank Canvas" option to start fresh.

Click the "Import" button and upload your CSV file—either your Apollo export or the file containing your company's data.

Quick tip: To get a clean worksheet, only import columns you’ll use for enhancement and outreach.

When you import your file, make sure to include these key fields:
- Company name
- Website address
- LinkedIn company page URL
- Industry type
- Number of employees
- Location
- Tech stack
- Year founded
Step 2 - Find and enhance contact information
With our company data imported, it's time to use Clay to pinpoint the right contacts at these organizations.
To start, click the "Actions" button at the top right corner and select "Find people at these companies."

In the configuration window, set up your search parameters. However, let’s first use Claude (or ChatGPT/Gemini 2.0) to help us identify the right decision-makers. We can then use Clay’s powerful filtering system to find them.
Prompt:
I want to sell [product/service] to companies in the [industry]. Can you help me identify:
1. Key job titles and departments I should target (maximum 3-4 titles)
2. Any job levels I should include (e.g., Manager, Director, VP)
3. Keywords or terms that might appear in their bio or experience
Keep the criteria focused and avoid over-filtering. Format your response using specific recommendations I can use in search filters.

Important tip: Start with broad search criteria and refine them as needed. Applying too many filters at once can drastically reduce your results. Since Clay's filters are highly effective, it's best to cast a wide net first and then narrow your focus.
We’ll follow Claude’s recommendations. Begin with the two or three most critical filters—usually job title and job level. You can always fine-tune your search further if necessary.
In Clay, choose "Search With Query" as your search method, and ensure you're searching using the company's LinkedIn URL for the most accurate results.
Critical search filters to consider:
- Job Level (e.g., Director, Executive, Manager)
- Job Function (e.g., Sales, Marketing, IT)
- Location
- Department

Step 3 - Add valuable context through multiple data enrichment layers
Once you've identified your target contacts, the next step is to enrich their profiles with more details.
Click ‘Import’ and choose ‘Import to a new table.’ Here, you'll have the option to enable ‘work email enrichment’—turn this on to start collecting email addresses immediately.

Hit ‘Save and Run’ to generate your new contact table. Clay will automatically start the email enrichment process, using its waterfall system to search multiple sources for valid work email addresses.
Quick Tip: Clay’s waterfall system prioritizes data sources based on cost-effectiveness, ensurin a balance between accuracy and credit usage. Unless you have specific needs, it’s best to stick with the default sequence, as it’s already optimized for optimal results.
Add additional enrichments
Next, let’s enhance your contact data with more valuable insights. But first, let’s start by cleaning up the data:
Apply a filter to identify empty rows in the ‘work email’ field. Select these rows. Right-click and select "Delete rows."

Once that is done, click ‘Add Enrichments’ and choose ‘Enrich person info’ from the menu on the left.

Begin with bio-enrichment to add more context to your contacts. Click the Bio Enrichment option in the "Enrich person info" menu.

You’ll see Clay’s waterfall sequence displaying the data sources it will use. Map your Work Email and LinkedIn URL columns as input fields—using both greatly enhances result quality.
Click Save and Run, but start with 10 rows to test the enrichment quality first.
To keep things simple, this tutorial focuses on enriching prospects’ bios. However, depending on your outreach goals and strategies, you can always explore additional enrichments.

Important Tip: Put together a quick checklist of the most useful enrichments for your needs. For most B2B campaigns, focusing on bio, job title, start date, and location gives you the key details to personalize your outreach effectively.
Create personalized outreach emails
Now that we've enriched our contact data, it’s time to leverage Clay’s AI to craft personalized cold outreach emails that get results. We’ll focus on keeping them brief, specific, and clear about the value you offer—proven tactics for higher response rates.
In the top right corner, click "Actions" and choose "Draft Email."

When the email drafting window opens, type "/ai" in the email body field to access the AI snippet option. From there, select GPT-4 as your model, or choose GPT-4o Mini if you want to save on credits.
In the prompt field, use this high-converting prompt template:
Prompt:
Write a personalized cold outreach email using these details:
1. Prospect's first name: {firstName}
2. Company name: {companyName}
3. Current role: {currentTitle}
4. Company background: {companyDescription}
5. Similar company case study: {caseStudyCompany}
6. Case study result: {caseStudyResult}
7. Your name: {senderName}
8. Your role: {senderRole}
9. Your company: {senderCompany}
Required Format:
1. First paragraph (2-3 sentences): Show you've done research by mentioning something specific about their role or company
2. Second paragraph (2 sentences): Present ONE clear problem you solve relevant to their context.
3. Final paragraph (2 sentences): Share the case study result and request a brief call
4. Close with a simple question about availability.
Critical Rules:
1. Keep the entire email under 100 words
2. Generate ONLY the email body - no subject line
3. No company backstory or feature lists
4. Focus 80% on their challenges, 20% on your solution
5. Use "you" and "your" more than "I" and "we"
6. Must be mobile-friendly (short paragraphs)
7. Include specific numbers/results
8. No industry jargon or buzzwords
9. Match the case study to the prospect's industry
Signature Format:
Best regards,
{senderName}
AI Solutions Architect | ABCServices

Click "Try on 5 rows" to preview the results. Review the generated emails for:
- Length (under 100 words)
- Specificity (mentions their company/role)
- Value focus (clear benefit/result)
Once satisfied with the email body, click "Save Changes."
For the subject line, click the subject field and type a template structure. Use dynamic placeholders by typing "/" and selecting relevant data points. Click "Save and Run" to generate emails for all prospects.

Step 4 - Export enriched data to your CRM for outreach
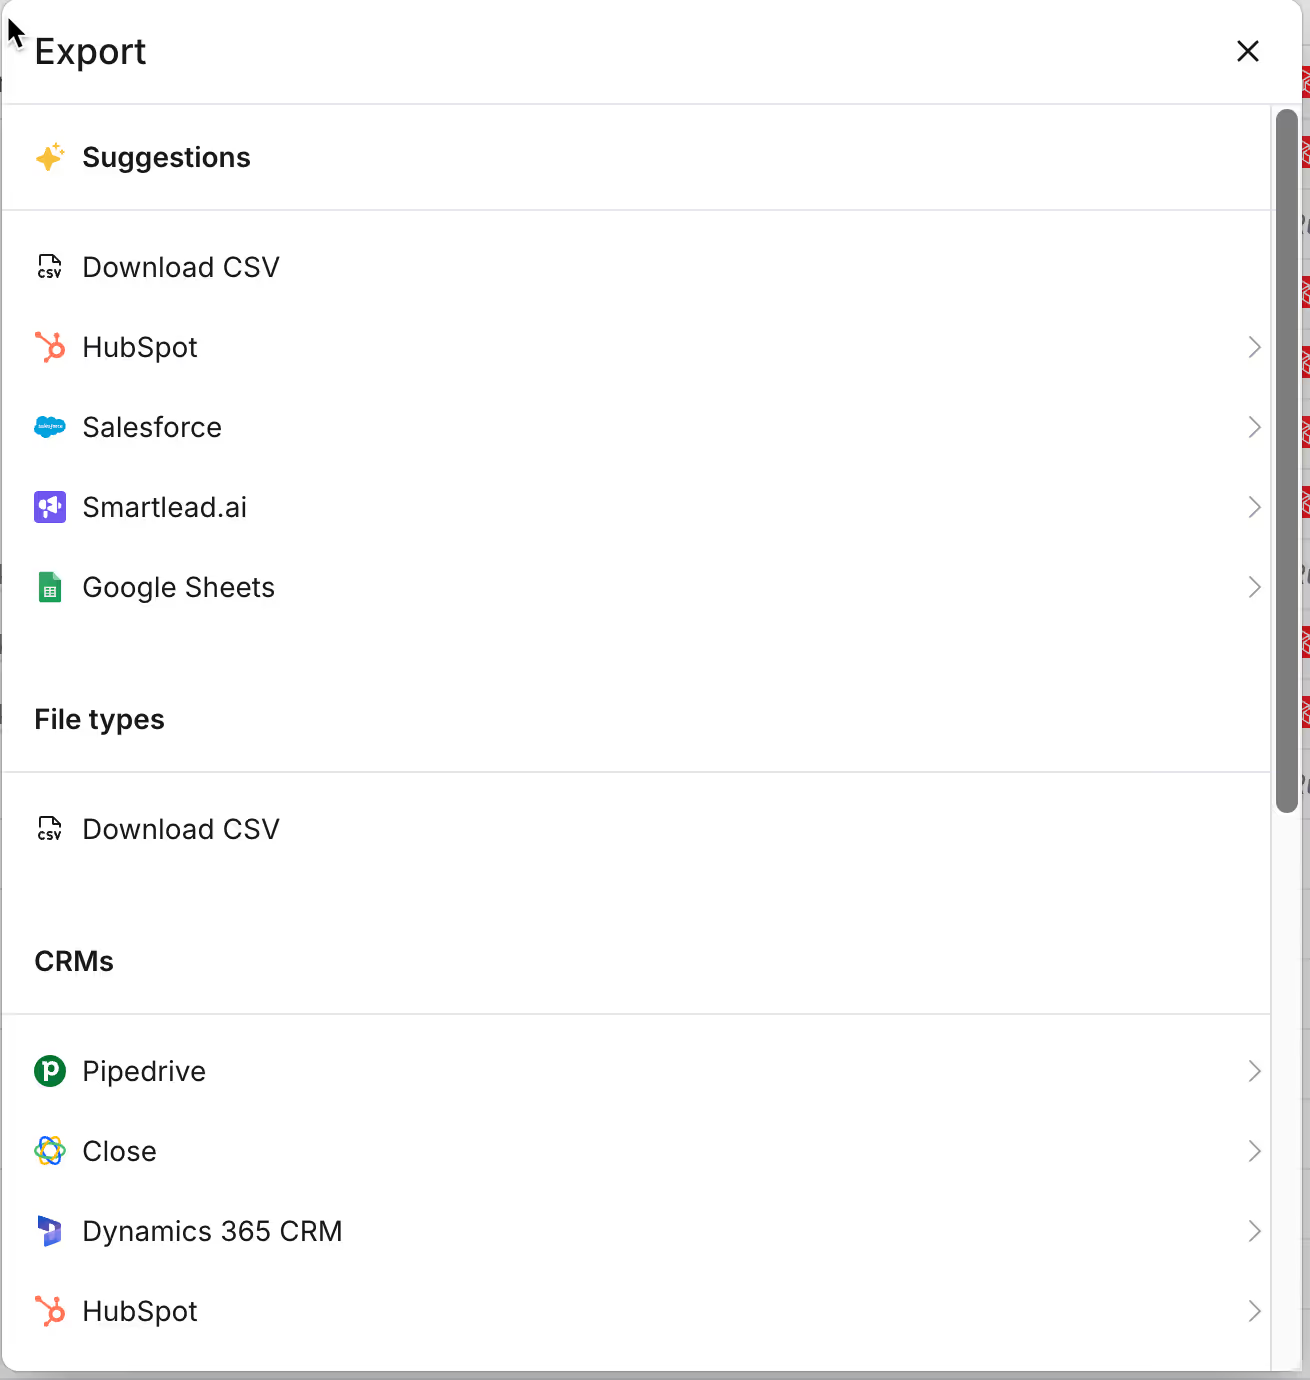
Now, you can export the enriched data to your CRM for outreach. Simply click the ‘Actions’ button and select ‘Export.’ You can export all the data instantly.

Select your desired CRM, like Hubspot or Salesforce, and Clay will send data there. If you want to download a CSV file, select ‘Download CSV’ and click OK.
You’ve now built a strong foundation for high-converting outreach, combining AI-driven personalization with key B2B email strategies. In our next tutorial, we’ll cover how to:
- Export these personalized emails to your outreach platform
- Set up automated follow-up sequences
- Track open and response rates
Remember, successful cold outreach is an ongoing process. Monitor your response rates and adjust your approach based on what works best with your prospects.
Click here to go to the next tutorial of the course.