.avif)
.avif)
Imagine having your voice narrate audiobooks, greet clients, or power a virtual assistant—all without recording a single new line.
This tutorial guides you through cloning your voice using ElevenLabs’ Instant Voice Cloning feature, explores the Professional Voice Cloning option for higher fidelity, and shares best practices for recording top-notch audio samples.
You’ll also learn how to generate audio with your cloned voice in the ElevenLabs web interface and access it via API to integrate into your workflows.
Let’s turn on the mic!🎙
Key objectives
- Clone your voice using ElevenLabs’ Instant Voice Cloning feature.
- Learn the Professional Voice Cloning process for superior results.
- Apply best practices to record high-quality audio samples.
- Use your cloned voice in the web UI and via API.
Step 1 - Sign up or log in to ElevenLabs
To get started, you need an ElevenLabs account. Visit their website and sign up if you’re new—it’s a simple process that takes just a few minutes. If you already have an account, log in to access the dashboard. This is your hub for all voice cloning and audio generation tasks. Note that some features, like Professional Voice Cloning, may require a paid subscription, so check your plan if you encounter restrictions.
Step 2 - Navigate to the Voices section
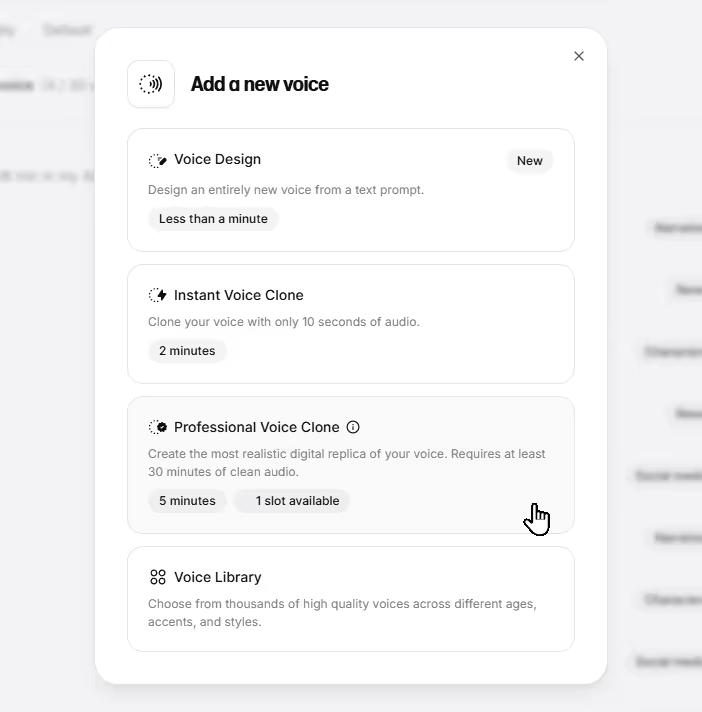
Once you’re on the dashboard, locate the “Voices” option in the left-hand menu. Click it to open the voice management area. Here, you will see any existing voices you’ve created. To add a new one, click the “Add a new voice” button.
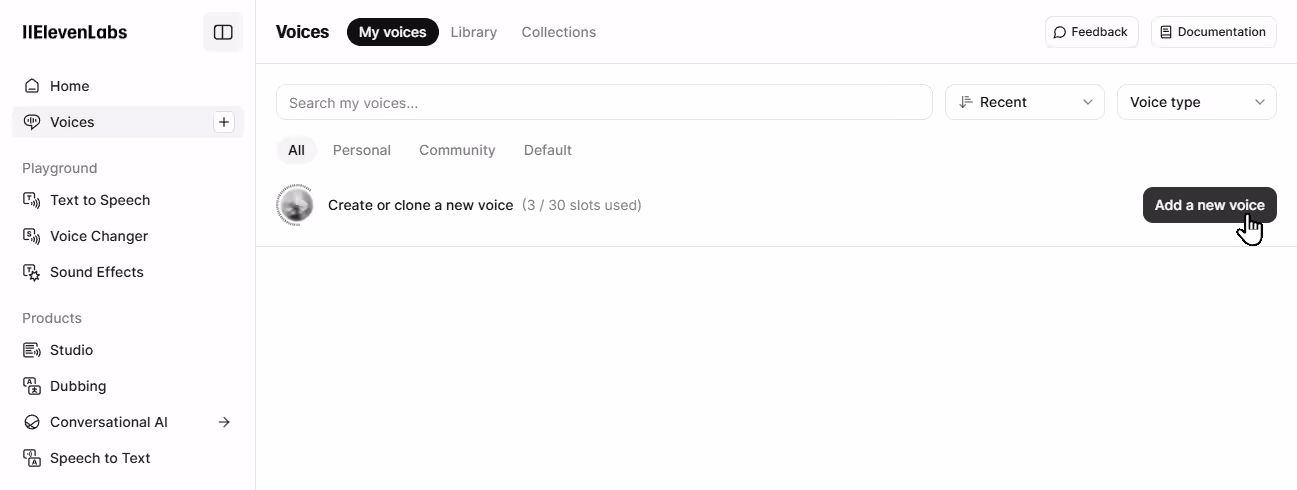
A modal will pop up, presenting you with options for Voice Design, Instant Voice Clone, Professional Voice Clone, and Voice Library.
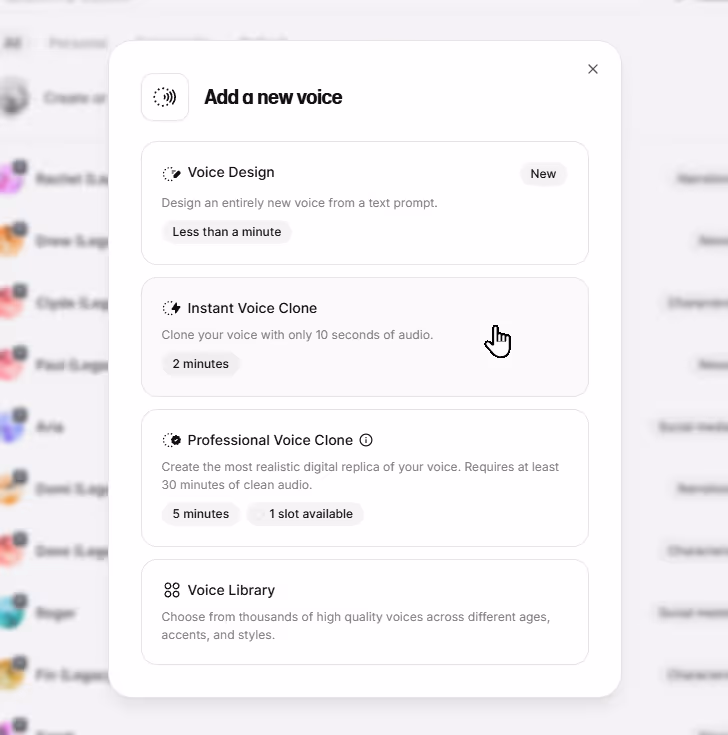
Step 3 - Choose Instant Voice Cloning
In the modal, select “Instant Voice Clone.” This feature is ideal for quick setups or when you have limited audio to work with. It requires only 1-2 minutes of clear audio to produce a functional voice clone. It’s perfect for professionals who need a fast solution for projects like voiceovers or demos.
Step 4 - Record audio
Your instant clone’s quality hinges on your audio samples. Record in a quiet space with no background noise—think a closed office, not a bustling coffee shop. Use a decent USB microphone, but smartphones also have pretty good microphones nowadays. Professional gear isn’t necessary for now, but avoid low-quality built-in mics of laptops or cheap webcam mics. Speak naturally, as if addressing a colleague, and vary your tone slightly for a dynamic clone. For Instant Voice Cloning, 1-2 minutes suffices.
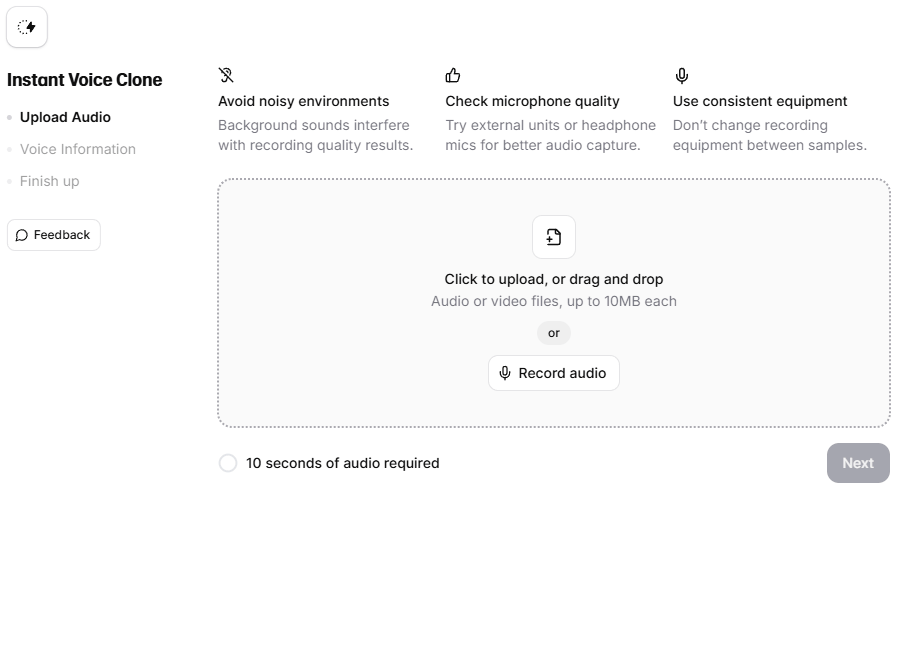
Step 5 - Upload or record your audio sample
Now it’s time to provide your voice. You can upload an existing audio file or record directly through the platform. If uploading, ensure the file is 1-2 minutes long and features only your voice—no music or other speakers. If recording, click the record button, speak naturally for a couple of minutes, and stop when done. The platform will process your audio, so keep it clear and free of background noise for the best outcome.
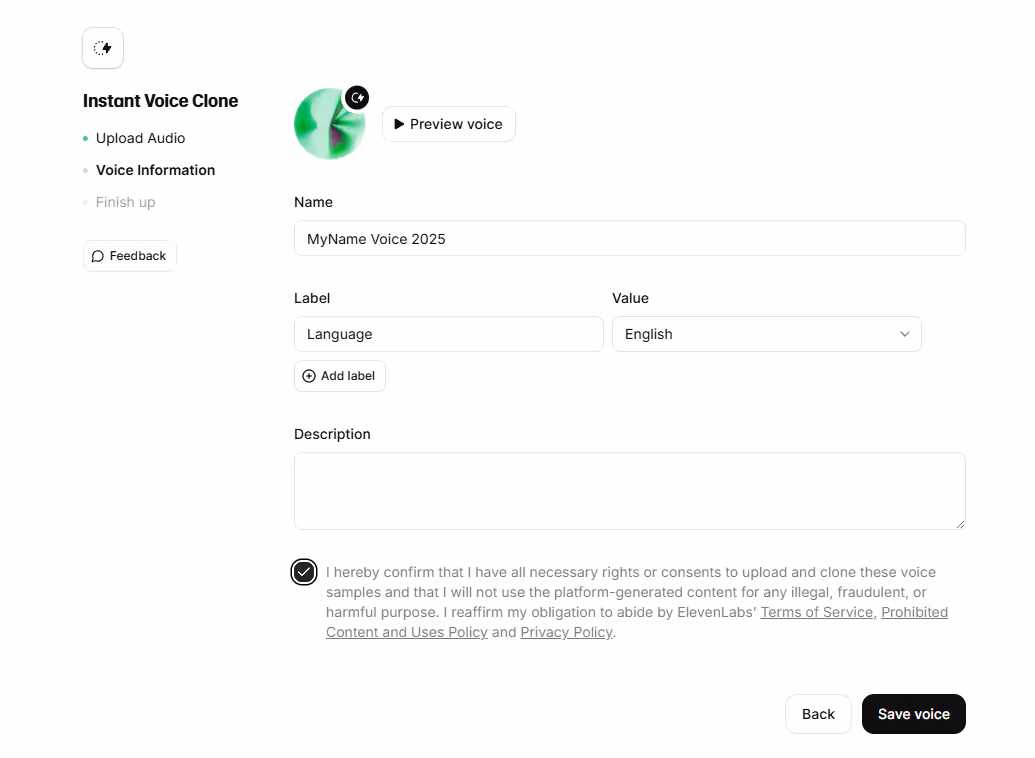
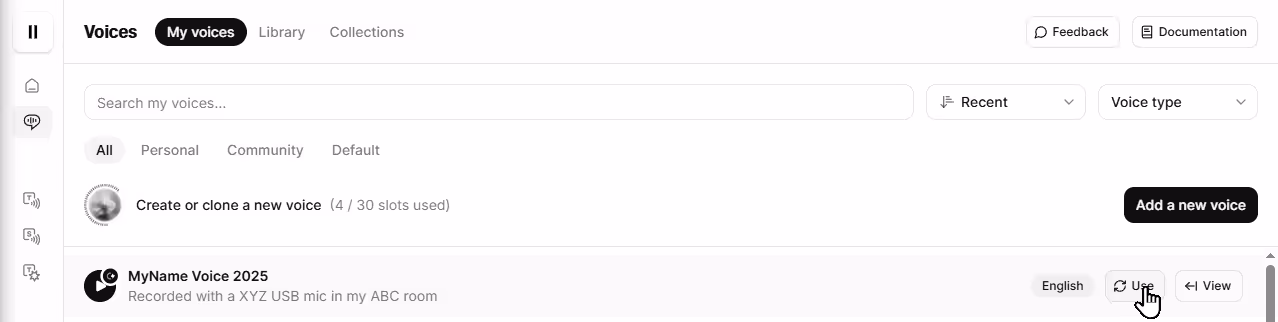
Step 6 - Name and save your voice clone
After submitting your audio, preview it and then give your clone a unique name—like “MyName Voice 2025”—add the Language label, and add any optional labels for organization. The "Description" field can be used to add a brief note about the voice, such as its intended purpose (e.g., "Podcast Voice") or recording details (e.g., "Recorded with a XYZ USB mic in my ABC room"), making it easier to organize and identify clones for specific projects. You’ll need to confirm you have permission to clone this voice (since it’s yours, this is straightforward). Click “Save voice” to finalize the process. In a few moments, your clone will be ready to use.
Step 7 - Generate audio with your cloned voice
Click on “Generate speech” on the following screen.
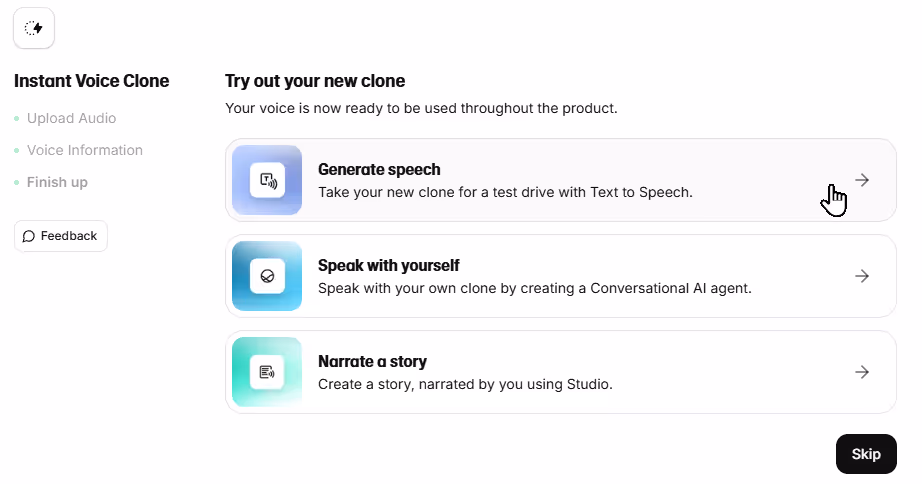
Or you can also head to the “Voices” section from the main menu where you select “Use” for your newly cloned voice.
On the next screen type or paste the text you want to hear in your voice—something like “Welcome to my latest project!”—and click “Generate speech”.
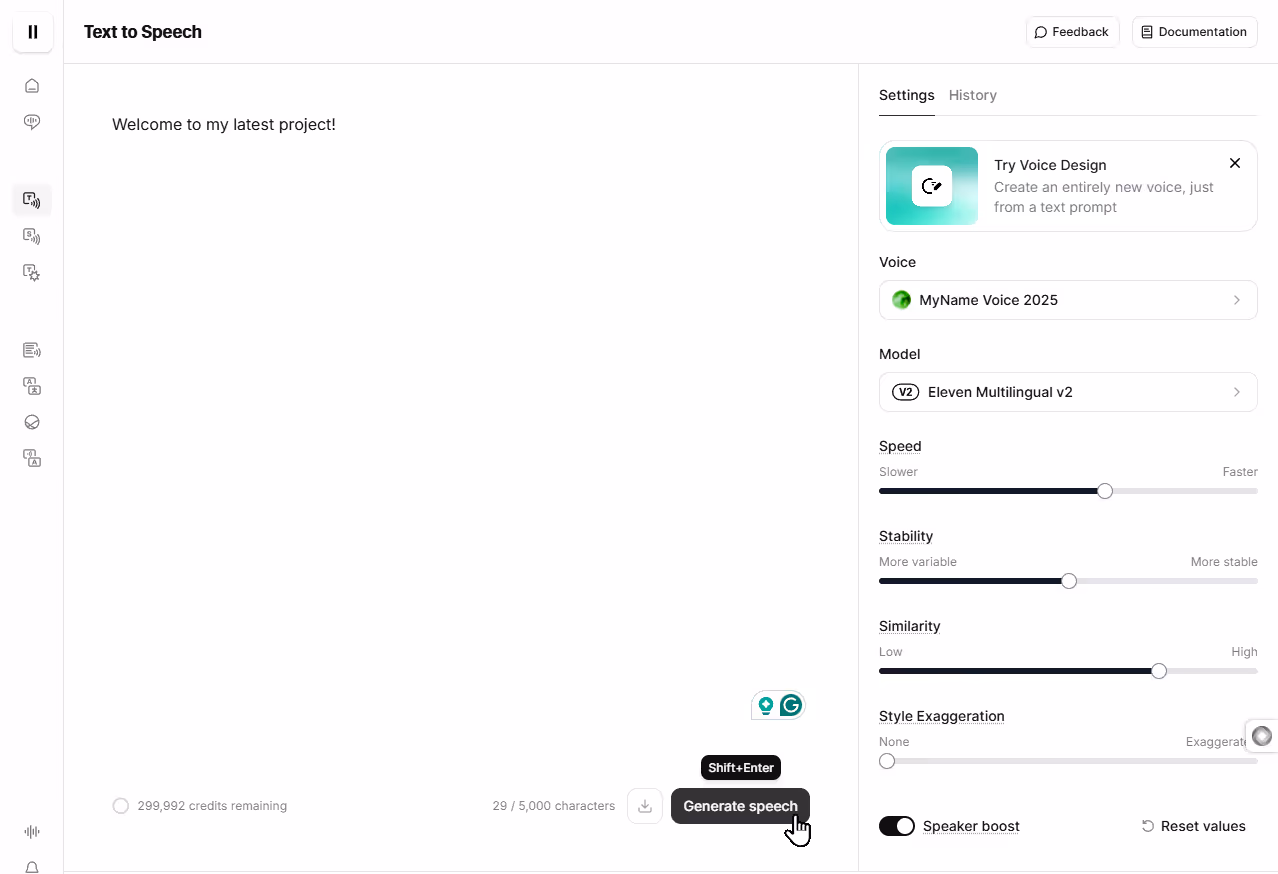
The platform will create an audio file you can listen to or download. Play around with different texts to test its versatility.
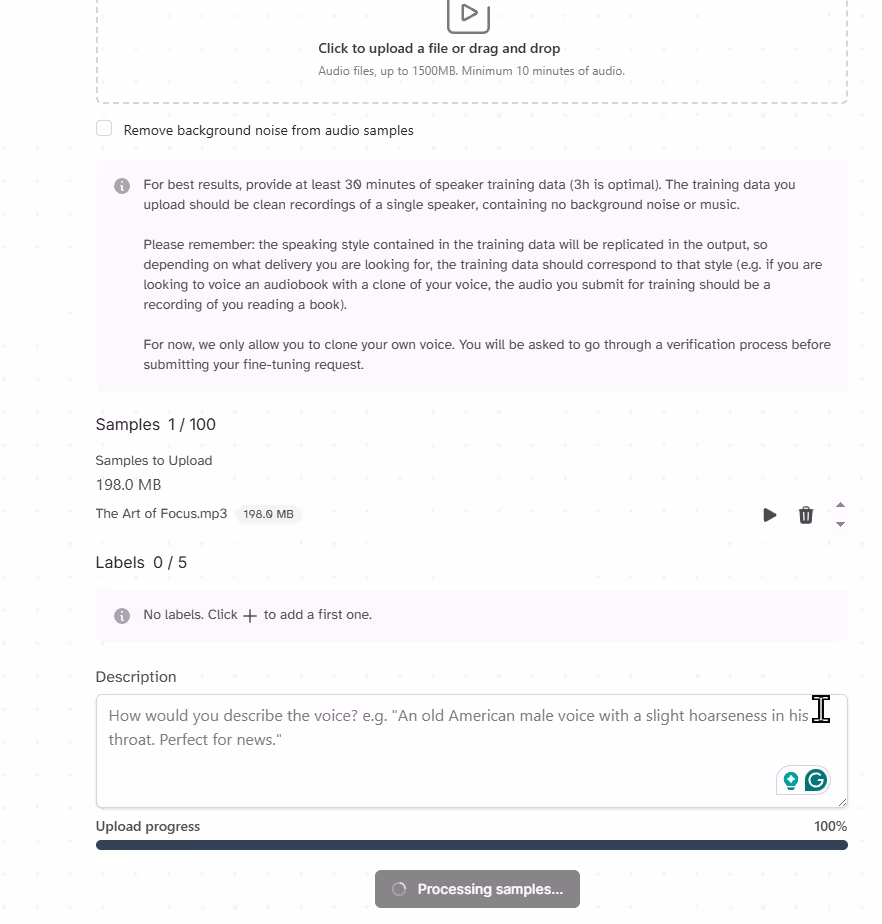
Step 8 - Explore Professional Voice Cloning
For a more refined clone, try the Professional Voice Cloning option. Back in the “Add a new voice” modal, choose “Professional Voice Clone”.
Unlike Instant Voice Cloning, which creates a voice clone from short samples almost instantly, Professional Voice Cloning trains a dedicated model on a large dataset for a highly realistic result. This process takes time, typically 2 to 6 hours, depending on queue length and other factors.
Recommendations for best results
- Recording Equipment: Use high-quality gear. An XLR microphone with an audio interface is ideal.
- Pop Filter: Always use a pop filter to minimize plosive sounds.
- Microphone Distance: Stay roughly two fists away from the microphone, adjusting slightly based on your needs.
- Noise-Free Environment: Record without background music or noise.
- Room Acoustics: Record in a space with reduced echoes, using temporary solutions like thick blankets or quilts if necessary.
- Audio Editing: Pre-process audio to remove long pauses or filler words if you prefer a cleaner result, as the clone will mimic your input exactly.
- Volume Levels: Aim for consistent levels between -23dB to -18dB RMS, with peaks around -3dB.
- Audio Length: Submit at least 30 minutes (ideally around 3 hours) of high-quality audio. For long sessions, split audio into roughly 30-minute segments.
- Uploading: Double-check all samples before uploading, as you won’t be able to edit afterward.
- Voice Verification: When verifying your voice, use the same equipment and speaking style from your recordings. If verification fails, contact support.
Step 9 - Access your voice via API
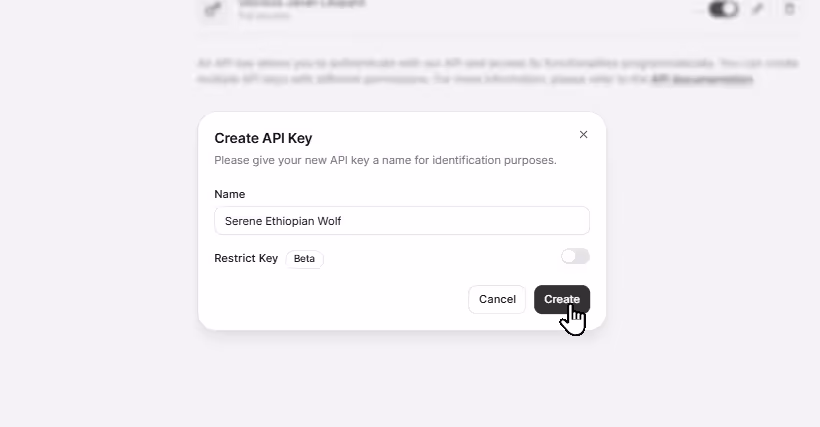
To use your cloned voice in external tools, ElevenLabs provides an API. From your account settings, navigate to the API section and click on "Create API Key".

Use the default name or rename it as needed, then click Create.
Once the key is generated, copy it and store it securely—avoid sharing it publicly or storing it in plaintext. Consider using a password manager or environment variables to keep it safe.
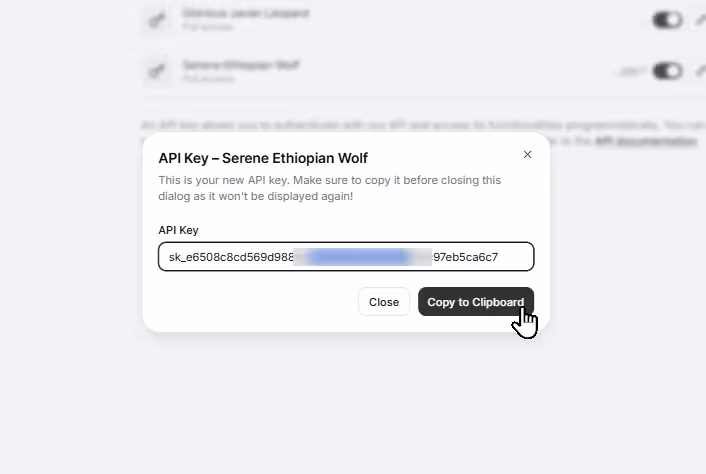
Keep your API key secure, as it acts like a password to your account. This key lets you connect to ElevenLabs’ system remotely. You’d send a request with your voice ID and desired text, and the API returns the audio.
curl -X POST "https://api.elevenlabs.io/v1/text-to-speech/<VoiceID>?output_format=mp3_44100_128" \
     -H "xi-api-key: <apiKey>" \
     -H "Content-Type: application/json" \
     -d '{
  "text": "The first move is what sets everything in motion.",
  "model_id": "eleven_multilingual_v2"
}'
You can use the provided code in Postman or any other HTTP request to test and integrate the API easily.
It’s a bit technical, but you don’t need to code—just follow the ElevenLabs API documentation or hand it off to a tech-savvy teammate.
For more details on creating speech, check out the API reference Text-to-Speech API or explore the full ElevenLabs Documentation.
Mic Drop
You’ve now cloned your voice with ElevenLabs! You used Instant Voice Cloning for a quick setup, explored Professional Voice Cloning for premium quality, applied recording best practices, and learned to generate audio in the web UI and via API.
If your clone sounds off, double-check your audio for noise or clarity issues, and try again. Want to take it further?
Experiment with different scripts, adjusting your emotions and intonation to find the perfect tone.
With your cloned voice ready, you’re set to integrate your voice into tools like presentation software or chatbots which will personalize your professional projects like never before—enjoy the possibilities!


.avif)
.png)
