.avif)

Upscayl is an open-source, AI-powered tool designed to enhance image quality by upscaling and deblurring photos. Unlike online tools that often require registration and payments, Upscayl Desktop is always free with no limits.
Whether you’re a content creator, marketer, or hobbyist looking to improve low-resolution images, Upscayl makes it simple to achieve professional results, and its batch processing feature allows professionals to upscale multiple images at once, saving valuable time.
This tutorial is crafted for beginners, walking you through the essentials of using Upscayl without overwhelming you with technical details.
Key Objectives
- Download and install Upscayl on macOS or Windows.
- Convert single or multiple images with Upscayl.
- Adjust basic settings for better upscaling results.
- Select the appropriate model using our reference table.
Step 1 - Download and install Upscayl
Visit Upscayl.org and on the download page select the appropriate installer for your operating system.
Upscayl works best if your computer has a dedicated graphics card (GPU) from NVIDIA or AMD. Using a GPU speeds up the upscaling process significantly, which is great if you’re working with large images or multiple files.
Don’t have a GPU? No worries—Upscayl can still run on your computer’s CPU (the main processor), though it’ll be a bit slower. For the best experience, check your system specs to see if you have a compatible GPU, but it’s not a must-have to get started.
Step 2 - Converting images
Once Upscayl is installed, you’re ready to upscale your images. Here’s how to do it for a single image or a batch of images.
First, use the toggle switch to choose the single image or batch image conversion mode and follow the numbered steps.
- Select your Image/Folder: Click the “Select Image” or “Select Folder” button and choose the image/folder you want to upscale from your files.
- Select AI Model: Pick a model from the dropdown menu (more on this later in the table section of step 4). Below the model you set the Upscale Factor, so how much bigger you want your image—options like 2x or 4x are common.
- Set Output Folder: Choose where to save the images after processing is done.
- Start processing: Hit the “Upscayl” button and wait for Upscayl to work its magic.
Once it’s done, click on the three little dots to access the right side bar. There, you can change between “Lens View” and “Slider View” to view your result.
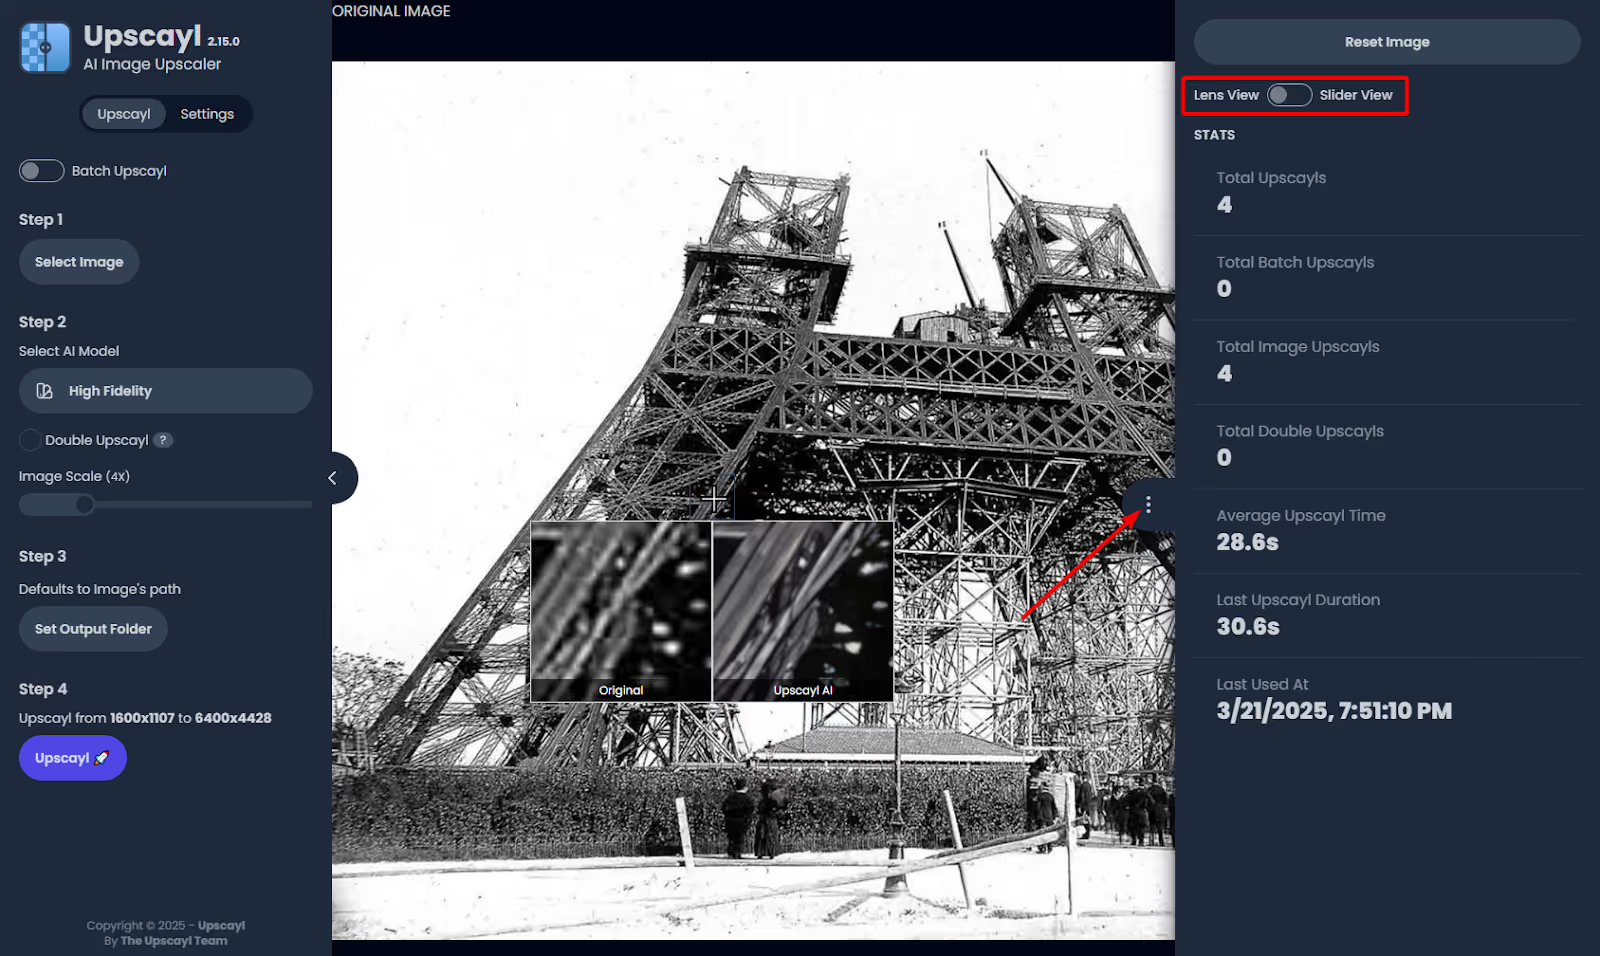
Here’s an example of a processed image, with the original on the left and the enhanced version on the right.

Step 3 - Basic settings
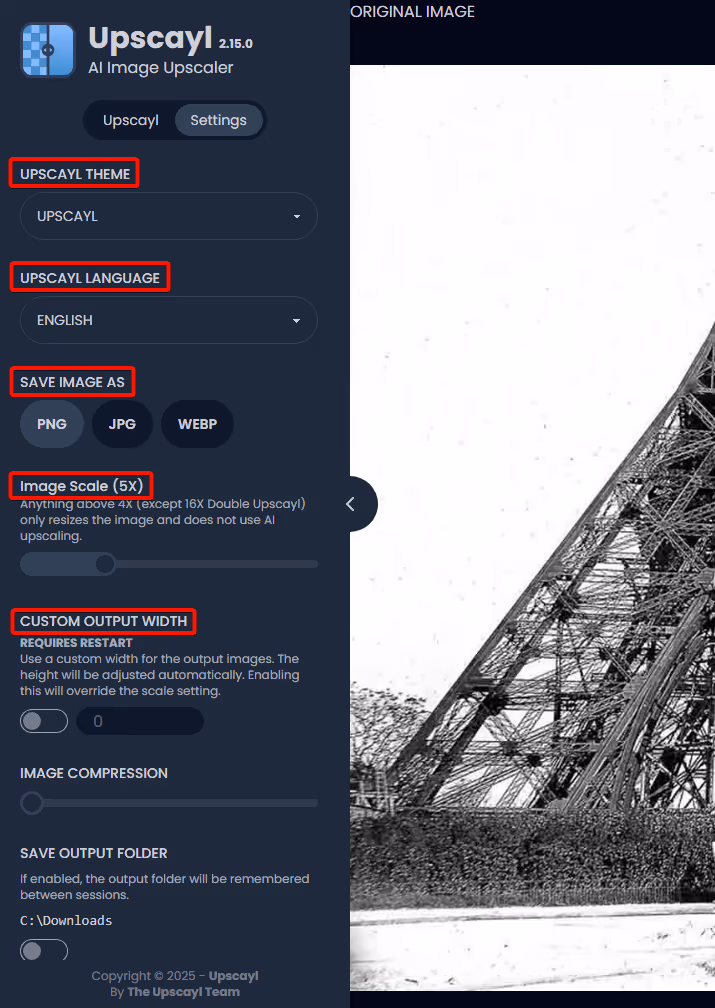
Upscayl’s settings can be a bit confusing, so here’s a quick rundown of the basics:
- Theme and Language: Upscayl allows you to personalize your experience with different themes and supports several languages for ease of use.
- Output format: Choose how you want your final image saved: PNG, JPG, or WEBP.
- Upscale factor: This controls how much larger your image gets (e.g., 2x doubles the size, 4x quadruples it). It seems that in our version of Upscayl, this slider is coupled with the one on the main page, which is redundant.
- Model selection: Different models work better for different types of images (like photos or illustrations). You’ll pick one before upscaling—don’t worry, we’ll help you choose with the table in step 4 below.
No need to dig into complicated stuff—just tweak these options and see what looks best for your project. But if you want to go deeper, here are the Docs.
Step 4 - Choosing the right model
Before you upscale, picking the right model is key to getting great results. Upscayl provides several built-in AI upscaling models, each tailored for different situations. To make this easy, we’ve got a table below that matches models to image types. Use it as your guide to pick the best one for your needs.
By matching your image to the best-fitting model, you'll achieve the highest quality result quickly and easily.
Ending words
Congratulations, you’re now equipped to start upscaling images with Upscayl! Play around with the settings and models to see what works best for your photos or artwork. Every image is different, so a little experimentation can go a long way.
Enjoy creating clearer, sharper, and more vivid images with ease!
.png)
.avif)

