.avif)

Scraping data from websites can be a game-changer for gathering information and automating processes.
In this tutorial, we’ll guide you through setting up Apify to scrape local businesses' and using Make to automate the handling of that data and ultimately contacting these businesses
We will use the example of hotels but you can adapt what we will implement to any kind of local business you could using Google Maps.
Key Objectives
- Set Up Apify: Learn to configure scrapers to target specific needs.
- Automate Data Processing: Use Make to automate data collection, integration, and follow-up tasks.
- Streamline Workflows: Eliminate manual data collection by automating repetitive scraping tasks.
- Custom Triggers and Workflows: Tailor your scrapers and workflows to scrape and use the data in various ways, including reports or updates.
- Generate Targeted Pitches: Integrate ChatGPT to craft personalized outreach emails using scraped data
Setting up the web scraper
Step 1: Create an Apify Account and Build Your First Actor
- Sign up on Apify.
- In the Apify dashboard under "Stores," you'll find a variety of prebuilt Actors designed for different scraping tasks. For example, you can choose an Instagram scraper to extract posts, followers, or profiles. We'll select the Google Maps scraper to gather business data like names, locations, and reviews. All of these data sets can then be automated and processed via Make for lead generation, competitive analysis, or market research.


- Follow the step-by-step prompts for the actor’s configuration to identify the data you need (e.g., search term, location, number of places per search, and language etc.). Then turn on the deeper city scrape. Then start the data scraping at the top right.

- Test the actor by running it and ensure that the correct data is being pulled. You’ll be able to download the results in JSON or CSV format.


Step 2: Schedule Your Scraper Runs
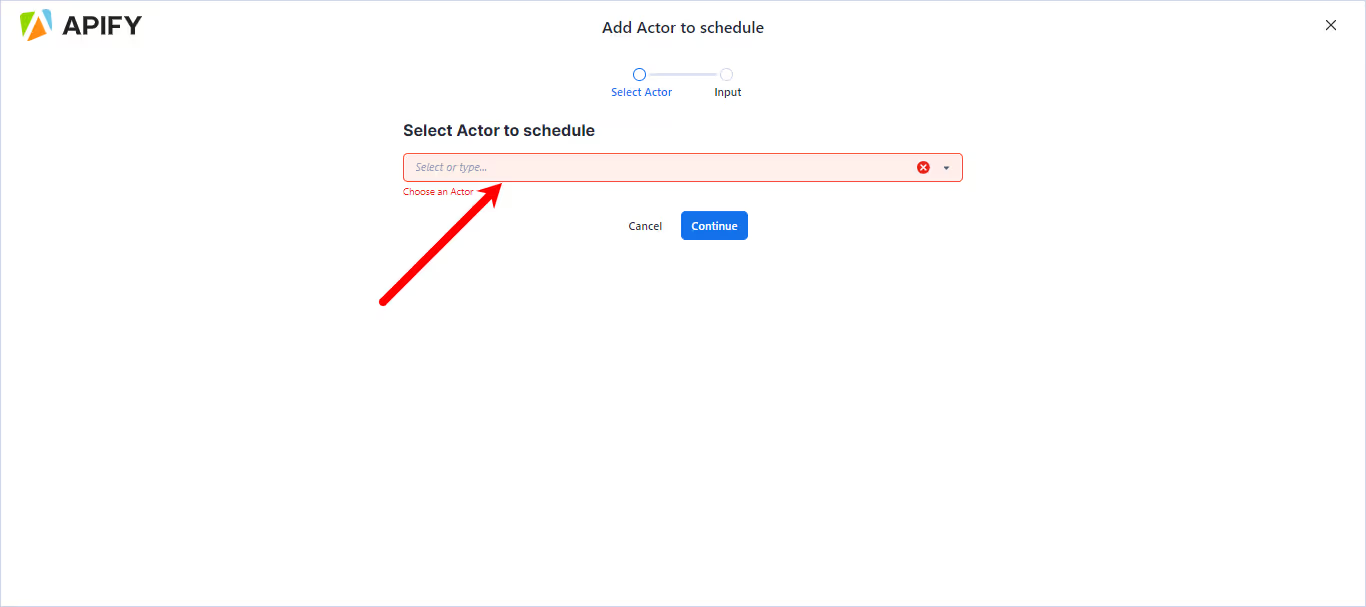
- Go to the Schedule tab in Apify, click on create new and then add new actor.


- Set the output format to match what you’ll need for our Make automation. Set up regular scraping sessions (e.g., daily, weekly) and click on enable


Integrate Apify with Make
Step 1: Set Up a Scenario in Make
- Log into your Make.com account (you might need a paid account but can totally start with a free one), then create a new scenario.

- Choose Apify as the trigger. Select Watch Actor Runs to trigger an automation each time a new scraping result is available from your Apify scraper. Connect your Apify and connect the Api token. To get your api token, navigate to settings on Apify and click on API and Integration then copy your Api token


- Add another Apify module and Select Get Dataset to get data from the trigger that watch actor runs

Step 2: Configure the Workflow
Map the data from the Apify dataset to the next modules in your scenario. For instance, you might want to send the data to Google Sheets, Notion, or any CRM. for this automation we are using Google Sheets.

Step 3: Set up afilter
Set up a filter (by doing a right click on the module you want to filter) to identify and use leads only with a website. To set this up on Make click on the tool or letter ‘’y’’ symbol between the module you want to have it. Give your filter a name, map the website and set up the condition. For this use case we are using if website exists.


Step 4: Search for Emails
- Add the Anymailfinder Module: Add the Anymail finder module after Apify. Use the "Find Email" function, mapping it to your scraped URLs or company names from Apify.

- Configure API Key: Enter your Anymailfinder API key.

Step 5: Map Scraped Data to Your System
We will use Google Sheets as a database here (you could alternatively use Airtable for instance).
First, create a Google Sheets document and prepare the database to the corresponding field you want to map.

Use Make’s mapping feature to map scraped information (e.g., tittle, name, address, email, phone number etc) from Apify’s output to your desired system fields.

Run the automation once. You should see new data in your Google Sheets document.

Step 6: Create a Targeted Email Pitch with ChatGPT
- Add the OpenAI (ChatGPT) Module: Use the “Generate Text” module from OpenAI and provide prompt details, such as hotel information and a structured template.

- Map Data: Map fields like hotel name and website from the Apify data into the prompt to generate a custom pitch.

Step 7: Send Email with Gmail Module
- Add Gmail Module: Choose "Send an Email" and configure email settings.
- Map Fields: Insert the recipient email (from Anymailfinder) and ChatGPT-generated pitch as the email body.

You're now good to go!
This is how our automation should look like:

Conclusion
By integrating Apify with Make and ChatGPT's AI module, you can automate data scraping, processing and streamline content creation workflows. With Make's powerful scenario-building features, this workflow can be expanded to integrate data into numerous platforms, saving time and improving efficiency. You can now automatically reach out to your leads without lifting a finger.

.png)