.avif)

Want to stand out in your prospects inbox? Or welcome your new clients with a personalized outreach? Using Potion AI and Zapier, automatically send presonalized emails to your prospects with ease.
This tutorial will show you how to leverage SendPotion and Zapier to create an automated system that generates and delivers personalized welcome videos. By the end, you'll have a fully functioning automation that handles everything from video generation to delivery.
Key Objectives
- Set up SendPotion for AI video generation
- Create a dynamic video template for your new prospects
- Configure Zapier to automatically process and deliver videos
What you will need
- Paid Zapier account
- Paid Potion account
- Claude
Setting up SendPotion
Step 1: Initial Access
Go to SendPotion.com and sign up. You can use the 7-day trial period to thoroughly test the workflow before committing to the monthly subscription.

Step 2: Complete the onboarding
Follow the guided onboarding process - its super simple and Potion steps you through the whole process.
To get the best results from your video, make sure you:
- Ensure good lighting conditions
- Minimize background noise
- Position your webcam at eye level
- Test your microphone quality
Step 3: Create a dynamic video template
- Navigate to the dashboard and select "Create a new video"
- Select "Record dynamic video"
- Choose your personalization type:
- For this tutorial, select greeting personalization - allows name-based customization i.e. “Hi [Prospect Name], welcome to the program!”
- Follow the steps to records you video, speak naturally and if you mess up you can always have another take.

Step 4: Name the database setup
Now that you have your video recorded in Potion, we need to upload a list of names that we can train the AI model to pronounce in your voice. To do that we need a list of names and emails to record.
1. Prepare a CSV file with prospect information
2. Required columns:
- First Name
- Email Address

Pro Tip: Generate test data using this Claude prompt:
Create a CSV with two columns: First Name and Email Address.
Fill the CSV with 50 rows of test data with realistic names for my region.
My region is [Your Region]
Nice! Our dynamic video template is all Set Up. Let’s automate it!
Configuring the Zapier automation
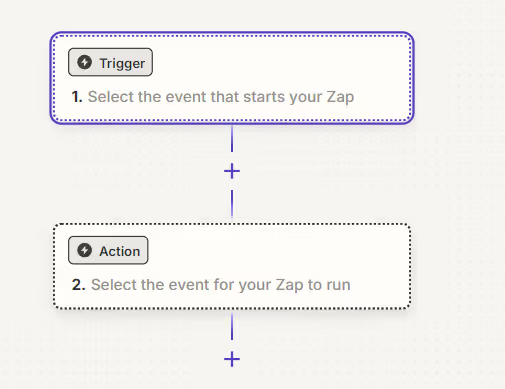
In order to automate the processing and sending of videos we'll need to create two essential Zaps for this workflow:
- Video processing trigger
- Video delivery system
Creating Zap 1: Video Processing
Step 1: Initial Setup
- Sign into your Zapier account and go to the dashboard.
- Click "Create Zap"
- Name it "Potion Zap 1 - Process Videos"

Step 2: Set up access to Potion in Zapier.
- Select Potion as the Action in your Zap
- Choose "Add Name" action from the action menu
- Click "Connect a New Account"
Step 3: Authorize Zapier to use Potion
In order to create Potion videos automatically we need to grant Zapier access to Potion. This is done by using an API key. To access your API key you will need to:
- Go to SendPotion Settings
- Locate your personal API token in Settings
- Copy the token
- Return to Zapier
- Paste token and click "Connect"
Pro Tip: You API token is like your password. It grants access to your Potion account. Keep it secure.

Step 4: Set up your trigger
The trigger is what Zapier ‘listens’ for to automate the video generation. We can use any type of new lead trigger here. For example, a new meeting is booked in Hubspot or a new response on your Meta lead form. As long as your trigger is capturing the required fields it should work!
- Name
- Website
For this tutorial we are going to use Google forms.
1. Add Google Forms as trigger
2. Select "New Form Response"

3. Sign into your Google account
4. Choose your form
5. Ensure form includes the following questions:
- Name
- Website

Step 5: Field Mapping
Now we need to plug the information from Google forms into Potion so potion can generate the Videos.
1. Map Google Form fields to Potion:
- Form name field → Potion name
- Form email → Potion email
- Form website → Potion website

Step 6: Test
Hit the test button and check that the video has been sent for processing in Potion. We have now finished automating the video generation process.
Let’s get stuck into sending those videos out automatically.
Creating Zap 2: Video Delivery
To get our videos out to our prospects automatically, we will need to create another Zap. This Zap will be responsible for getting finished Potion videos and sending the link to the prospect via your email address.
Step 1: Initial Setup
- Create new Zap
- Name it "Potion Zap 2 - Send Processed Videos"
Step 2: Trigger Configuration
- Select Potion as trigger
- Choose "Video Status" trigger type
- Leave workspace ID empty for now since we only have one workspace in Potion.
- Press test. You should see processed videos appear in the test data window. If you don’t go back to potion and make sure your videos have finished processing and click retest in Zapier.

Step 3: Email Action Setup
- Add your email provider as the action step. For this tutorial we are going to be using Gmail.

- Select “Send Email” as the action
- You may need to create a new connection. Sign in using the Google Account you’d like to send emails from.

- Configure email settings:
- To: Map Potion email field
- From: Your email address
- Subject: Create welcoming subject line
Step 4: Email Template Configuration
- Generate a pretty HTML email template using Claude. Put this prompt into Claude to generate an email template.
Generate a HTML welcome email with a button. The email should say "Welcome, we are so excited to meet you. Here is a video from [Your Name] to say Hi"
- Copy and paste the HTML into a HTML viewer like this one. Make sure you are happy with the layout and styling. You can always ask Claude to make any changes.
- Copy and paste the completed HTML email template into the Gmail step here. Make sure you set the Body type field to HTML. Set Body type to HTML

- Map variables into the HTML template This will customise the email to your prospect and let them access the video in Potion The specific mapping location will change depending on your template. If you’re having trouble knowing where to map the fields, ask Claude to show you.
- First name from Potion
- Video link from Potion

Step 5: Test it out!
Test the email step in Zapier. You can use your own email address for the test. Wait a few second and you should have a full customised email in your inbox with the link to the SendPotion video.
Pro tip: You can change how the landing page looks in the settings of Potion. You can add you own logo and color scheme as well as your own URL.
Woo Hoo! You did it
Remember to monitor your first few automated sends to ensure everything works as expected. Consider setting up Zapier alerts for any failed steps to maintain a smooth operation.


.avif)
.png)
