.avif)

If any business area benefitted from automation, it's bookkeeping.
This tutorial shows you how to automate one of the most boring aspects of bookkeeping - reading and transcribing receipts into an Excel or Google spreadsheet. Instead of converting a PDF into an Excel document and spending hours formatting and copying/pasting the data here and there, you can now get all the receipts you want in your Google spreadsheet, Quickbooks, or any other software you choose.
Key Objectives
- Step 1 - Build Zapier Automation using inbox labels.
- Step 2 - Use OpenAI Vision to extra key data as JSON
- Step 3 - Turn the JSON object into separate data fields
Step 1 - Build Zapier Automation using inbox labels
This tutorial uses Gmail. However, this automation workflow can easily be adapted to Outlook or any other email service.
The first thing to do is to create a label in Gmail. Use it to label any incoming emails containing receipts or invoices you want to automate using Zapier. You can call it ‘Invoices&receipts.’ We have labeled an email from OlaLukker containing an invoice for its services.

Access Zapier and log into your account. Click the big orange button ‘Create’ and select Zaps from the drop-down menu.

There are a couple of boxes in the Zaps editor. Click the first box, ‘Trigger,’ search, and select ‘Gmail.’ Select ‘New Labeled Email’ as the event for that trigger.

Select the Gmail label you created in the ‘New Labeled Email’’ field. Click ‘Continue.’

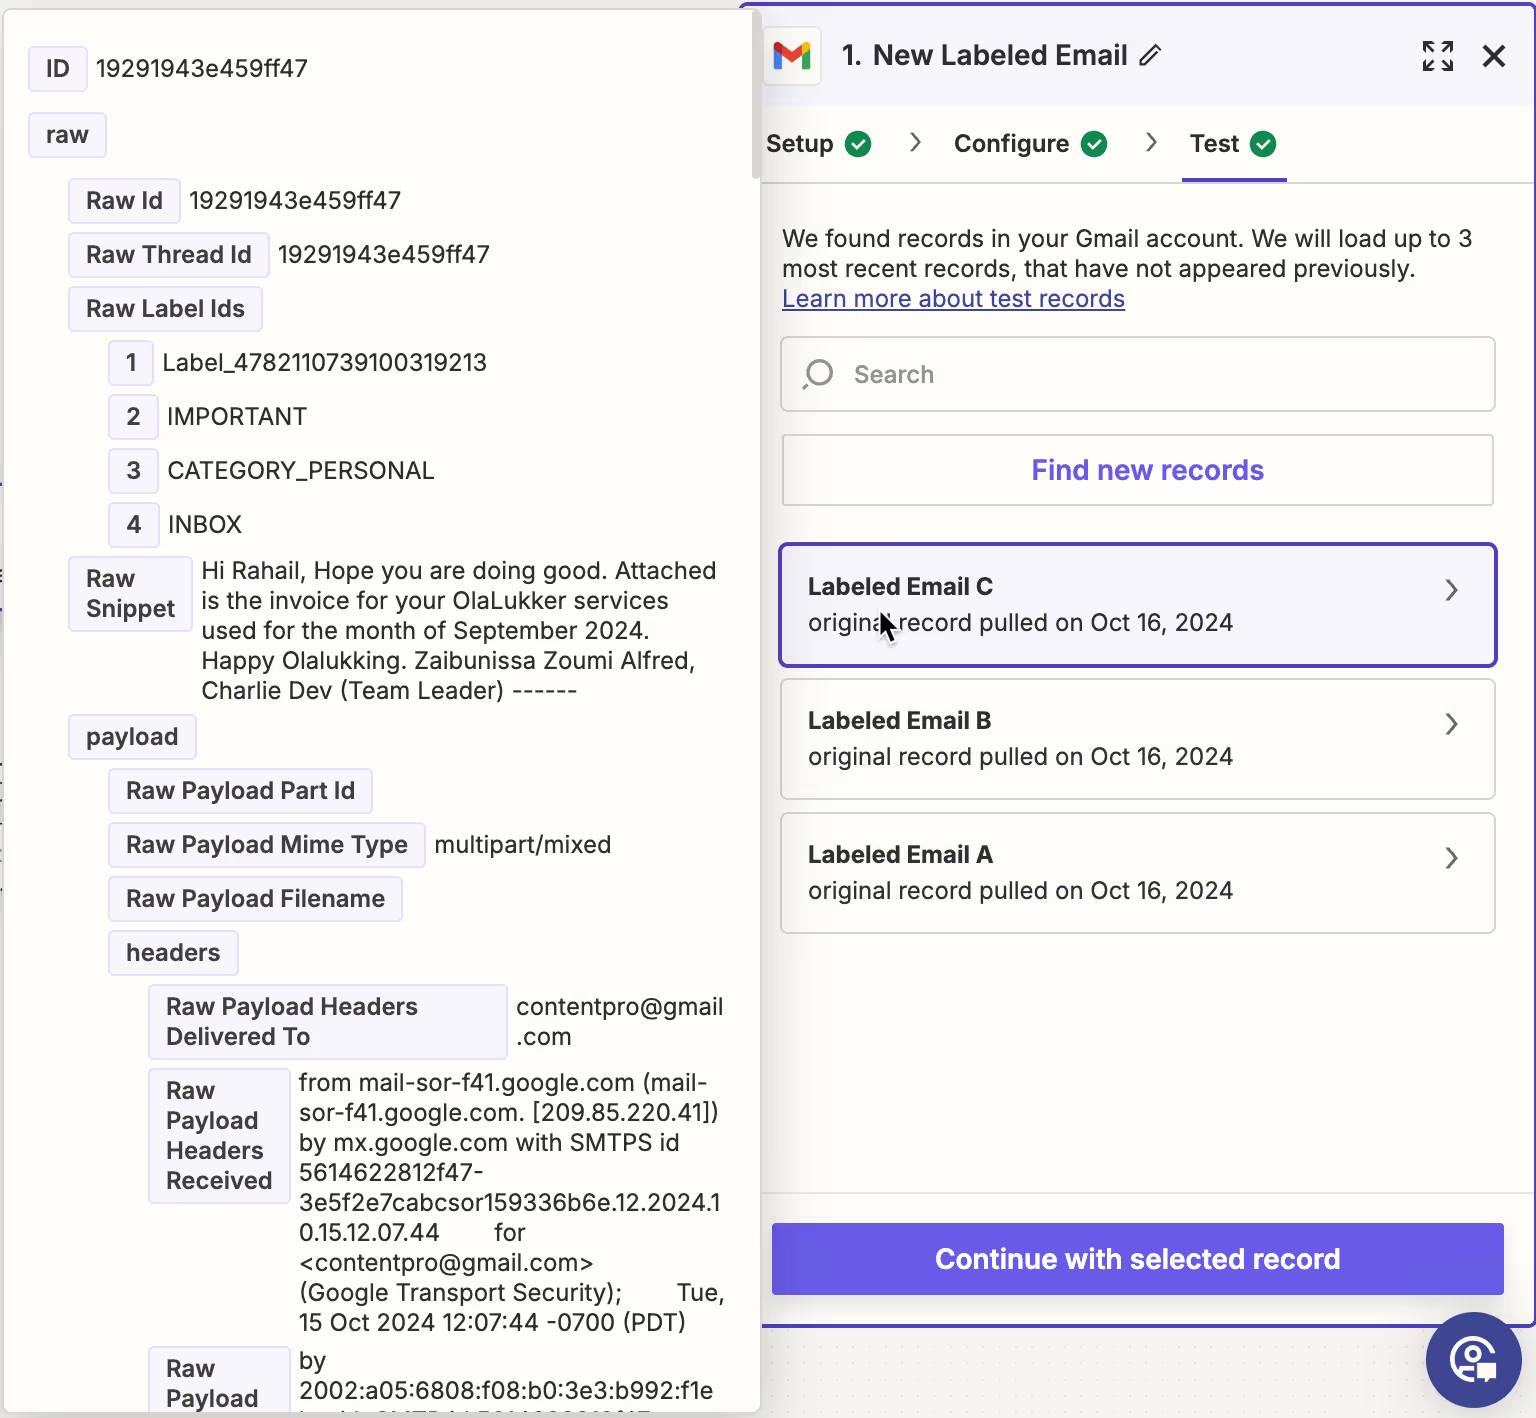
In the search field, type the name of the label you created and click ‘Continue.’
Zapier will pull all the emails under the label you searched for. Click the first one and check the message. Click ‘Continue with the selected record.’
Step 2 - Use OpenAI Vision to add extra key data as JSON
First, we must convert the attachment to an image file so ChatGPT can read and parse the data. For this step, we will use ConvertAPI, which has a free trial and paid options.
Sign up for an account and go to the Authentication/ Secret Key tab. Copy the API key from the ‘API Secret’ field.
Go to your Zap and click the second trigger. Search for ConvertAPI. Click ‘Sign In’ in the account field and paste your secret API key.

In the ‘Action Event,’ choose ‘Advanced: Convert File’ and click Continue. Select ‘All Attachments’ in the file field. Select PDF in the convert from field and JPG in the convert to field.

Click Test Step to test the trigger. Check the file name. Copy the file URL and test it in the browser. A file will be downloaded. Check the file to see whether it has been converted into a JPG.

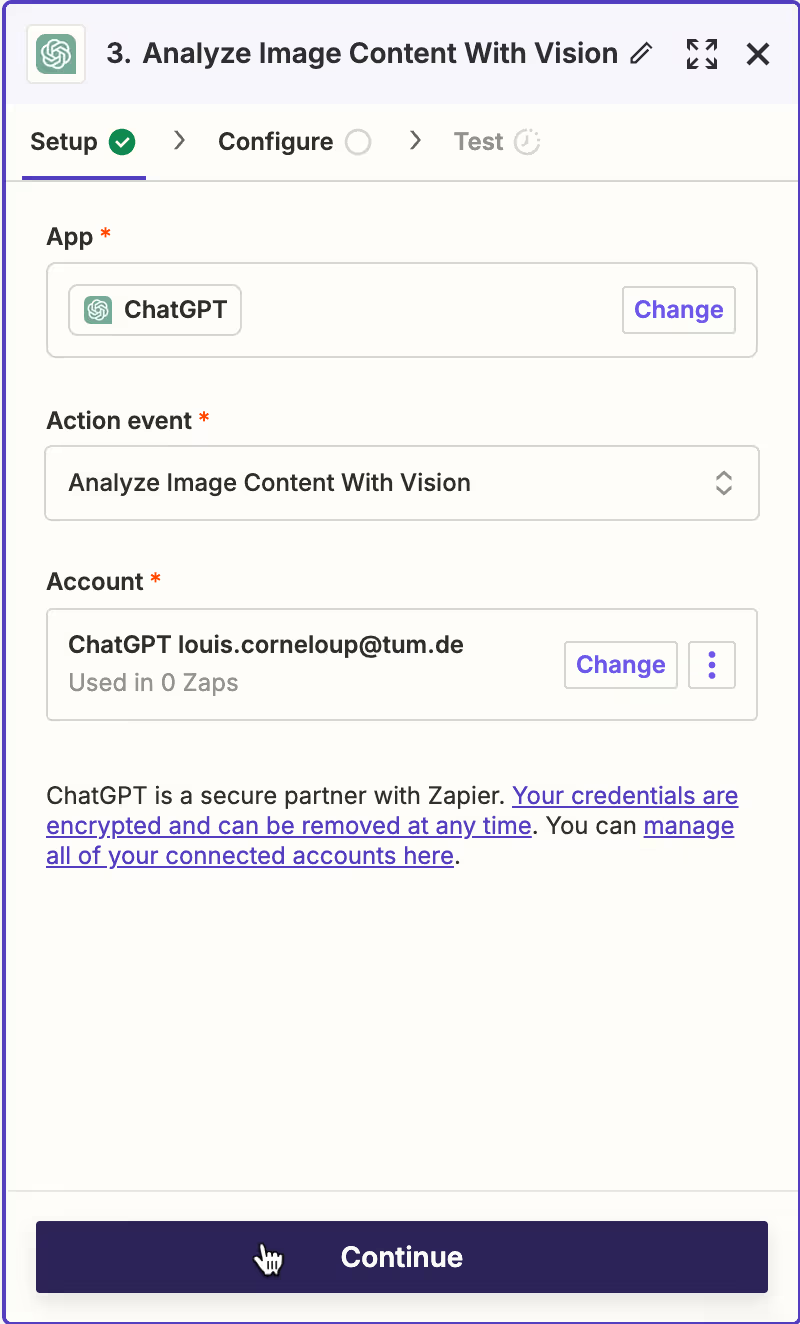
Now, we need to send this image to OpenAI. Add a step in your Zap, search/select ‘ChatGPT,’ and search for ‘Analyze Image content with Vision’ as the event.
We must determine the output's appearance before mapping the data and converting the file into JSON.
It's crucial to have fields with consistent names each time the zap executes to map data values accurately in the subsequent steps of the zap.
We will instruct ChatGPT to generate the data as a JSON object to ensure this consistency. JSON is a widely used data format in the IT industry.
Use the following prompt to extract data from the jpg file. Feel free to experiment, but a format like this tends to work effectively. At the end of the prompt, we specify exactly how we want the JSON object to be structured.
Prompt:
You are a bookkeeper.
See the attached image(s) of an invoice and extract key data.
Output as a JSON object in the following format (the output should start with { and end with }):
{
"CompanyName": "",
"CompanyAddress": "",
"CompanyTaxID": "",
"Date": "",
"AmountPaid": ,
"Currency": ""
}
In the image field, select the File URL from the ConvertAPI. The URL should be the same as the one you used to download the image.
Specify the maximum tokens for this step. We have specified 2000 tokens for this step.

Test the Zap. If it is successful, you can see the populated JSON fields in the results.

Step 3 - Turn the JSON object into separate data fields
The JSON object is stored in a single field within Zapier, and we need to separate it into individual fields. We can accomplish this using a Zapier Code step.
To do this, add another step to your zap, choose "Code by Zapier" as the app, and select 'Python' as the event.
In the "Input Data" section, enter 'data' in the left column and map the 'Image Analysis' value from the ChatGPT step to the right column.

You don’t need to know how to code to instruct Zapier to extract the data into fields. Click ‘Generate with AI’ and paste the following prompt in the box.

If you are comfortable with it, copy the following JSON code:
import json
import re
# Extract the JSON string from the input data
data_string = input_data.get('Data', '')
json_string = re.search(r'```json\n(.*?)\n```', data_string, re.DOTALL)
# If a JSON string is found, parse it; otherwise, return an empty object
if json_string:
json_data = json.loads(json_string.group(1))
Else:
json_data = {}
# Prepare the output with the individual fields from the parsed JSON
output = json_data
Click ‘Use Code’ in the ‘Generate with AI’ text box. Test the step.

That’s a success. It has broken down all the fields into separate data fields.
You can now import this into Google Sheets. Alternatively, you can use Quickbooks or any other accounting software. Zapier supports almost all of them.
Create a new step and search for/select Google Sheets. In the action event, specify ‘Create Spreadsheet’ and sign in to your Google account.

Click ‘Continue’ to configure the specifics for this step. In the Title field, insert the Email subject from your Gmail step.
NOTE: Remember to create a blank spreadsheet or select the one you use to gather all the invoices.
In the ‘Spreadsheet to copy,’ select the name of the spreadsheet to which you want to export the data.
In the Headers field, select all the data segregated into separate fields.

Test the step and check your Google Sheets. The data will be populated into separate columns in a single row.

Step 4 - Link The PDF in the Google Sheet
If you want to access the original invoice PDF, you can upload the file to Google Drive. Anyone with a link can download the PDF and attach it to Google Sheets as a reference.
Download the attachment on your computer—access drive.google.com and drag the invoice PDF file to upload.

Create a new trigger in the Zap and search/select ‘Google Sheets.’ Then select Create Spreadsheet column’ in the action event and link your Google Drive account.

Select the Google Drive where the sheet is located and specify the spreadsheet name. Then, select the worksheet number or name and the column where you want the file URL to be displayed.

In the Index field, click Gmail and attach the PDF included in the email. Test the step.

The column in Gmail is updated with the attachment link.

There you have it. Experiment with the Zaps to generate a Quickbooks entry or use any other software. These steps will automate invoice/receipt extractions and give you an easy way to gather data and compile your books.
.png)
.png)
.png)
