.avif)
.avif)
This tutorial will guide you through using Gemini 2.0 Flash's new image generation features in Google AI Studio to create consistent, professional visuals for marketing campaigns. You'll learn how to generate, edit, and integrate images seamlessly, saving time and effort in your workflow. We'll use a practical example of creating marketing assets for a shoe product, but the techniques can be applied to any product or service. All you need is a Google account.
In a professional context, creating consistent visuals is critical for branding and marketing. Whether you're designing product mockups or storytelling sequences, maintaining coherence across images can be time-consuming with traditional tools. Gemini 2.0 Flash simplifies this process, making it an invaluable asset for professionals looking to streamline their creative workflows.
Key objectives
- Access and navigate Gemini 2.0 Flash in Google AI Studio
- Upload and edit images using conversational prompts
- Create consistent, multi-image assets for marketing campaigns
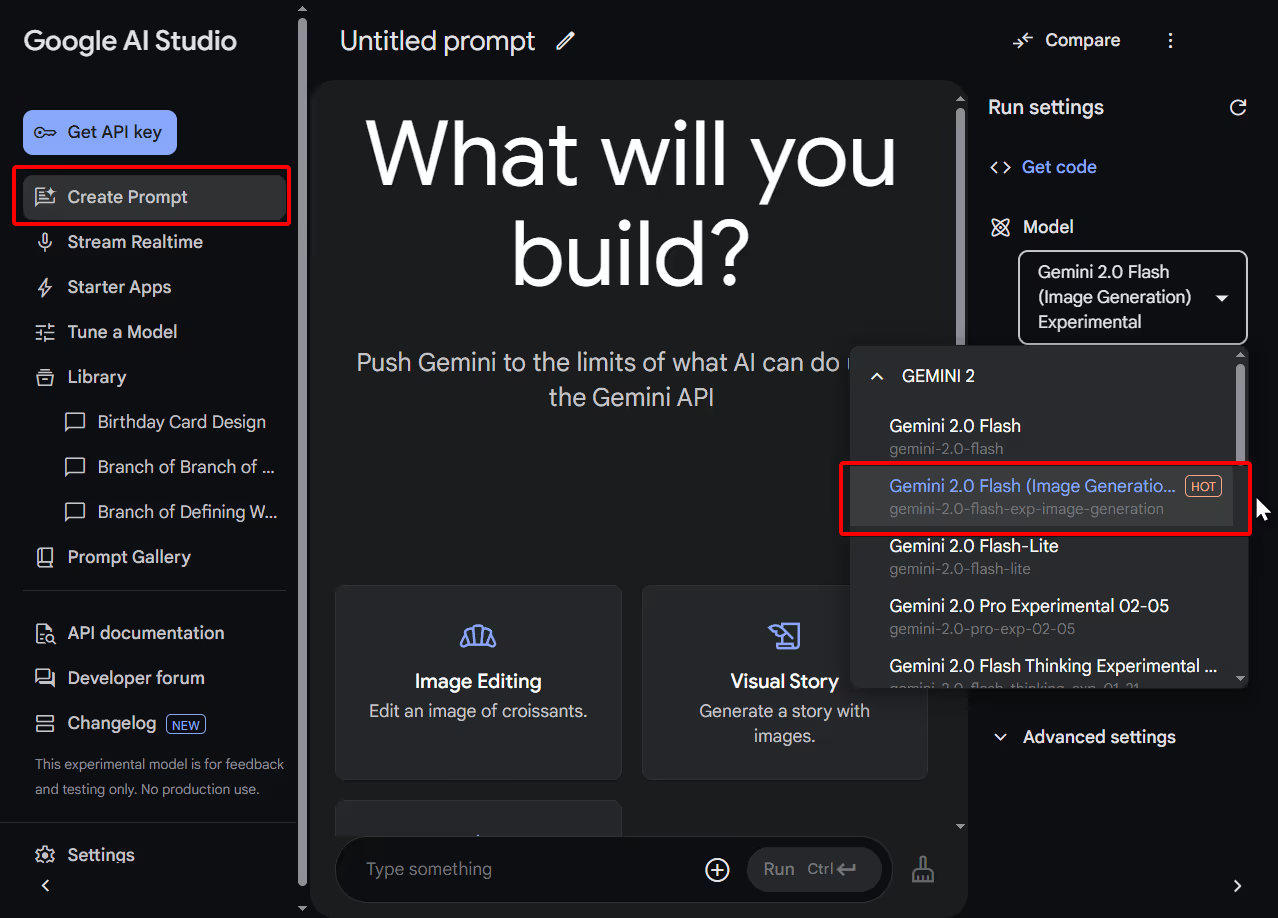
Step 1 - Access Gemini 2.0 Flash in Google AI Studio
To get started, head over to Google AI Studio. Once you’re in, click "Create Prompt" left and then find the model selection dropdown in the interfaces right side. Click it and choose "Gemini 2.0 Flash (Image Generation)" from the list. As of March 2025, this model is free to use, so you can experiment without worrying about costs.
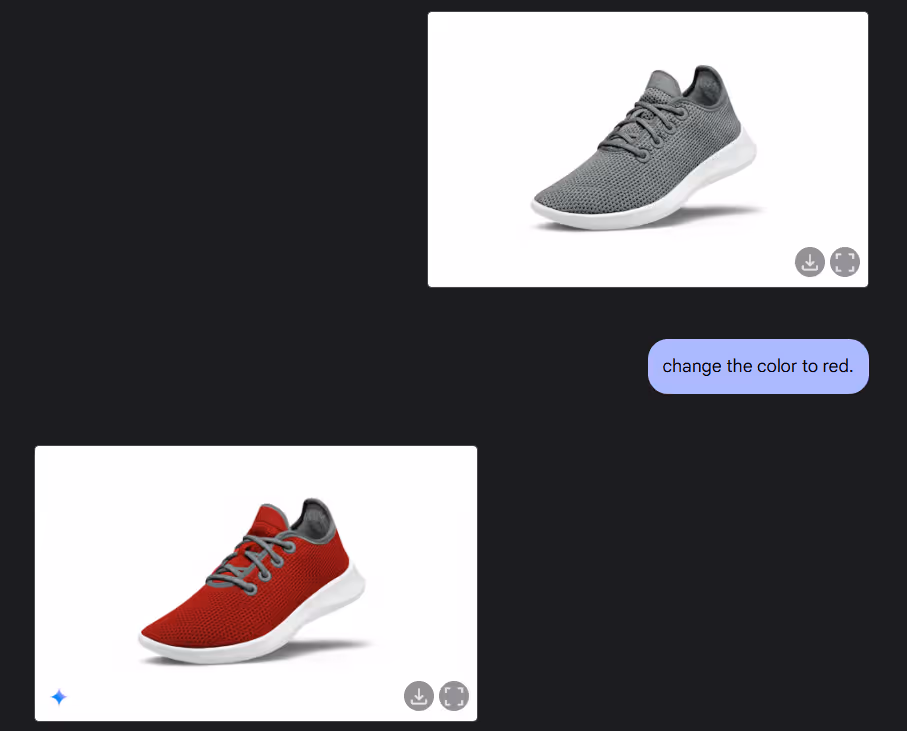
Step 2 - Upload & recolor the image
Now, you’ll need an image to work with that has no copyright. For this example, we’ll use a side-view photo of a grey shoe. Use the + button right to the chat area, and select “Upload File” or just drag and drop the image into the chat area. After a moment, the shoe image will appear in the workspace, ready for you to edit. If you don’t have a product image handy, any simple object photo will do for practice.
Let’s make the shoe stand out by changing its color.
Prompt:
Change the color to red.
Hit CTRL+ Enter, and Gemini 2.0 Flash will process the request. In seconds, you’ll see a new image of the shoe, now red, with the original details like texture and lighting preserved. This conversational editing feature is simple yet powerful for quick adjustments, not just changing the color.
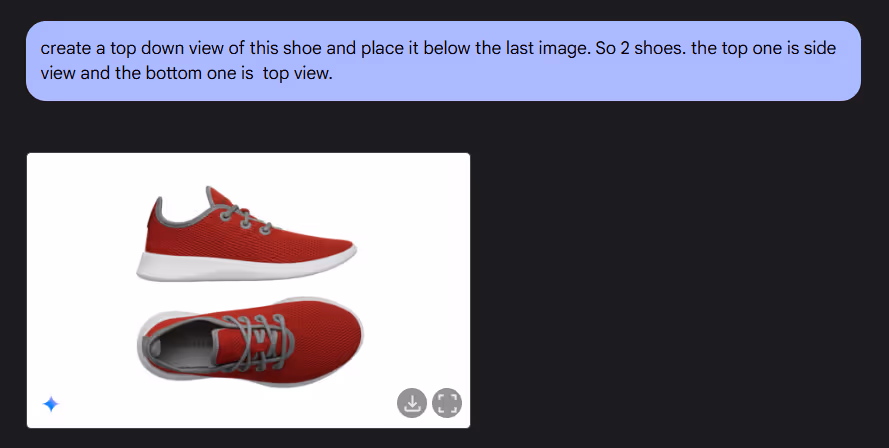
Step 3 - Create a new perspective
To show the shoe from multiple angles, we’ll generate a top-down view.
Prompt:
Create a top-down view of this shoe and place it below the last image. So, two shoes: the top one is side view and the bottom one is top view.
Submit it, and the tool will create a new image with both perspectives stacked vertically. This ability to manipulate perspectives is great for creating versatile marketing assets without needing multiple photos.
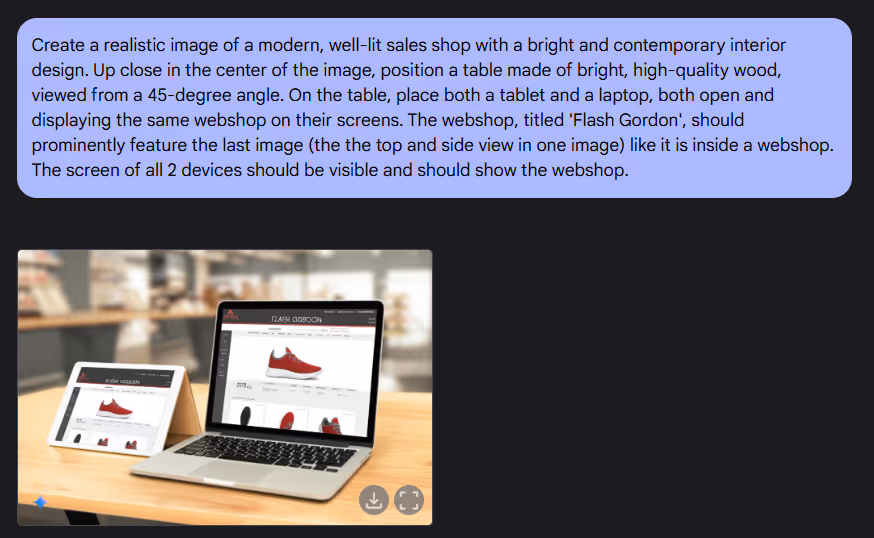
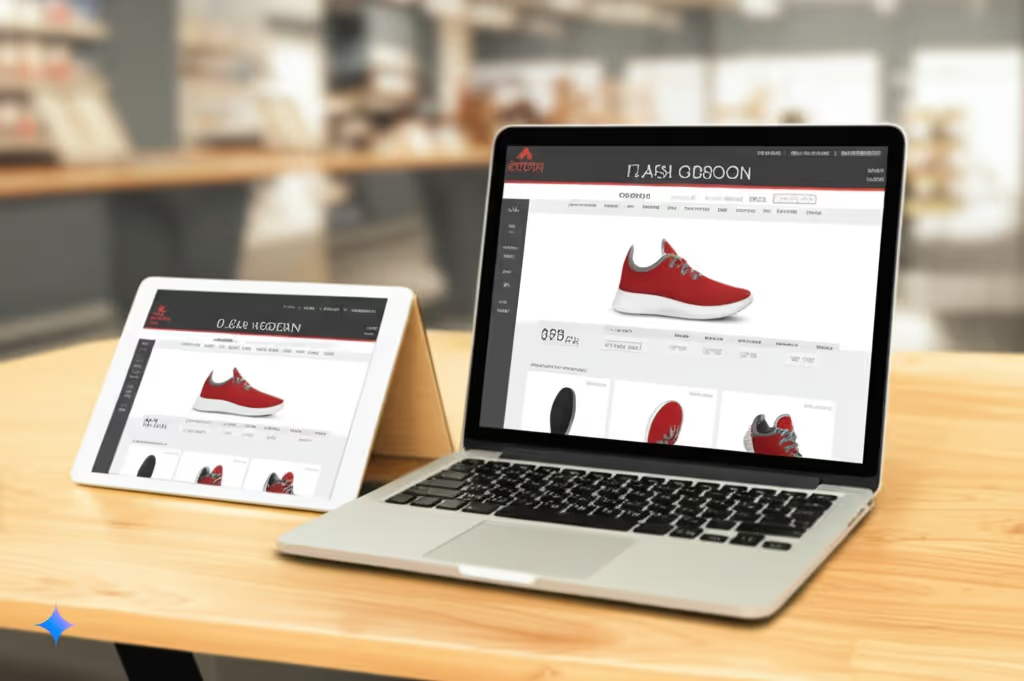
Step 4 - Place the image in a sales scene
Next, let’s integrate the shoe into a realistic marketing mockup.
Prompt:
Create a realistic image of a modern, well-lit sales shop with a bright and contemporary interior design. Up close in the center of the image, position a table made of bright, high-quality wood, viewed from a 45-degree angle. On the table, place both a tablet and a laptop, both open and displaying the same webshop on their screens. The webshop, titled 'Flash Gordon', should prominently feature the last image (the top and side view in one image) like it is inside a webshop. The screen of all two devices should be visible and should show the webshop.
The result is a polished mockup that looks ready for a campaign, showcasing the shoe in our webshop.
Step 5 - Branch from a previous step
Beside editing an old prompt and regenerating the image one new handy feature of Gemini 2.0 Flash is the ability to revisit earlier steps and branch from there. Go back to the red shoe image from Step 3. Next to it, you’ll see three dots—click them and select "Branch from here."
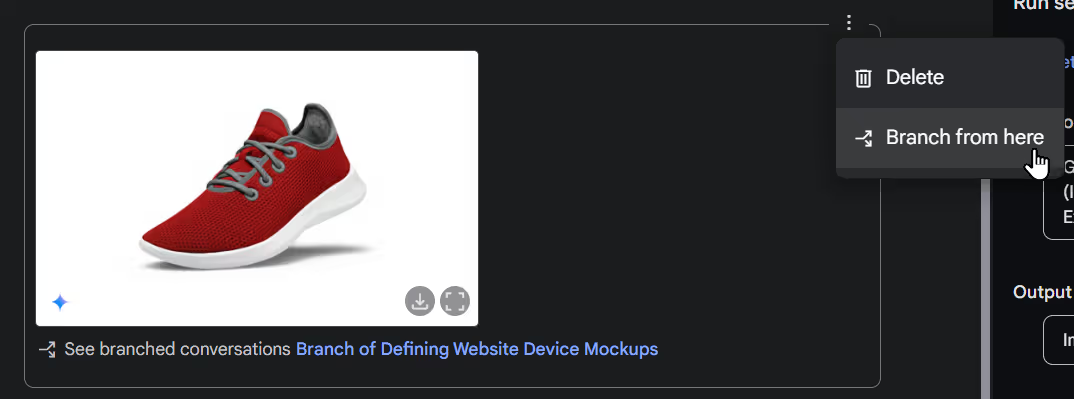
This opens a new path from that point, letting you experiment with different edits while keeping your original work intact. It’s a great way to explore variations without starting over and keeping other workflows intact.
Step 6 - Add a character to the scene
Now, let’s bring in a human element. Upload an image of a person’s upper body—any clear photo will work. Make sure to not use any celebrity or copyright protected image since Gemini might refuse to use it.
Prompt:
Rotate the shoe 45 degrees around the z-axis and let him hold the shoe in his hand presenting it to us.
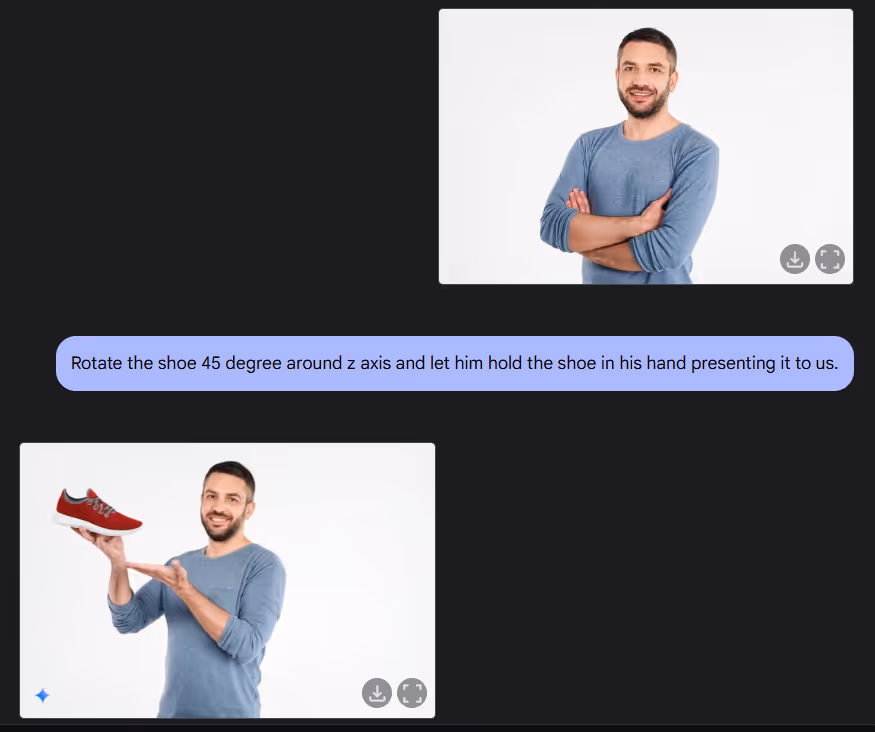
Gemini generated an image of the person holding the red shoe. This step shows how easily you can combine uploaded and edited elements with other uploaded elements and due to Gemini's world knowledge, the positioning of the shoe is just perfect on our first try.
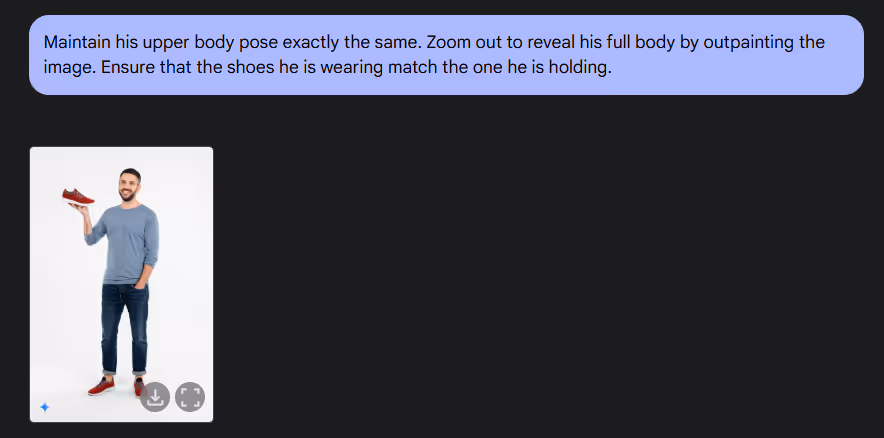
Step 7 - Extend with outpainting
Let's go a step further and go two steps back. :-) To see the full person, we’ll use outpainting to expand the image.
Prompt:
Maintain his upper body pose exactly the same. Zoom out to reveal his full body by outpainting the image. Ensure that the shoes he is wearing match the one he is holding.
Submit it, and the tool will extend the image downward, adding legs and matching our red shoes on the person’s feet. This consistency in details is a standout feature for professional visuals.
Step 8 - Build a visual story
Finally, let’s create a mini marketing narrative example with just one prompt.
Prompt:
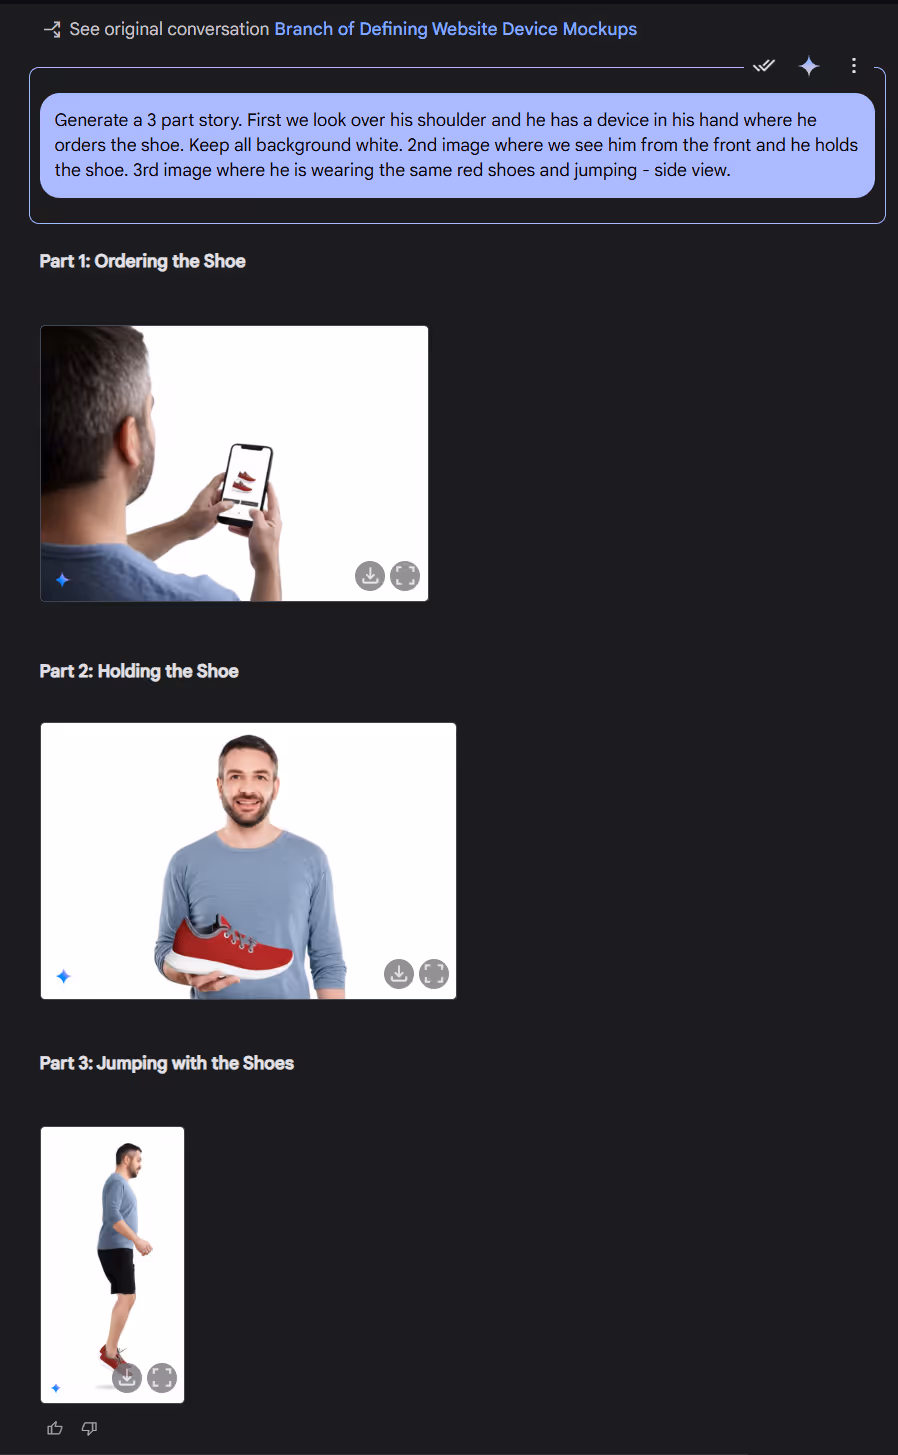
Create a three-part story. In the first image, we see from the back over his shoulder - zoom in a bit on the device - as he holds a device in his hand, ordering the shoe. In the second image, show him from the front as he holds the shoe. In the third image, depict a side view of him wearing the same red shoes while running. Keep the background entirely white for all images.
The result is a three-image sequence that tells a story—ordering, receiving, and using the product—perfect for storyboarding, ads or social media.
With these steps, you’ve built a set of consistent, professional-grade visuals using Gemini 2.0 Flash. Previously, achieving this level of consistency required dedicated image tools and manual work or training custom models with our product.
Now, Gemini 2.0 Flash handles it in minutes, making it a game-changer for simple marketing workflows. Whether you’re adjusting colors, adding perspectives, or crafting a story, the tool keeps everything cohesive.
Want to dive deeper? Try tweaking prompts to experiment with other products or settings. Play with text rendering to add slogans to your images, or test the tool’s world understanding by generating detailed backgrounds. Gemini 2.0 Flash is packed with potential—keep exploring to see how it fits your unique workflow.
Happy prompting!
.avif)


