.avif)

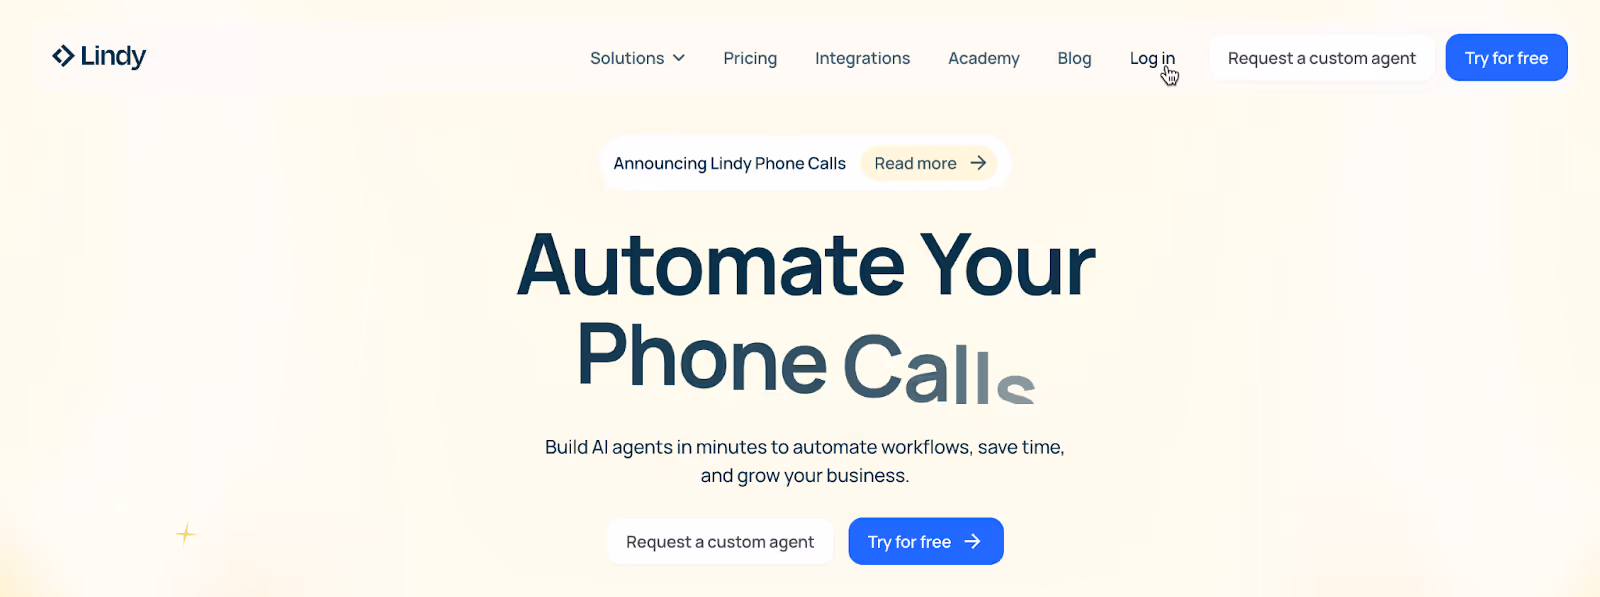
Lindy AI's exciting new Loop feature is a game-changer for sales professionals looking to streamline their outreach process. With Loop, you can now set up a completely automated system that handles the time-consuming tasks of researching potential clients and crafting personalized emails without manual intervention.
This powerful tool allows you to scale your prospecting efforts efficiently while maintaining that crucial personal touch in your communications. By eliminating the tedious legwork typically associated with researching and reaching out to prospects, Loop frees you up to focus on what truly matters: building relationships and closing deals.
This tutorial will show you how to set up context for your AI agent, create a workflow structure, set up a parallel processing loop, and test the workflow.
By the end of this tutorial, you’ll be able to:
- Set up the context for your AI agent
- Create a workflow structure
- Set up a parallel processing loop
- Finalize and test your workflow
Let’s get started
Step 1 - Set up the context for your AI agent
Go to Lindy and sign into an account or create a new one.
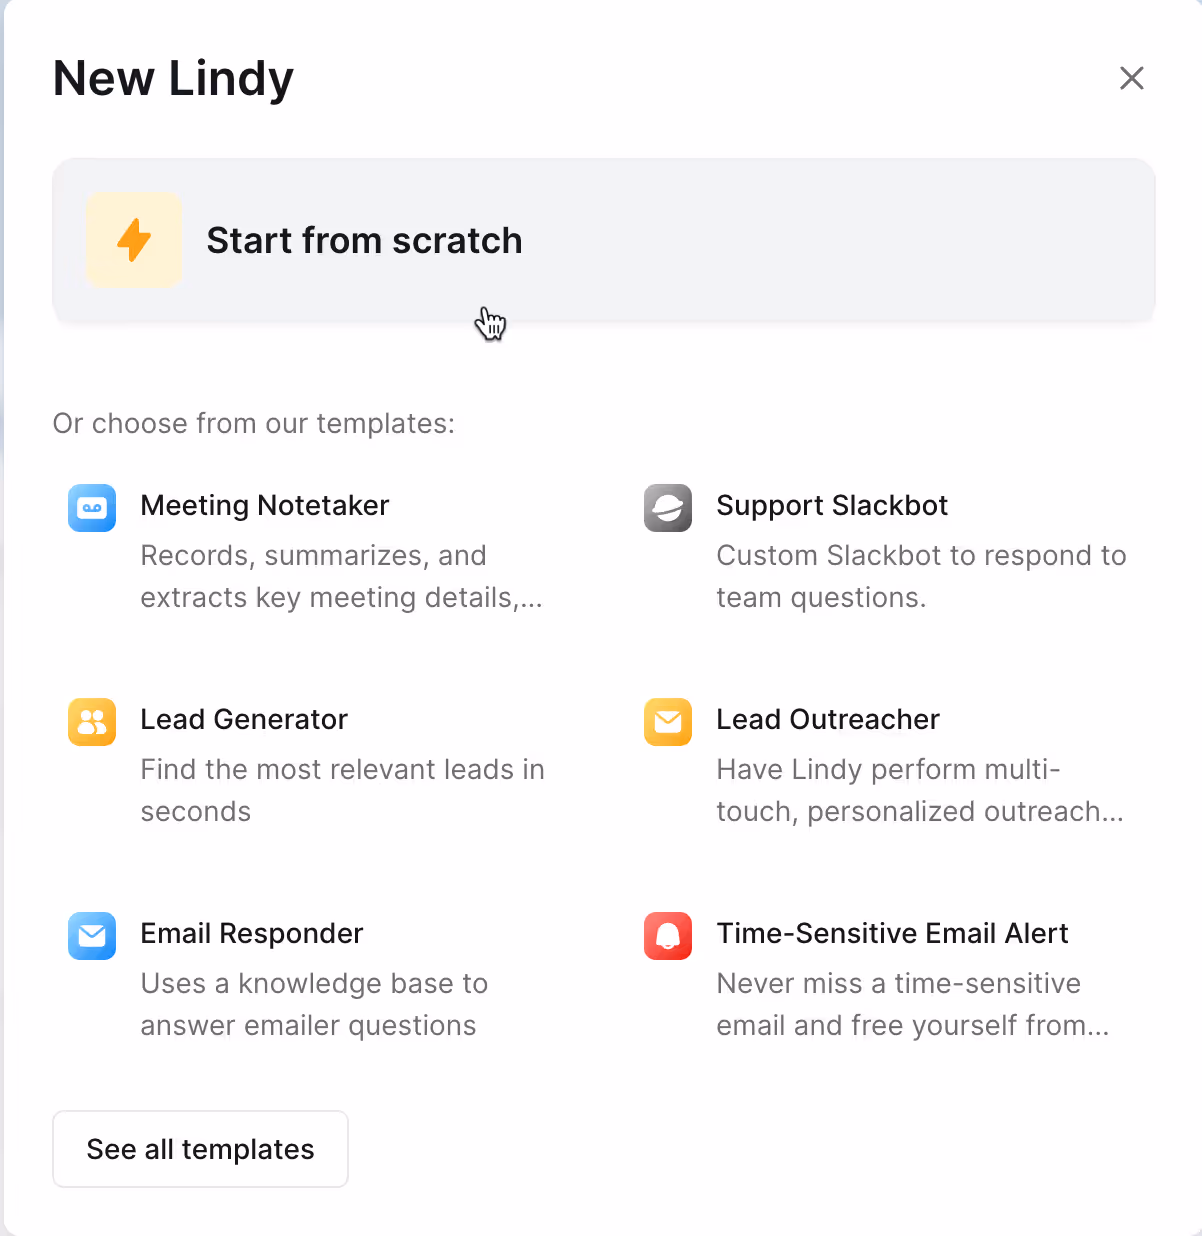
Start by clicking ‘New Lindy’

Since we are creating a workflow from scratch, click ‘Start from Scratch.’
In the workflow editor, click ‘Settings’ and locate the ‘Context section. Name your new lindy to ‘Lead Outreach.’ This is a really important step that shapes how your AI agent will act throughout the process. It's basically setting the foundation for how it'll respond and behave as it works with you.
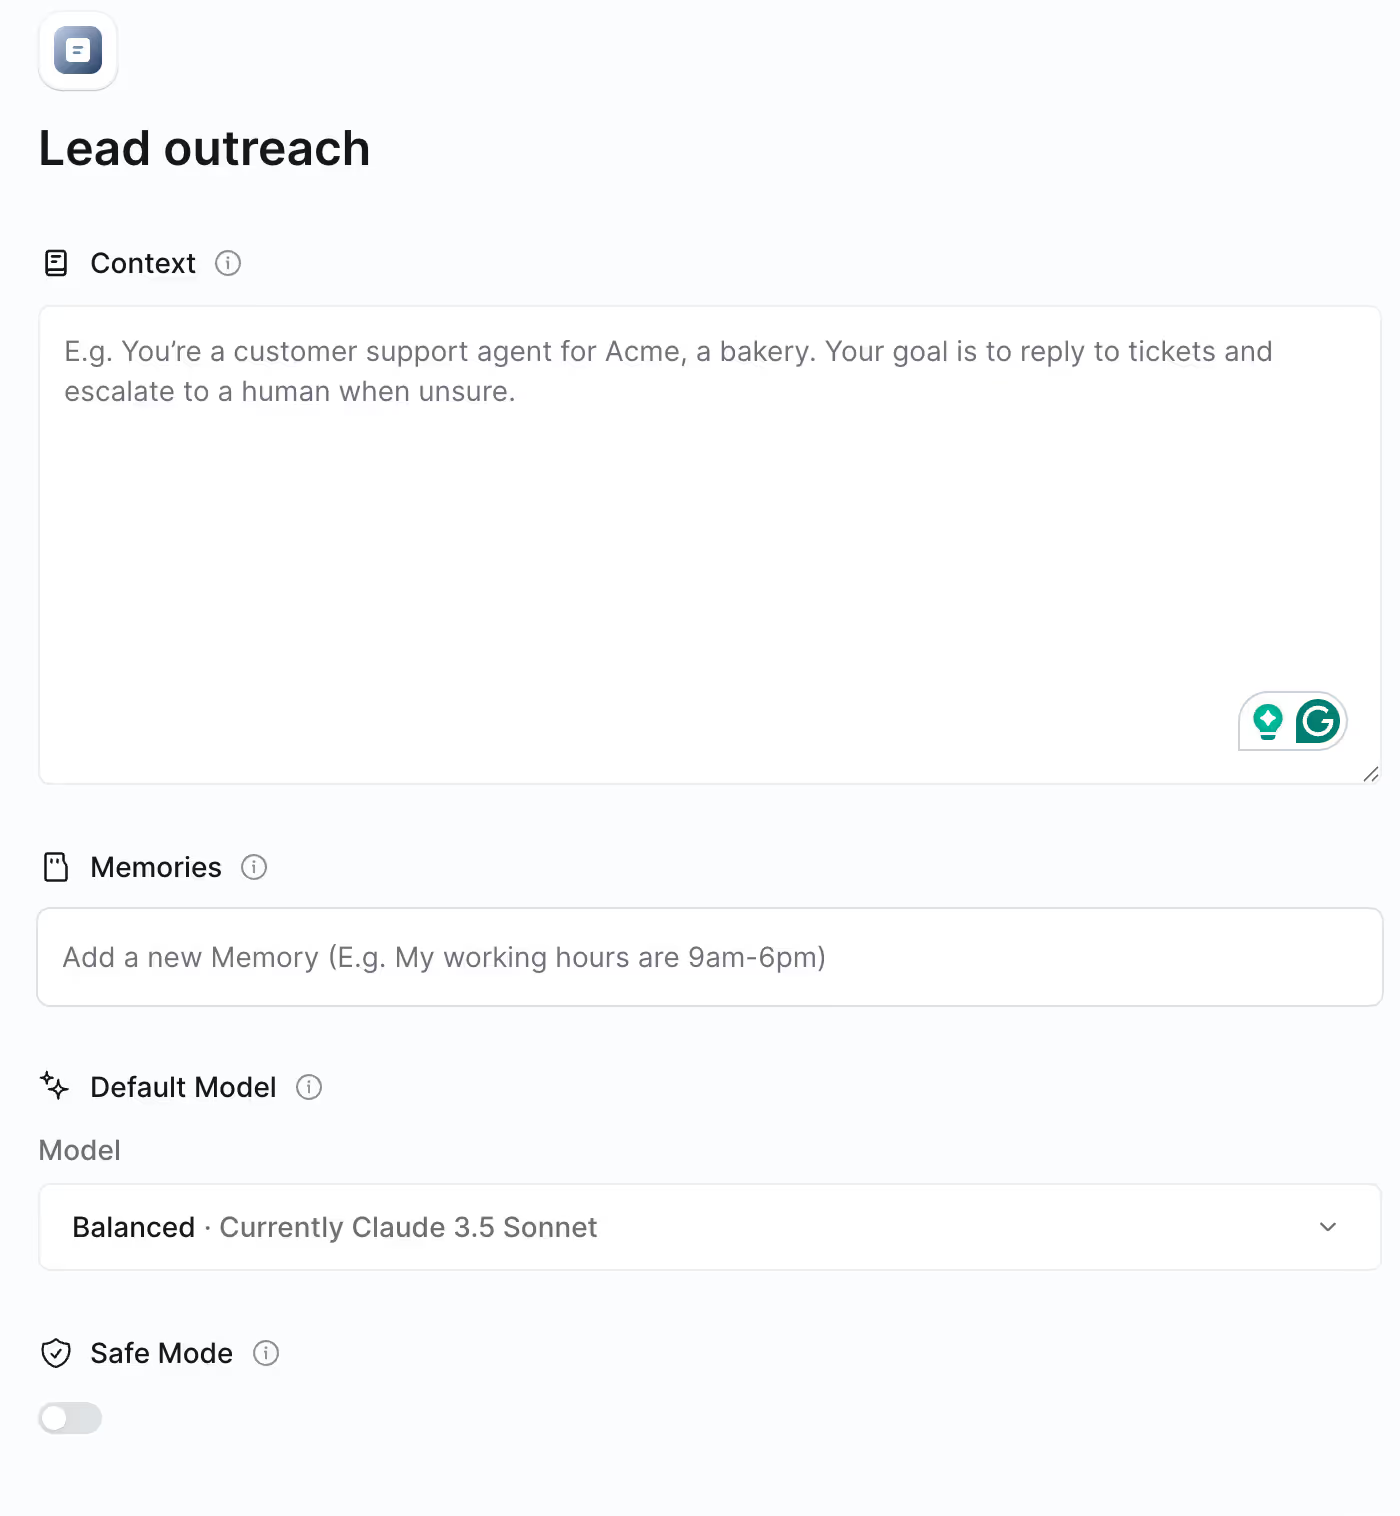
When you get to the Context section, add a simple and clear explanation of what your agent is meant to do. Think of it as introducing your agent's main job or purpose.
Context:
You're an outreach assistant who can look through spreadsheets, do background research on your potential contacts, and then write personalized emails just for them. The emails will be tailored specifically based on what you learn about each person.
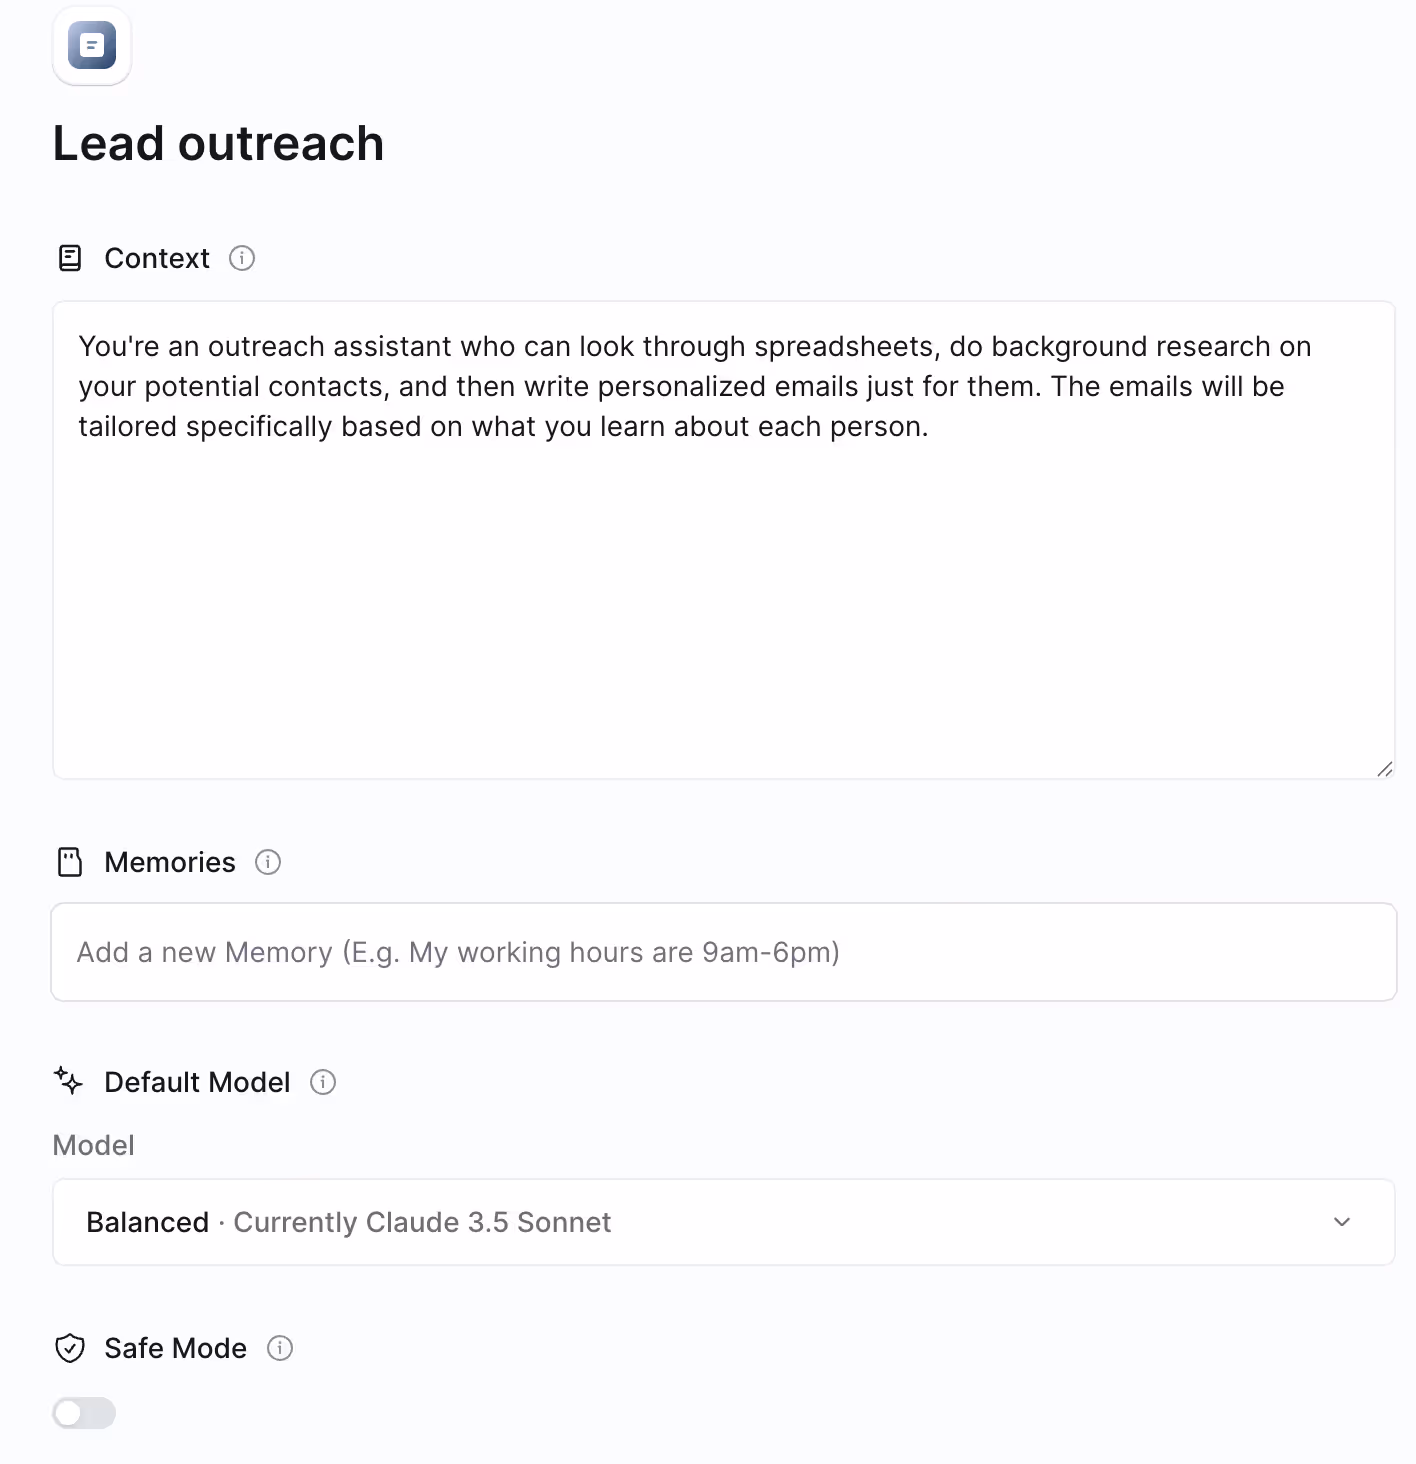
This setup basically gives your AI assistant its personality and helps it understand what it's supposed to do. When your AI knows its job clearly, it'll make smarter choices when handling your contacts and writing those custom messages for each person.
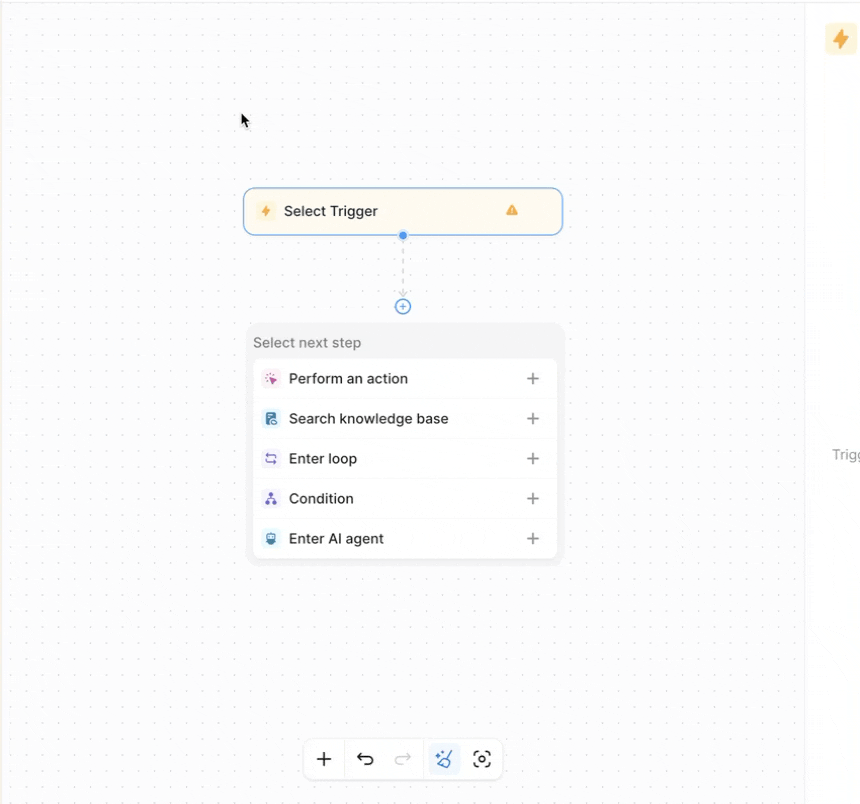
Step 2 - Create a workflow structure
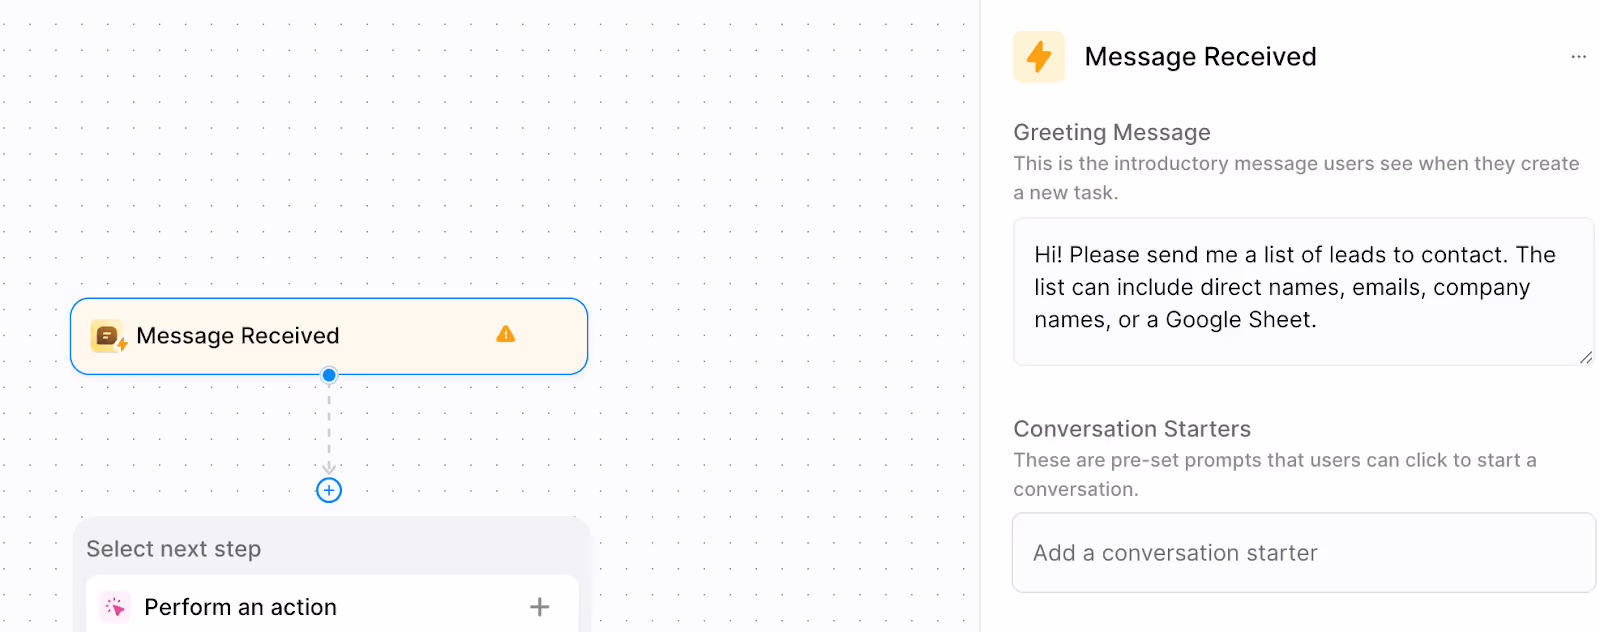
Now that we have set the context. It’s time to add a trigger node. Click ‘Select trigger’ and search for ‘Message received. This will be the entry point that activates when you provide a list of leads.
Populate the greeting message for the message received trigger by clicking the message received step. Use the following message.
Message:
Hi! Please send me a list of leads to contact. The list can include direct names, emails, company names, or a Google Sheet.
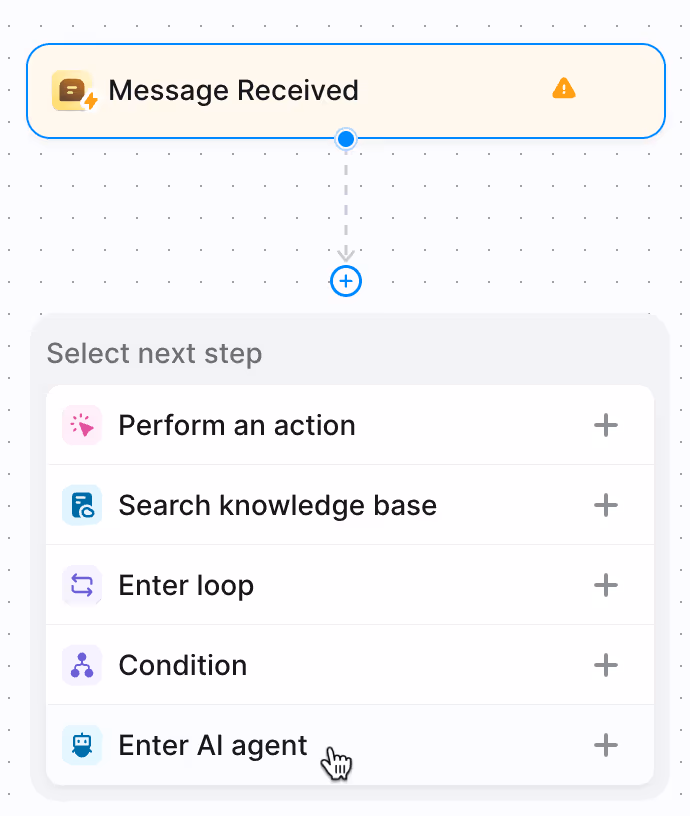
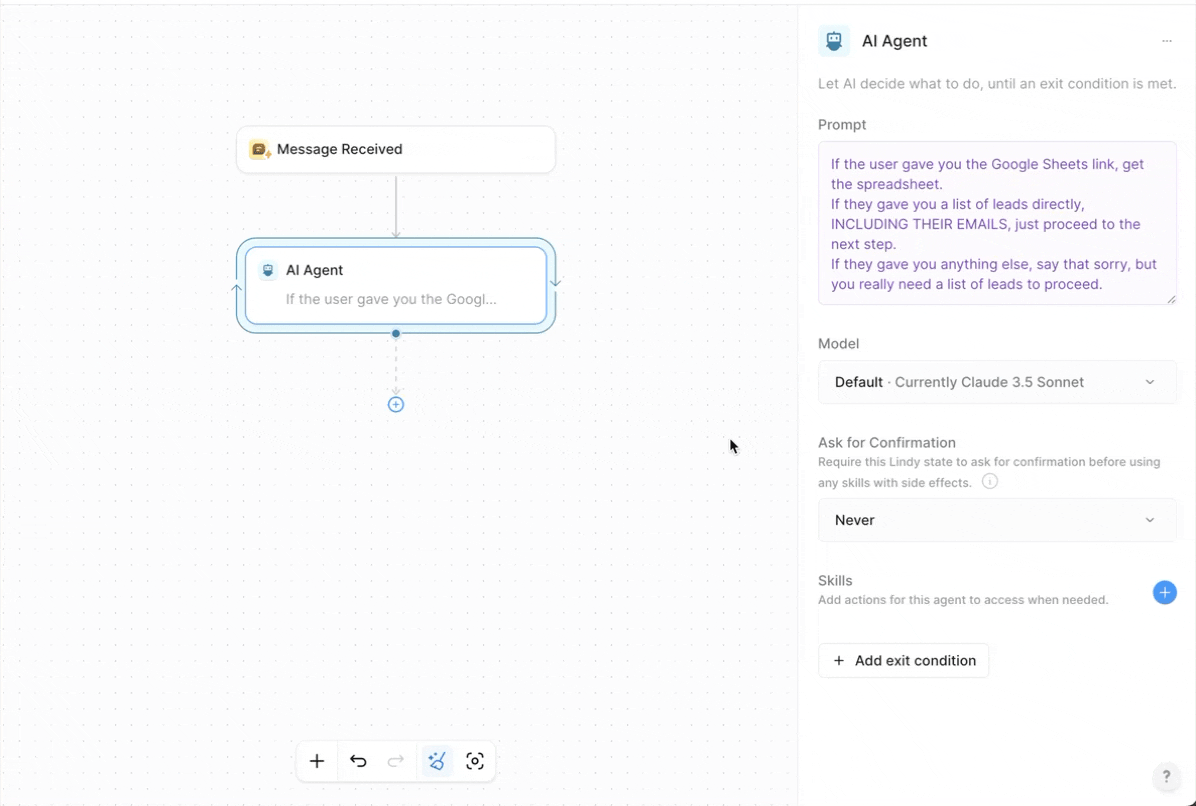
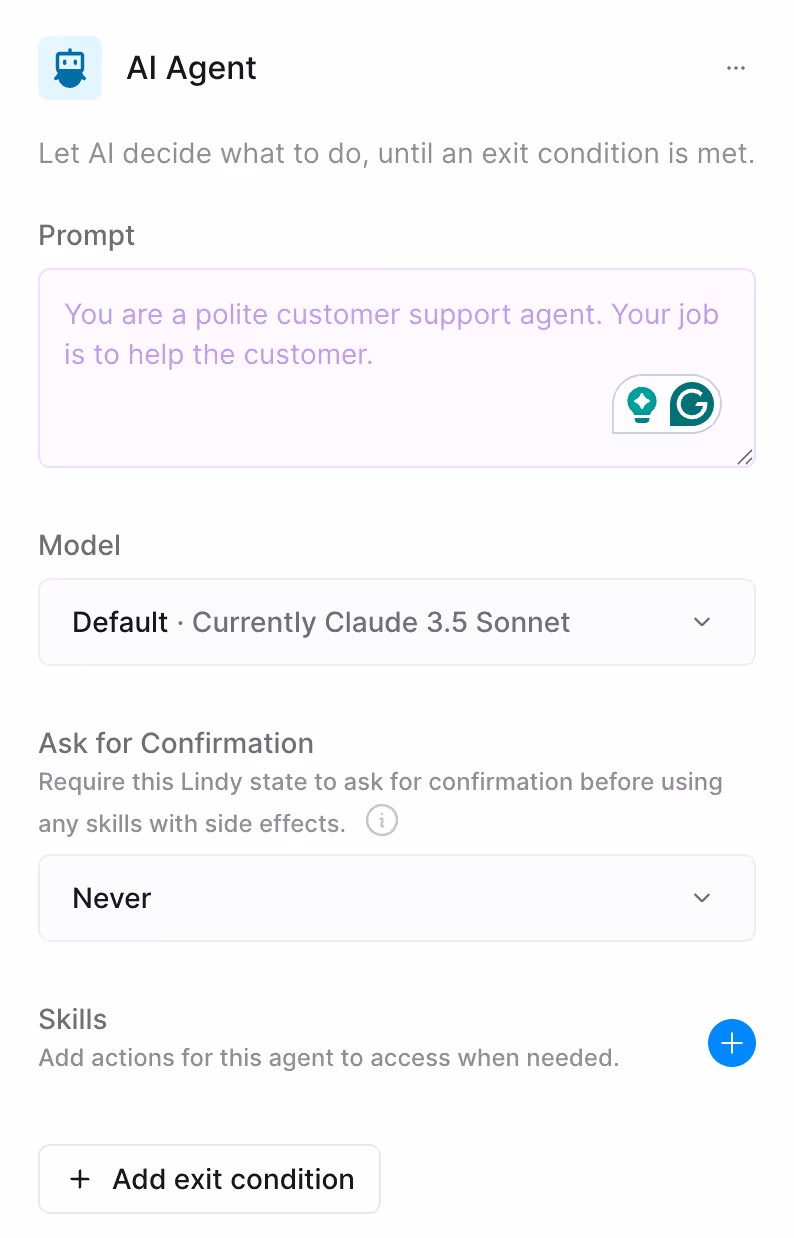
Click the ‘+’ button to add a step. Now, we need to add our first AI Agent node. Select ‘Enter AI Agent’ in the suggestions box.
Add a prompt for the AI agent to decide what to do until an exit condition is met. Basically, it means that you must provide a prompt to handle spreadsheet retrieval.
Prompt:
If the user gave you the Google Sheets link, get the spreadsheet.
If they gave you a list of leads directly, INCLUDING THEIR EMAILS, just proceed to the next step.
If they gave you anything else, say that you are sorry, but you really need a list of leads to proceed.
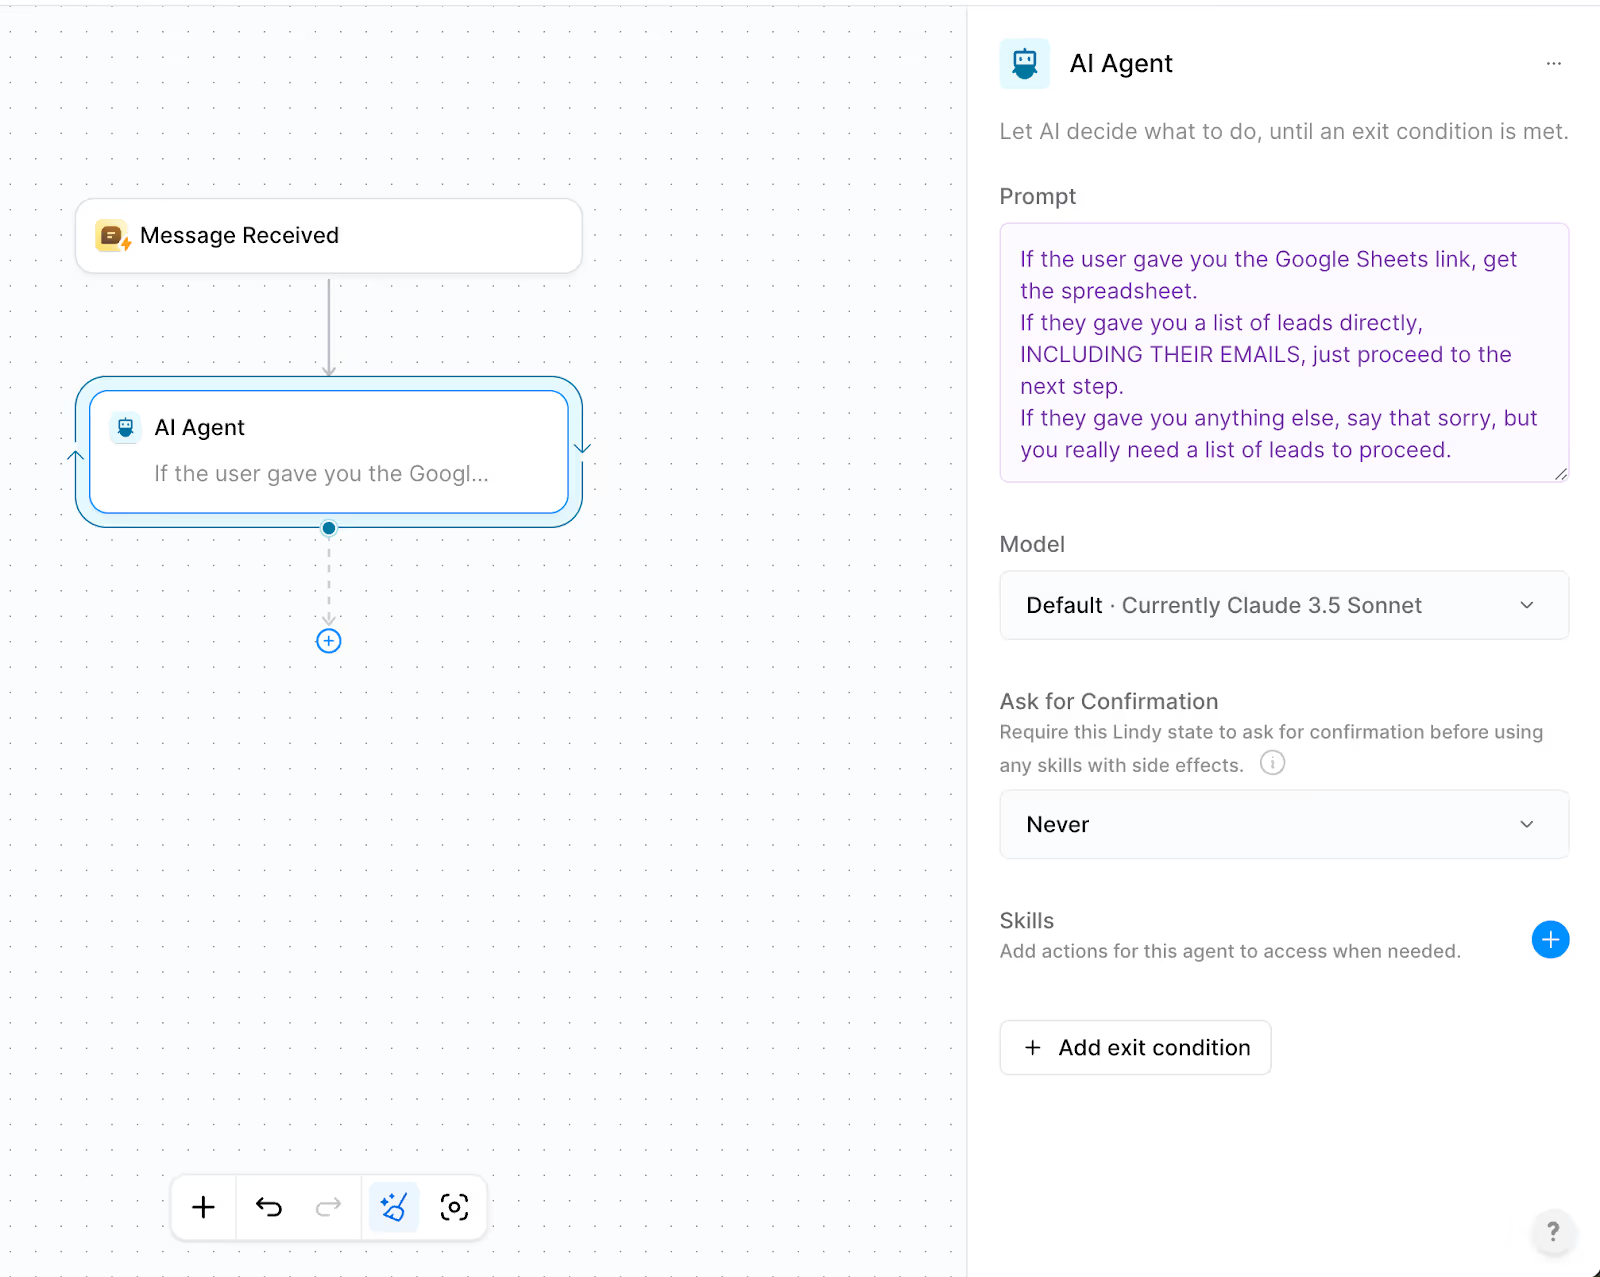
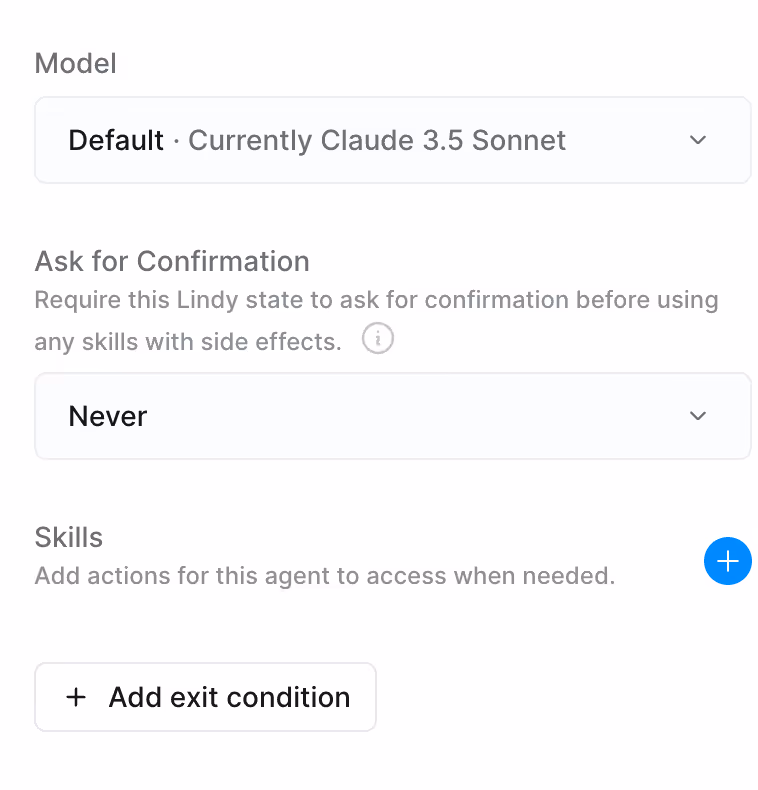
Choose Claude 3.5 Sonnet (or whatever model you like best) and then add the "Get Spreadsheet" skill by clicking the plus button in the Skills area.
After that, connect this to your trigger to automatically move to the next step once it pulls all the contact information from your spreadsheet.
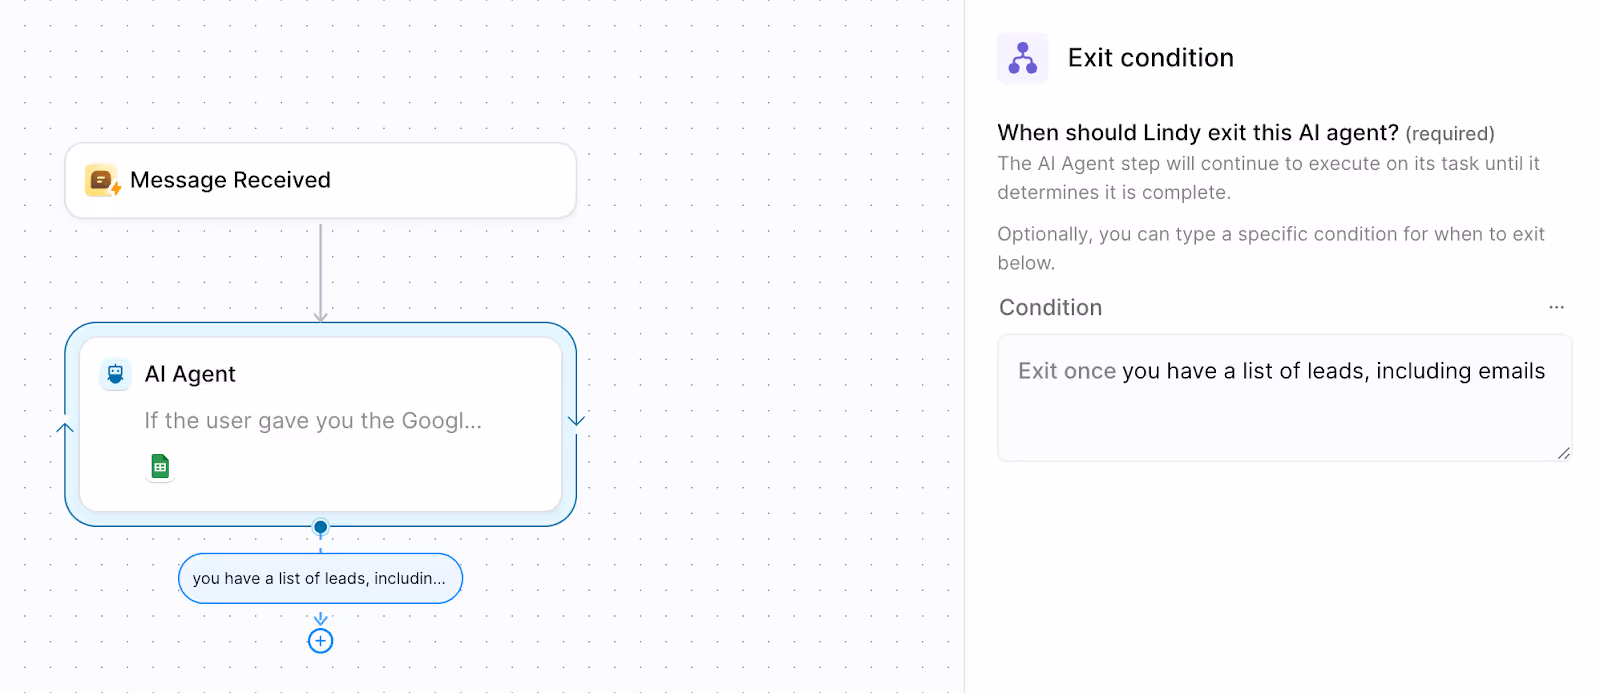
Now, set the exit condition. Click ‘Add exit condition’ and specify ‘Exit once you have a list of leads, including emails.’
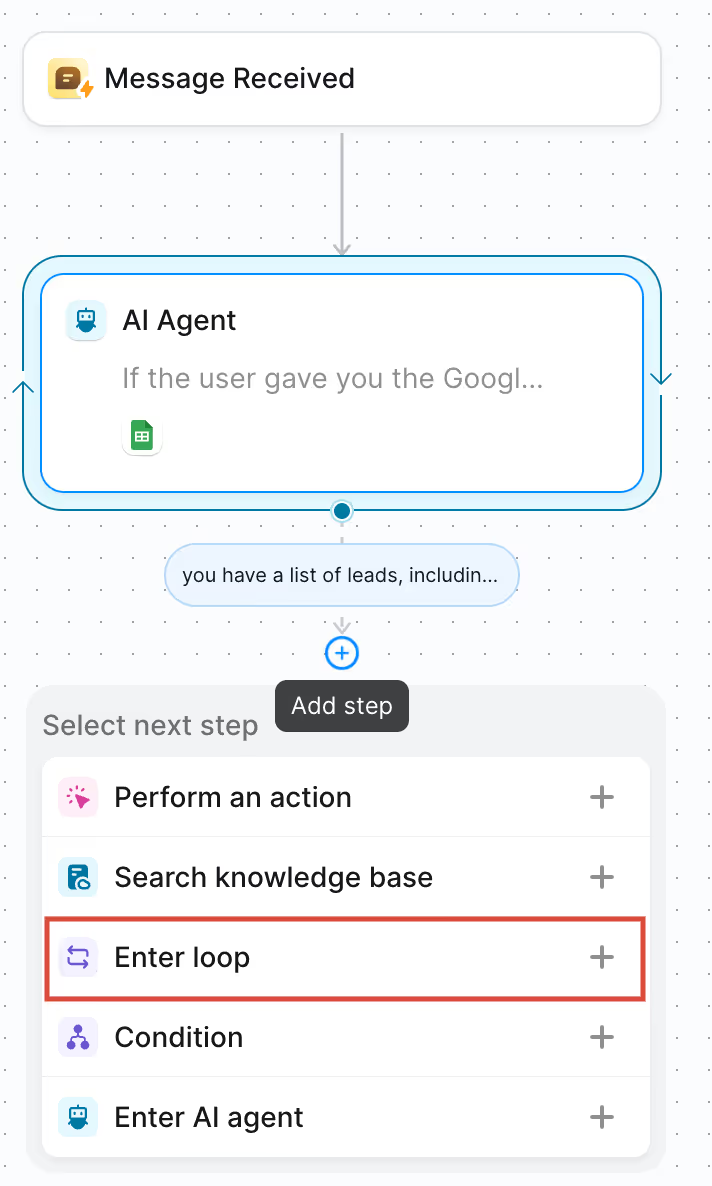
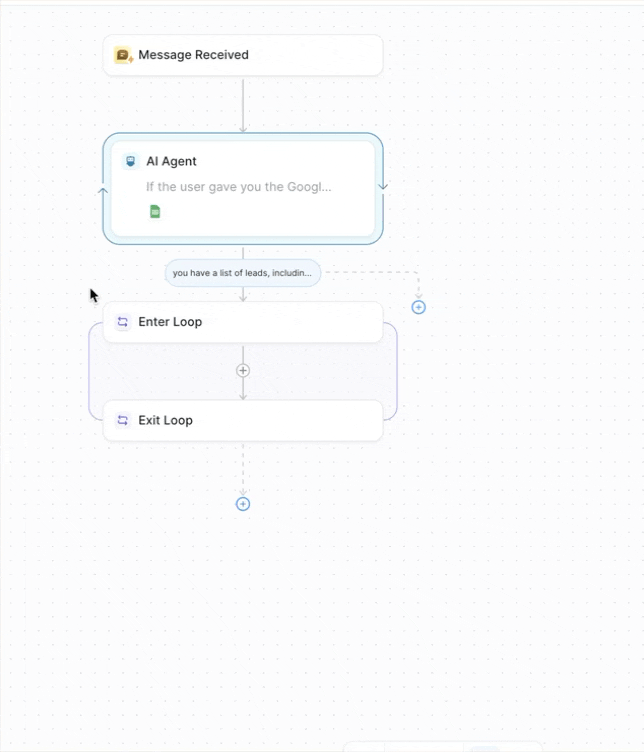
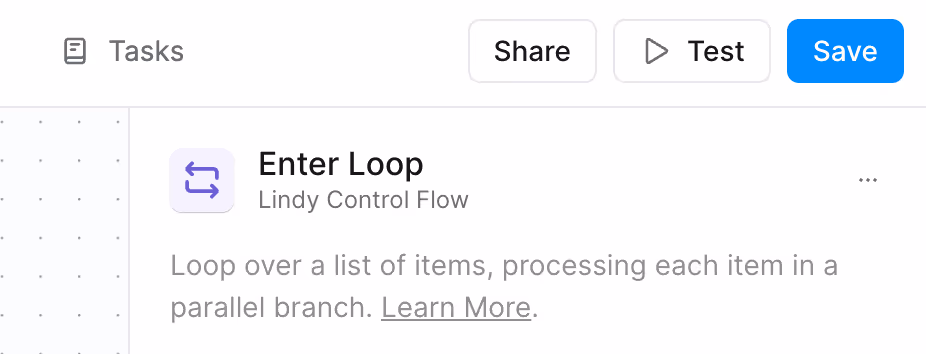
Step 3 - Set up a parallel processing loop
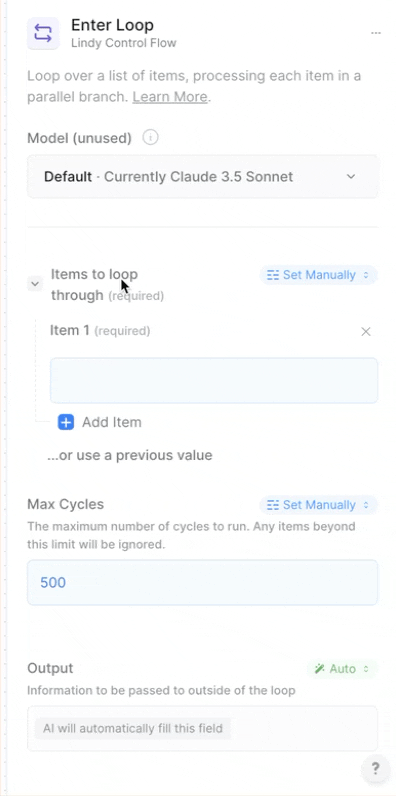
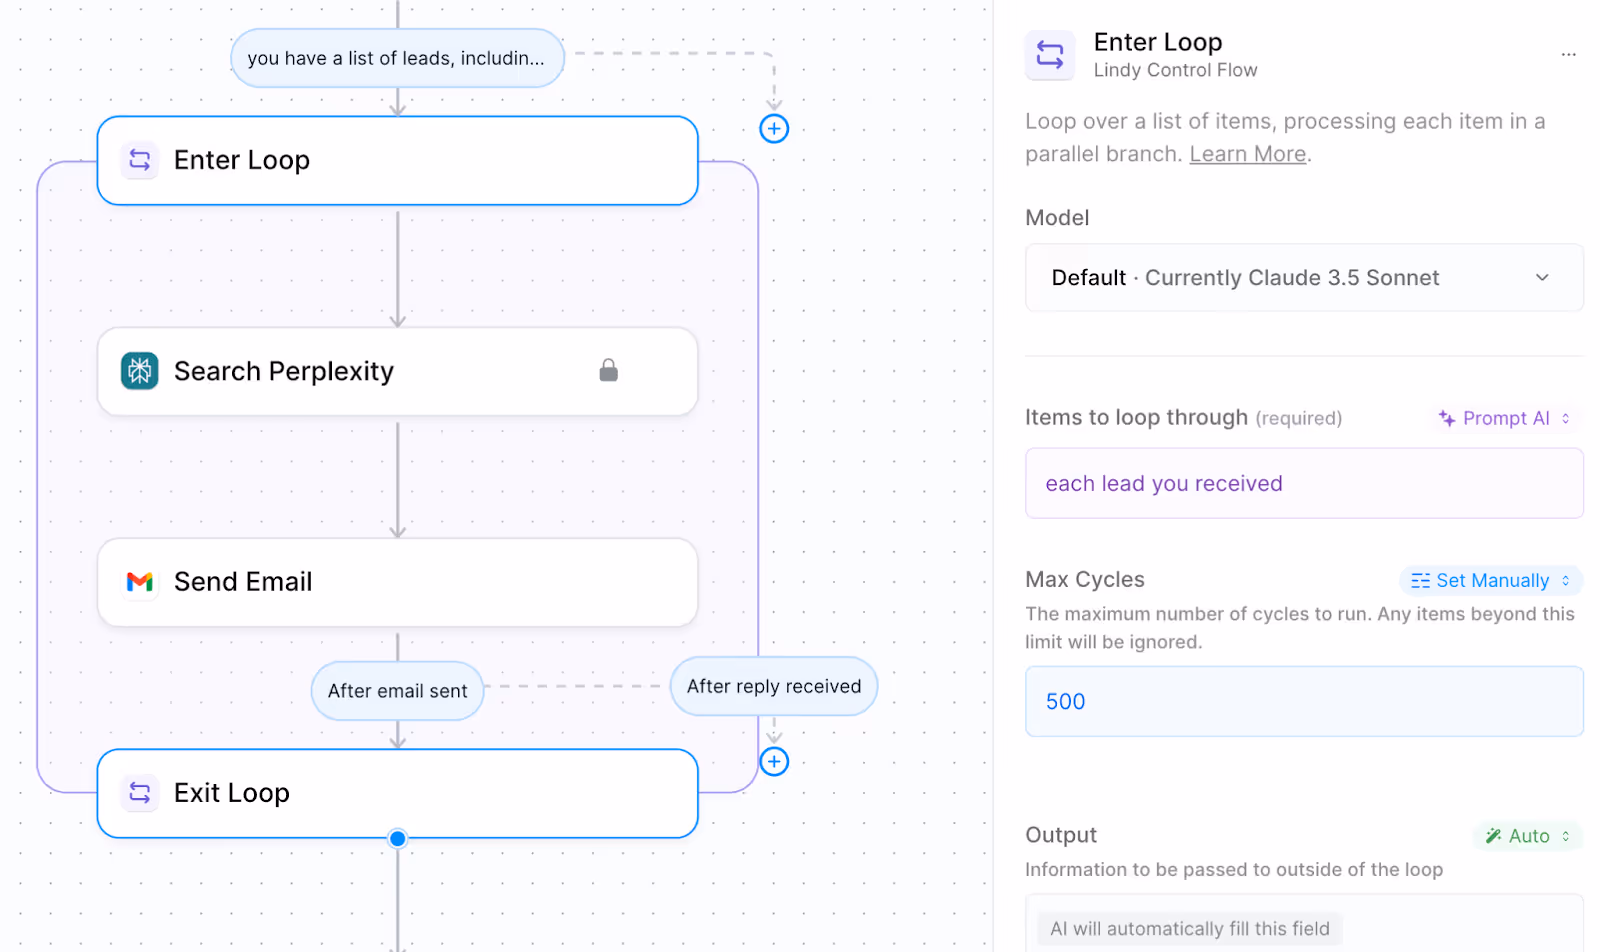
After setting up your first AI step, click the ‘+’ button and add an ‘Enter Loop’ node - this is the cool feature that handles all your leads at the same time. Just set it up to go through ‘Each lead’ from your spreadsheet, and it'll work on everyone in your list simultaneously.
In the Enter loop settings, configure ‘items to loop through’ by clicking ‘set manually.’ Select ‘Prompt AI’ in the drop-down menu. Specify how you want to loop through the leads.
Inside your loop, add these nodes in order:
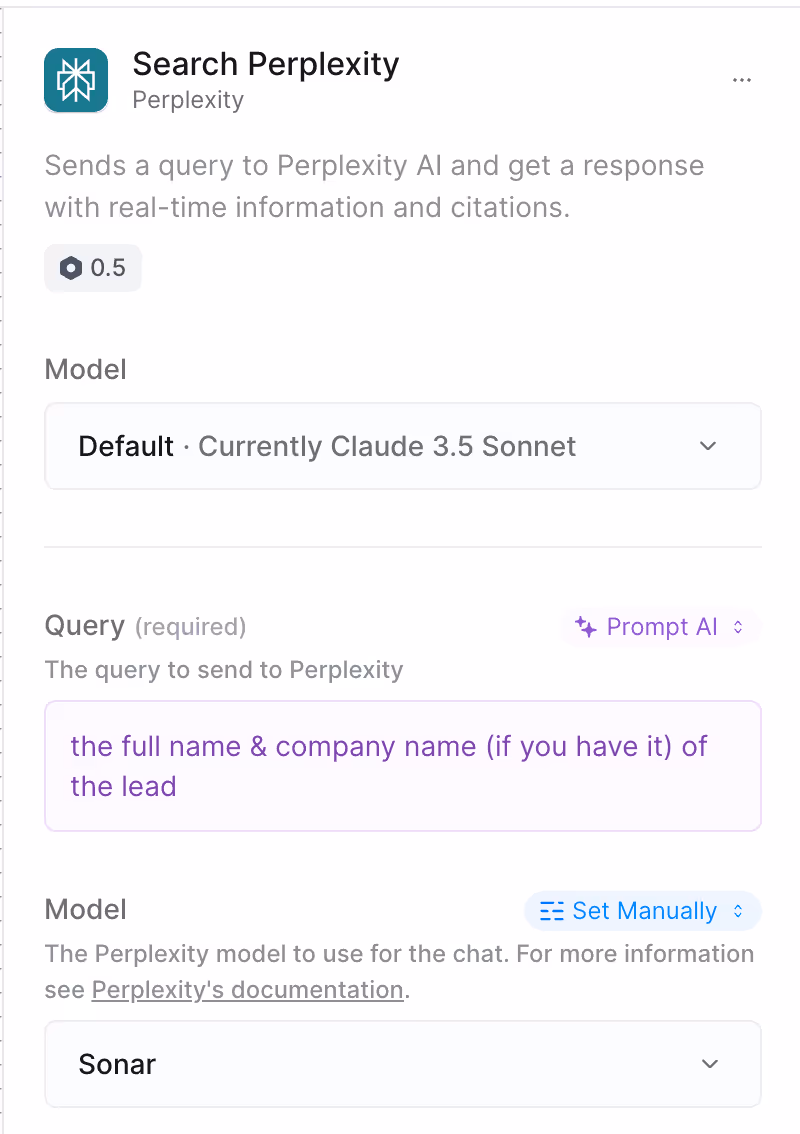
First, select action and search for perplexity. Add a "Search Perplexity" node and set it to look for information about each company using the company name in your spreadsheet.
Note: To use Perplexity, you must upgrade to Lindy Pro because this step costs 0.5 credits.
Select ‘Prompt AI’ in the Query module and use the following prompt.
Prompt:
The full name and the company name (if you have it) of the lead.
Next, add a "Draft Email" node - configure this to write personalized emails using both the research results and the lead's email address from your data.

After these steps, add an "Exit Loop" node to finish the process for each contact. This setup creates individual processing paths for each person, making your workflow much faster since it handles multiple leads simultaneously instead of one after another.
Click ‘Save’ at the top right corner of the screen to save your workflow.
Step 4 - Finalize and test your workflow
Once the loop is finished, add one more AI Agent node outside of it to summarize everything that happened after all your leads have been processed. This gives you a quick overview of what was accomplished.

Leave the AI agent's configuration at default and hit the "Save" button at the top right to save your workflow.
Click "Test" and paste the link with all your contacts into your spreadsheet.

In just a few minutes, you'll see the system in action - it'll grab your spreadsheet, work on all your leads at the same time, research each company, and write custom emails for everyone automatically. The best part? You don't have to do any of the work yourself!


